
User's Manual


Franck-Hertz Experiment Software Setup
15
012-14264A
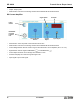
3. Connect a second 8-pin DIN Extension Cable from the 0 - 100V / 0 - 200V INTERFACE port on Power Supply II to
ANALOG INPUT B on the Universal Interface.
4. Turn ON the power for the Universal Interface, the power supplies, and the current
amplifier.
5. On the DC Current Amplifier, turn the CURRENT RANGES switch to 10
-10
A. To set
the current amplifier to zero, press the SIGNAL button in to CALIBRATION. Adjust
the CURRENT CALIBRATION knob until the current reads zero. Press the SIGNAL
button to MEASURE.
6. On the DC (Constant Voltage) Power Supply I, set the Voltage Range switch to -4.5 –
+30 V ( ). On Power Supply II, set the Voltage Range switch to 0 – 100 V ( ).
7. On Power Supply I, rotate the 0 – 6.3 V adjust knob until the voltmeter reads 3.5 V.
This sets V
H
= 3.5 V (Filament Voltage). Note: The Argon Tube Enclosure may have a different suggested filament volt-
age. If so, use it instead of 3.5 V.
8. On Power Supply I, rotate the -4.5 – +30 V adjust knob until the voltmeter reads 1.5 V. This sets V
G1K
= 1.5 V (the volt-
age between the first grid and the cathode)
9. Rotate the 0 – 12 V adjust knob until the voltmeter reads 10.0 V to set V
G2A
= 10.0 V (Retarding voltage).
10. Rotate the 0 – 100 V adjust knob until the voltmeter reads 0 V. This sets V
G2K
= 0 V (Accelerating voltage).
11. Remember, allow the argon tube and the apparatus to warm up for 15 minutes.
12. When you have finished the above steps, check that V
H
= 3.5 V (Filament voltage), V
G1K
= 1.5 V (the voltage between
the first grid and cathode), and V
G2A
= 10.0 V (voltage between the second grid and anode – “retarding voltage”). If so,
the equipment is ready for the experiment. Note: These are suggested settings for the experiment, but other values could
be tried. You can do the experiment by parameters that are marked on the Argon Tube Enclosure.
Software Setup
1. Start the PASCO Capstone software.
2. The current is a very small number, so to make the current to appear as a number between zero and 100 on the graph, cre-
ate a calculation:
• Electron Current = [Current, Ch A (A)] x 10^10 with units of (x 10^-10 A)
3. Create a graph of “Electron Current” vs. Voltage.
4. Create a digits display of the Voltage. This will clearly show you the accelerating voltage so you can monitor it to make
sure that you do not exceed 85 V.
5. Create a table and create Run-tracked User-Entered Data called Peak Voltage with units of (V).
6. In the second column of the table, create a calculation:
• Diff between Peaks = diff(1,[Peak Voltage (V)]) with units of (V)
(This calculation calculates the voltage difference between adjacent current peaks.)
7. Add a column and create Run-tracked User-Entered Data called Trough Voltage with units of (V).
8. In the fourth column of the table, create a calculation:
NOTE: It is very important to
allow the argon tube and
apparatus to warm up for 15
minutes prior to making any
measurements.