
User Manual

4
EN
A
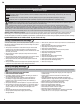
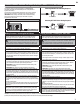
Battery Charging
Assembly
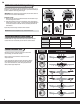
1
2
3
OR
6
Refer to the charging warnings. It is recommended to charge the battery while you inspect the aircraft. The fl ight battery will be required to confi rm proper
aircraft operation in future steps.
Battery Charging Process
NOTICE: Charge only batteries that are cool to the touch and are not damaged. Look at the battery to make sure it is not damaged e.g., swollen, bent, broken or
punctured.
1. Attach the input cord of the charger to the appropriate power supply (12V accessory outlet).
2. When the Li-Po charger has been correctly powered up, there will be an approximate 3-second delay, then an audible “beep” and the green (ready) LED will
fl ash.
3. Turn the control on the Amps selector so the arrow points to the charging rate required for the battery (the included 2200mAh Li-Po battery will charge at
2.0 amps, which is 1C). DO NOT change the charge rate once the battery begins charging.
4. Move the cell selector switch to 3-cell for your battery.
5. Connect the Balancing Lead of the Battery to the 3-cell (it has 4 pins) charger port.
6. The green and red LEDs may fl ash during the charging process when the charger is balancing cells. Balancing prolongs the life of the battery.
7. When the battery is fully charged, there will be an audible beep for approximately 3 seconds and the green LED will glow solid. Attempting to charge an
over-discharged battery will cause the charger to repeatedly fl ash and beep, indicating an error has occurred.
8. Always disconnect the battery from the charger immediately upon completion of charging.
CAUTION: Never exceed the recommended charge rate, overcharging a battery can cause a fi re.
CAUTION: Only use a charger specifi cally designed to charge a Li-Po battery. Failure to do so could result in fi re causing injury or property damage.
CAUTION: The balance connector must be inserted into the correct port of your charger prior to charging.
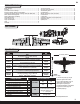
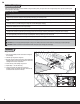
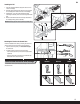
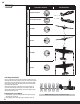
Wing Installation
1. Insert the wing tube (A) into the round hole of the wing slot
of the fuselage.
2. Slide the right wing onto the wing tube.
3. Move the wing on the tube into the slot in the fuselage while
feeding the aileron control connector through the hole in the
fuselage into the receiver compartment.
4. Secure the wing in the fuselage using a screw.
5. Repeat Steps 1– 4 for the other wing.
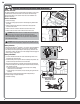
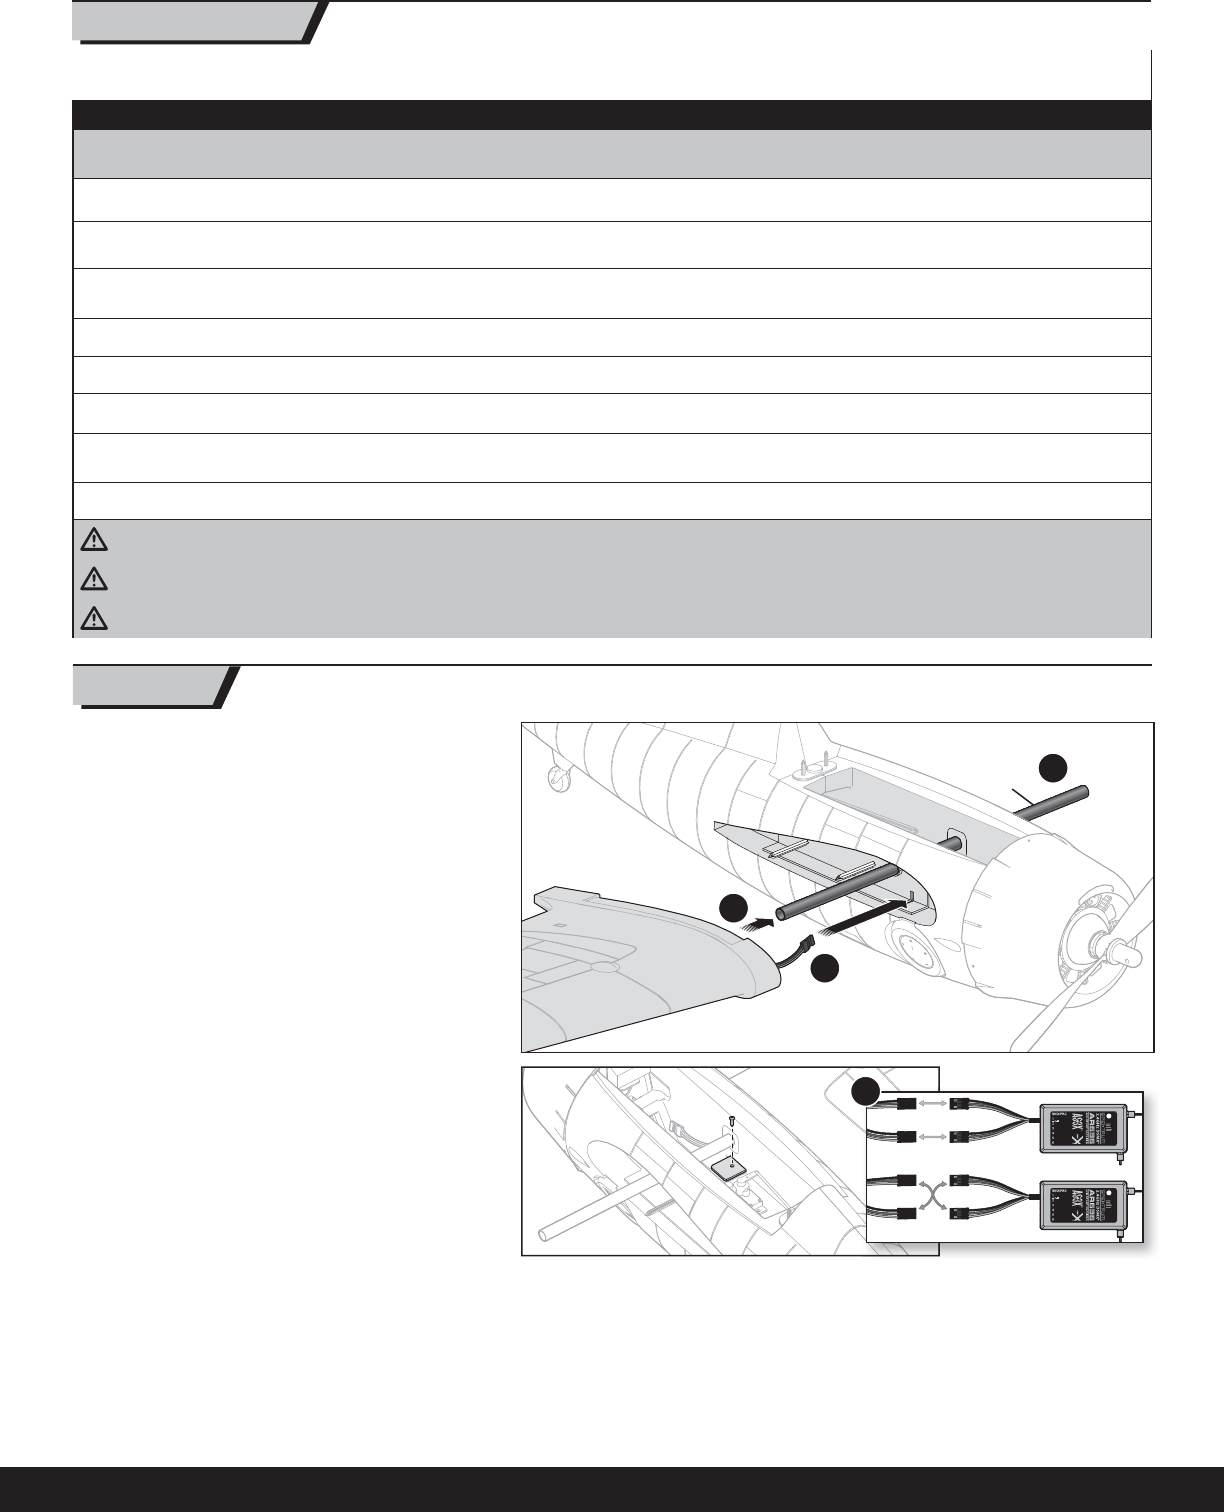
6. Connect the left and right aileron servos to the pre-
installed Y-harness. The left and right aileron servos can be
connected to either side of the Y-harness.