
Operation Manual


GB
│
IE
│
NI
│
CY
│
7 ■
PAS 4 B3
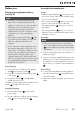
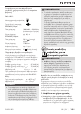
Before use
Charging the appliance battery
(see fig. A)
NOTE
►
The battery is supplied partially charged.
Before first use, charge the battery in the
charger for at least 1 hours. This guarantees
full battery power. Li-ion batteries can be
charged at any time without adversely
affecting their service life. Interruption of the
charging process will not damage the
battery.
► If the battery charge level indicator lights
up red during use, the battery is at less than
30% of its capacity and needs to be
charged.
► Never charge the cordless appliance when
the ambient temperature is below 10°C or
above 40°C. If a lithium-ion battery is to be
stored for an extended period, the charge
level should be checked regularly. The
optimum charge level is between 50% and
80%. The storage climate should be cool and
dry and the ambient temperature should be
between 0°C and 50°C.
Start charging:
♦ Connect the micro USB plug of the charging
cable
9b
to the charging socket .
♦ Connect the USB plug of the charging cable
9a
to the charger .
♦ Connect the charger to a 100–240 V ∼
50/60 Hz power source.
The battery is fully charged when the battery level
display changes from red to green.
Stopping charging:
♦ Disconnect the charger from the mains
power supply.
♦ Disconnect the micro USB plug of the charging
cable
9b
from the charging socket .
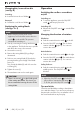
Assemble the attachments
Usage:
- With the torque attachment
screwing stops as
soon as the screw is tight. Set the required torque
from one of the 10 levels.
- The eccentric attachment
allows you to screw
even in locations that are close to the wall.
- The angle attachment
allows you to screw at
right angles.
- The cutting attachment
allows you to cut soft
materials, such as card and similar materials up to
a thickness of 6 mm.
Assembly:
NOTE
►
Before carrying out any work on the appli-
ance, ensure that the rotation direction switch
is in the middle. This prevents unintentional
switching on.
♦ Start by removing the rubber cap from the tool
holder (see fig. B).
♦ Now you can fit the supplied attachments to the
appliance in 45° steps. Fit the attachment onto
the appliance so that the attachment clicks into
place. (see fig. C, example: torque attachment
).
Dismantling:
♦ To remove the attachments from the appliance,
press the release button and pull the attach-
ment off forwards.
♦ Afterwards, replace the rubber cap on the tool
holder.