
System information


106
Parallels Mac Management Features
Parallels Desktop and a source virtual machine can be configured before deployment in a number
of ways according to your requirements. This includes the general virtual machine configuration
parameters, such as the number of CPUs, available RAM, hard disk size, etc., as well as additional
configuration options. For instance, you may want to modify the default virtual machine location,
install Parallels Tools in a virtual machine, set up automatic Windows SID generation, and do other
customization. For more information on how to customize Parallels Desktop and a source virtual
machine, please read the Parallels Desktop Mass Deployment and Management guide, which
can be downloaded from the Parallels Web site.
Note: The Parallels Desktop Autodeploy.pkg package will not automatically register Parallels
Desktops deployed to remote Macs. If your license allows to run Parallels Desktop simultaneously on
several Macs, all you have to do is register it once on one Mac. If you have individual licenses, you'll have
to manually activate Parallels Desktop and register it on every Mac to which it was deployed. Parallels
Desktop can also be purchased through the Parallels Volume Licensing program. If you have such a
license, you don't have to register Parallels Desktop and still get all the benefits of a registered product.
Creating a Software Distribution Package
The Parallels Desktop deployment package is distributed to Macs using the standard Configuration
Manager functionality:
1 In the Configuration Manager console, navigate to Administration / Overview / Application
Management / Packages.
2 On the toolbar, click Create Package.
3 Use the Create Package and Program Wizard to create a software distribution package and
a program.
4 On the Package page, specify the package name, description, and other information. Select
the This package contains source files option and then click the Browse button. Browse for
and select the Parallels Desktop Autodeploy.pkg folder. When done, click Next.
5 On the Program Type page, select the Standard program item and click Next.
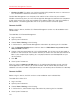
6 On the Standard Program page, specify the information about the program. Type the following
in the Command line field:
chmod 700 "Parallels Desktop
Autodeploy.pkg/Contents/Resources/postflight" && installer -pkg
"Parallels Desktop Autodeploy.pkg" -target /
7 When done specifying the program information, click Next.
8 Click Next on the Requirements page.
9 Review the summary and click Next to create the package.