
User manual

12
Copyright© 1994-2010 Paragon Software Group. All rights reserved.
Recordable CD/DVD drive to burn data to compact discs
External USB hard drive to store backup data.
Installation
As we have already mentioned only Windows components of the product require installation. So to install Paragon
Partition Manager Server under Windows, please do the following:
1. Run Setup Application. Click on the *.MSI file. This application will guide you through the process of the
program installation. The setup utility is compiled with the InstallShield SDK, hence it contains the standard user
interface and set of installation steps.
In case there is some previous version of the program installed on the computer, the
program will offer the user to uninstall it first.
2. Starting Setup. The Welcome page informs that the application is being installed. Click the Next button to
continue.
3. Confirm License Agreement. The License Agreement page displays the Paragon License Agreement. Read the
agreement and then select the appropriate option to accept. If you do not agree with any conditions stated
there, the installation process will be interrupted. By clicking the Print button, the License Agreement may also
be printed out.
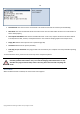
4. Provide Registration Information. On the Registration page you are to provide your product key and serial
number.
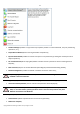
5. Provide Customer Information. On the Customer Information page you are to provide the standard
information, i.e. a user name and an organization. Besides you need to decide whether to make the program
available for all users of this computer (if several) or only for the current one.
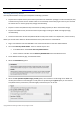
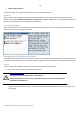
6. Select an Installation Folder. The Destination Folder page allows you to choose a folder where the program will
be installed. By default, the installation folder will be created as:
C:\Program Files\Paragon Software\Paragon Partition Manager Server. To select another folder, click the
Change… button.
After you have selected the required folder, click the Next button to continue.
Do not install the program on network drives. Do not use Terminal Server sessions to install
and run the program. In both cases, the program functionality will be limited.
7. Confirm Installation. On the Ready to Install the Program page click the Install button to start the installation or
the Back button to return to any of the previous pages and modify the installation settings.
8. Copying Files. The Copying Files page shows the overall progress of the installation. Click the Cancel button to
abort the setup.
9. Finishing the Installation. The Final page reports the end of the setup process. Click the Finish button to
complete the wizard.