
User's Manual


Entries can be retrieved by name or group.
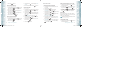
NEW CONTACT
To add a new number to your Contacts List:
Using this submenu, the number is saved as a new Contact.
To save the number into an existing Contact, edit the Contact entry.
1. From standby mode, press the OK Key [MENU], and press
1. New Contact.
2. Enter the name, then press the Directional Key
down. To change
the input mode, press the Left Soft Key [Abc].
3. Press the Directional Key
down to enter information in other
fields for the contact. Fields include:
Mobile 1/Home/Work/E-mail 1/Group/Picture/Ringtone/
Mobile 2/Fax/E-mail 2
If entering information in a phone number field, press the Right Soft
Key [Options] to select one of the following options:
1. Set Speed Dial/2. Set As Default/3. Add Pause
4. Press the OK Key
[SAVE].
For additional details on how to add a new contact, see page 38.
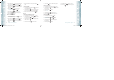
NEW PTT CONTACT
To add a new PTT number to your PTT Contacts List.
1. From standby mode, press the OK Key [MENU], and press
New PTT Contact.
2. Enter the name, then press the Directional Key
down. To change
the input mode, press the Left Soft Key [Abc].
3. Enter the PTT number, then press the Directional Key
down.
4. Select the PTT Group, press the Left Soft Key
[Edit]. Press the
Directional Key up or down to select the group, then press the
OK Key [MARK]. Press the Left Soft Key [Done]
5. Press the OK Key
[SAVE]. Connect to server and update Contact
information.
“New PTT Contact” menu appears only when the “PTT Mode” is set “On”.
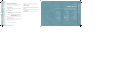
CONTACT LIST
You can review all the entries stored in your Contact List or quickly find an
entry by entering a name or its character string.
1. From standby mode, press the OK Key [MENU], and press
2. Contact List. Or, press the Right Soft Key [Contacts].
48
Chapter 5 − Menu Function
ContactsContacts
The list of names in your contacts is displayed alphabetically.
2. Enter a name or part of a name in the Go To field at the bottom of the
screen or press the Directional Key
up or down to scroll through
your Contact List.
3. To edit the entry, press the Left Soft Key
[Edit]. To view contact
details, press the OK Key
[VIEW].
•
By pressing the Right Soft Key [Options], you can choose from the following:
1. New Contact: To add a New Contact.
2. Erase: To delete a contact.
3. Copy to PTT Contacts: To copy to PTT Contact list.
4. New TXT Message: To create a TXT message.
5. New Picture Message: To create a Picture message.
6. New Video Message: To create a Video message.
7. New Voice Message: To create a Voice message.
8. Send by Bluetooth: To access Bluetooth Menu.
9. Set As ICE Contact: To set as emergency number.
10. Call: To call the contact.
11. Erase All Contacts: To delete all contact list.
“Copy to PTT Contacts” option appears only when the “PTT Mode” is set “On”.
4. To call the selected number, press the Right Soft Key [Options]
and then select ”Call” or press the SEND Key .
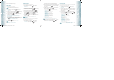
PTT CONTACT LIST
You can review all the entries stored in your PTT Contact List or quickly find an
entry by entering a name or its character string.
1. From standby mode, press the OK Key [MENU], and press
PTT Contact List.
2. Enter a name or part of a name in the Go To field at the bottom of the
screen or press the Directional Key
up or down to scroll through
your PTT Contact List.
3. Press the Left Soft Key [Alert]. Press and release the PTT Key
to alert. To view PTT contact details, press the OK Key [VIEW].
•
By pressing the Right Soft Key [Options], you can choose from the following:
1. New PTT Contact: To add a New PTT Contact.
2. Copy to PTT Contacts: To copy to PTT Contact list.
3. Temp PTT Group
4. Erase: To delete a PTT contact.
5. Edit: To edit a PTT contact entry.
6. Call: To call the contact.
7. New TXT Message: To create a TXT message.
8. New Picture Message: To create a Picture message.
9. New Video Message: To create a Video message.
10. New Voice Message: To create a Voice message.
11. Sort: To sort your PTT Contact list.
“PTT Contact List” menu appears only when the “PTT Mode” is set “On”.
Menu Function − Chapter 5
49
ContactsContacts
080803_CDM8975_RAP_REV00.indd 48-49080803_CDM8975_RAP_REV00.indd 48-49 2008.8.14 10:36:24 AM2008.8.14 10:36:24 AM