
User Manual


50
6. Camera (현재 C120 Camera flip book 나오지 않음. 현
재상태는 C300매뉴얼 기준에서 PG1400 매뉴얼에 있는
Video 기능을 추가만 한 상태)
You can take a photo in various ways using the built-in camera.
The photo can be saved and sent with a Multimedia Message.
6.1 Take a Photo
1. Select ‘Menu>6.Camera>1.Take a Photo’ in sequence.
* Tip: Press and hold the side up key to enter into the capture mode
when the flip is closed. At this time, the image size is VGA only, and the
image is displayed on the external LCD.
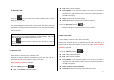
2. Adjust the image by focusing the camera at the subject.
Press the Soft key [
] to change the shooting mode.
Shooting Mode Icon Description
Single Capture Take a single photo.
Multi Capture
Take multiple photos. Number of photos to be
taken set by the [Multi-shot] option.
Frame Capture
Take a photo with a built-in frame.
Image size is fixed as 128X128
(‘Frame’ cannot be set in VGA mode.)
3. Push up/down joystick to zoom in/out of the image in the current
preview when the image size is the LCD. And push left/right joystick to
control the brightness of 7 levels.
4. The phone saves the image automatically when the user pushes in
on joystick. Press [
] key to return to the camera preview screen.
(Note: In Multi Capture mode, the photo will be named automatically only
if one photo is set as ‘Marked’. Select [Mark]/[Unmark] to check the
image that you want to save.)
Camera Specific Functions
Function Description Key
Brightness
Control the brightness of 7 levels (from
0 to 6)
[push
left/right
joystick] key
Zoom
Change the zoom levels(only available
in LCD Size(128x128) mode)
[push
up/down
joystick] key
6.1.1 Using the Camera Options
1) The preview mode
Press the [Options] Soft key [
] in the preview mode to select the
following the information which will be applied to the image. Its setting
value is temporary, so if you want to save its value, go to ‘Menu>
6.Camera>3.Settings’
Go to Album: Moves to the Photo Album.
Image Size: Displays the size of image that you want to shoot