USER’S MANUAL C150 Thank you for choosing the Pantech C150, our latest triband GSM mobile phone. The C150 has many features that will enhance your mobile experience. From its light weight and reliability, to the builtin camera, we know you will enjoy all the features the C150 has to offer. The C150 user guide contains important information about using your handset. 1 070703_C150_EN(00)�‚�¬.indd 1 2007.7.
Phone Specifications Design Power Management (Performance) Bar type phone with single display Battery Type Standard Lithium-Ion (Li-ion) Displays •28.032 mm x 35.04 mm display for 1.
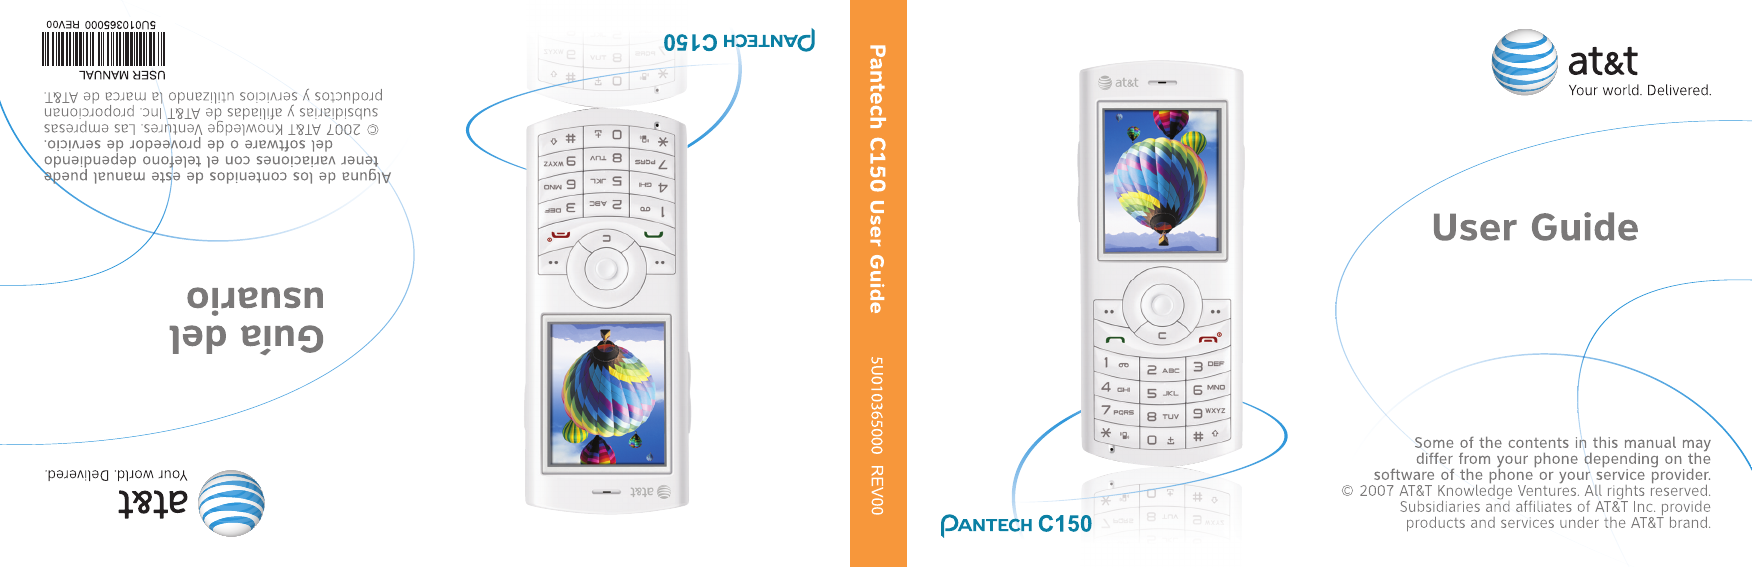
Pantech C150 at a glance Headset Jack Earpiece Camera Display LCD Right Soft key Performs functions in lower right display. Selected Menu Item Left Soft key Performs functions in lower left display. Camera key 4-way Navigation MEdia Net Access/ OK key Press to enter menu system. Press oto scroll through menus and lists. Power on/off Menu Exit key/End key Turns phone on/off, ends calls, exits menus.
Menu tree Using Shortcuts Menu Outline Numbered menu items, such as menus, sub-menus, and options can be quickly accessed by using their shortcut numbers. In Menu mode, Main Menus can be accessed by pressing the number keys (1 to 0) corresponding to their location on the screen. The following list shows the menu structure and indicates the number assigned to each option. Example: Accessing the Language menu. 4 1. Press the Menu soft key. 2. Press the [9] for Settings. 3. Press the [4] for Phone. 4.
Menu tree 5.3 5.4 5.5 5.6 Shop Graphics Shop Multimedia Shop Applications MEdia Net Home 6 Game & Apps 7 My Stuff 7.1 Audio 7.2 Graphics 7.3 Photo Album 7.4 Video Album 7.5 Other Files 7.6 Tools 7.6.1 Camera 7.6.2 Alarm 7.6.3 Calendar 7.6.4 Notepad 7.6.5 Voice Memo 7.6.6 World Time 7.6.7 Calculator 7.6.8 Converter 7.6.9 Stopwatch 7.7 Memory Info 8 Address Book 8.1 Contact List 8.2 Add Contact 8.3 Speed Dial 8.4 Groups 8.5 My Business Card 8.6 Memory in Use 8.7 Delete All 8.8 Copy All 8.
Quick & Easy Keys ( ) Functions Perform the functions shown at the bottom line of the display by using these Soft keys. Scroll through the menu options in Menu mode. In standby mode, Left Scroll: Access My Stuff menu Right Scroll: Access IM menu Up Scroll: Access Create Text Message menu Down Scroll: Access Contact list menu For details, see “Using the Shortcut Key in Standby Mode”. 6 o Select a menu function or store user-input information, such as names.
Quick & Easy Keys 0 ~9 Functions Enters numbers, letters or special characters. Go to the dial screen if pressed in standby mode. * Enter or exit from vibrate mode if pressed and held in standby mode. Show the symbol input screen if pressed and held in text input mode. Work in Word search mode if pressed in the Predictive text input mode. 0 Enter an international dialling prefix. Enter the space character in text input mode.
Contents Getting started Package contents .................................................................16 SIM card.................................................................................17 About your SIM card ...............................................................17 Installing/Removing your SIM card .........................................17 Battery ...................................................................................17 Inserting your battery .............................
Contents •Making a call while you are on a call ..................................29 •Switching between two calls ...............................................30 •Ending a call .......................................................................30 Transferring a call ...................................................................30 Multi-party calls.......................................................................30 •Making a multi-party call ...................................................
Contents IM............................................................................................42 •Starting Instant Messenger .................................................42 •Viewing the Conversation Log ............................................42 Messaging .............................................................................42 Text Message .........................................................................43 Multimedia Message....................................................
Contents Shop Games...........................................................................60 Shop Graphics ........................................................................60 Shop Multimedia .....................................................................60 Shop Applications ...................................................................60 MEdia Net Home ....................................................................60 Games & Apps ...................................................
Contents •Setting Speed Dial in Name Search ...................................75 Group......................................................................................76 My Business Card ..................................................................76 Memory in Use .......................................................................76 Delete All ................................................................................76 Copy All ...........................................................
Contents •Master Reset.......................................................................87 •Master Clear .......................................................................87 TTY .........................................................................................87 Appendix Access codes........................................................................90 Troubleshooting checklist ...................................................91 Performance and safety ................................
14 070703_C150_EN(00)�‚�¬.indd 14 2007.7.
Getting Started 1. Package Contents 2. SIM Card 3. Battery 4. Internal & External Displays 5. Selecting Functions and Options 070703_C150_EN(00)�‚�¬.indd 15 1 2007.7.
Package Contents Phone Battery Travel charger User’s Manual 16 070703_C150_EN(00)�‚�¬.indd 16 2007.7.
SIM Card & Battery About your SIM card When you subscribe to your network operator, you receive a SIM (Subscriber Identity Module) card containing your registration information, PIN code, etc. Like a credit card, it should be kept secure and handled carefully. Do not bend, scratch or expose it to moisture. Avoid static electricity. To avoid corrupting your SIM card’s memory, always switch your phone off before removing or inserting your SIM card.
Battery 2 please inquire at your nearest dealer. You can use your phone while the battery is being recharged. When the battery is inserted in your phone, open the protective cover located on the top of your phone and connect the charger , as illustrated. When your battery is fully charged, remove the charger from the outlet, then disconnect the adapter from your phone by pressing the adapter’s side buttons and pulling the adapter away from your phone, as illustrated. 18 070703_C150_EN(00)�‚�¬.
Battery & LCD Display •Dispose of used batteries and recycle them in accordance with local regulations. Do not dispose of batteries by burning; they may explode. •To prevent injury keep metal objects away from + and - terminals of the battery. Display Layout Icon area Text and graphic area Displays the following information in Standby mode: Textural and graphical information showing Network Name, Time and Date, or a Greeting put in by the user. LCD Display Your phone has a single display.
LCD Display Icon(s) Description Icon(s) Description You have received one or more text, multimedia or e-mail messages. is displayed if the message memory is full. You have set the alert type for incoming call to ring ascent volume increases over the duration of the ring). A GPRS signal is available. is displayed when there is an active GPRS session. You have set the alert type for incoming call to ring and vibrate. An EDGE signal is available. is displayed when there is an active EDGE session.
LCD Display Icon(s) Description Icon(s) Description A message is being received. This becomes set when Bluetooth Headset/Handsfree are connected. A message is being sent. This becomes set while Bluetooth data is being transmitted. Speakerphone mode is activated. Email & IM You have received a new browser message. This icon is displayed until the message is loaded.
LCD Display Icon(s) Description My Stuff Address Book Settings Automatic display off If you do not press any key for ten seconds (dependent on the user setting) while the display is dimmed, the internal display turns off automatically to save power. To restore the display, press any key. 22 070703_C150_EN(00)�‚�¬.indd 22 2007.7.
Selecting functions and options Your phone offers several convenient ways for you to select the phone function you want. You can access all of your phone’s functions when the phone is active. Selecting functions and options Your phone offers many phone operating and customization functions arranged in menus and sub-menus. Each menu and sub-menu allows you to view and change the settings of the particular function. You access these functions using the left and right selection (“Soft”) keys ([(] and [)]).
Keypad Lock Locking the keypad Keypad lock prevents accidental pressing of the keys. Press the [Menu] Soft key then select [*] key. Unlocking the keypad Press the [Unlock] Soft key then select [*] key within 3 seconds to unlock the keypad. 24 070703_C150_EN(00)�‚�¬.indd 24 2007.7.
Basic functions 1. Switching your phone on or off 2. Making and ending a call 3. Answering a call 4. Options during a call 5. Using your headset 6. Using the Speaker Phone 7. Selecting menu functions 8. Entering text 070703_C150_EN(00)�‚�¬.indd 25 2 2007.7.
Switching your phone on or off & Making and ending a call Switching your phone on ❶ Press the [e] key until the phone switches on. ❷ If you are asked to input your PIN (Personal Identification Number), enter your SIM card’s PIN and press the [o] key. (For further details, see Security on page 85.) Your phone starts to search for an available network and the current date and time is shown on the LCD display. Once connected to the network, you can make and receive calls.
Making and ending a call If you dial the same number more than once, only the latest occurrence is saved. ❶ Press the [s] key to display the Call Logs list of dialed, received or missed call numbers in reverse chronological order. ❷ Press the [Up] or [Down] scroll key to select a number. ❸ Press the [s] key to dial the selected number. (For further details, see 3. Recent Calls on page 54.
Answering a call Answering a call When you receive a call, your phone rings (or vibrates). If the caller can be identified, the caller’s phone number is displayed (or the caller’s name, if it is stored in your contact list). NOTE This function is network and subscription dependent, and may not be available in all areas. ❶ To answer a call, press the [s] key. ❷ If your answer type is set to [Any Key], you can answer calls by pressing any key except the [e] key.
Options during a call reconnected to you. Adjusting the call volume To adjust the earpiece volume during a call, do one of the following. •To increase the call volume during a call, press the [Up] volume key on the left side of your phone. •To decrease the call volume during a call, press the [Down] volume key on the left side of your phone. •In Standby mode, adjust the ringtone volume and set vibrate mode and silent all mode by using the [Up/Down] keys.
Options during a call Switching between two calls Press the [Swap] Soft key. The current call is put on hold and the held call is reactivated so that you can continue your conversation with the caller. Ending a call Press the [e] key to end a call. To terminate all active calls at the same time while you are in multi-party call, select [Options] and then select [End All Calls].
Options during a call whether the remote party is participating in the multi-party call (‘Far Multiparty’) or on hold (‘Far Hold’.) Answering or make a second call during a multi-party call ❶ Place the multi-party call on hold by pressing the [Options] Soft key then selecting the [Hold All Calls] option. ❷ Answer or make a call. ❸ To reactivate the multi-party call on hold, press the [Options] Soft key then select the [Retrieve all calls] option. ❹ To end the multi-party call, press the [e] key.
Options during a call ❹ The entries are displayed. Searching for a name in Address Book Enter the first letters of the name for Name Search. The entries are displayed starting with the first entry matching your input. Finding a name manually in Address Book Press the [Up] or [Down] scroll key. Viewing the highlighted entry in Address Book Press the [o] key. (For further details, see 8. Address Book on page 74.) Using DTMF tones You can turn the DTMF key tones off or on during a call.
Using your headset & Using the speaker phone function You can send or receive a call using your headset. When you connect your headset to the jack located at the top of your phone, the button on the headset works as follows: •While in Standby mode, press the button once to list recent calls. •While in Standby mode, press the button twice to redial the last call. •Press the button once to receive a call. •Press the button once to end the call.
Selecting menu functions Displaying your phone’s menu functions. To display your phone’s menu functions, press the [Menu] Soft key ([(]) in Standby mode. Moving within your phone’s menu and sub-menu functions To move within your phone’s menu and select the function or value you want, press the following keys. Key Soft key [(] [ Function Go to the main menu in Standby mode. ]navigation Move within the main menu. Search for the sub-menu. key [o] [OK] key Go to the sub-menu.
Selecting menu functions & Entering text Key Menu selected if pressed [*] key If pressed and held Enter or exit from Vibrate mode Entering text conventional ABC mode (see below). ABC mode In this mode, you input the letter you want by pressing the keypad once to select the first letter on the key, twice to select the second letter on the key, three times to select the third letter on the key and so on until the letter you want appears.
Entering text Changing text input mode Inserting a space When you are in an area where you can input text, the text input mode indicator is displayed at the top of your screen. Example: Typing a Text Message. To insert a space between words, press the [0] key. To insert a space at the end of a line, press the [Right] scroll key to add a new space character.
Entering text Key Function Press and hold the [*] key Display the symbol screen. Return to the previous screen in Symbol mode. Press the [0] key Enter a space character. Press the [c] key Delete characters one by one. After deleting all the characters, return to the previous screen. Press and hold the Delete all the characters and move the cursor to the beginning of the input [c] key screen. Press and hold the Change the text input mode. Multi-Tab → T9 → Numeric → Symbol [#] key mode. display.
Entering text NOTE The cursor moves to the right when you press a different key. When entering the same letter twice or a different letter on the same key, just press the [Right] scroll key or wait a few seconds for the cursor to move to the right automatically, and then enter the next letter. Refer to the table below for more information about the characters available. The characters vary depending on the text input language.
Entering text Using Symbol mode The symbol mode allows you to enter symbols into your text. To display more symbols, press the [Up] or [Down] scroll key. To input a symbol, press the number for a symbol, and the symbol appears in the input screen. 39 070703_C150_EN(00)�‚�¬.indd 39 2007.7.
070703_C150_EN(00)�‚�¬.indd 40 2007.7.
Applications 1. Email & IM 2. Messaging 3. Recent Calls 4. MEdia Net 5. AT&T Mall 6. Games & Apps 7. My Stuff 8. Address Book 9. Settings 3 See the appendix for information about the menu tree. 070703_C150_EN(00)�‚�¬.indd 41 2007.7.
Email & IM & Messaging Mobile Email The phone can receive Email from the service provider. Press [Menu] Soft key, select 1. Email & IM, and then select 1. Mobile Email, where the number of unread Emails is shown. When you are in the list of Emails, press the [Options] key to select from the following functions. •Delete: Delete a message. •Delete All: Delete all the messages in Inbox. •Ok: Show the information for the selected message.
Messaging Text Message Short message service (SMS) allows you to send and receive a short text message to and from other phones. Multimedia Message Multimedia Message Service (MMS) is a messaging service similar to Short Message Service (SMS). It provides asynchronous delivery of personal multimedia messages. In addition to the familiar text content of text messages, multimedia messages can contain images, graphics, video, and/or sound.
Messaging memory available for the new messages. Use the [Delete] option within each mailbox, or use the [Delete All] option to delete all the messages. NOTE If “Auto delete” is set to On, and the inbox full, when the handset receives a new message, it deletes the oldest read message and saves the new message instead. 44 •Write New: Write a multimedia message (MMS) or a text message (SMS) •Inbox: Display the received messages in the SIM and Phone memory.
Messaging •Save: Save messages in the phone memory. •Input Mode: Change the mode used to input data into your message, such as text, numbers, and symbols. •My words: Manage the words that you have added to the dictionary. You can edit and delete the words (For more information about My Word, see My Words on page 35). •Language: Select English, Spanish or French. ❸ After you have created the message, press the [o] key to send the message.
Messaging 46 •Language: Selects English, Spanish or French. •Setting: The user can only change the setting for the message which is in the process of being written. The setting for Slide Timing, Page Layout and Priority can only be set while a message is being written. However, Delivery Reports and Read Reports setting can also be set by pressing 2.Messaging, select 10.Settings, and then select 2.Multimedia Message. •Slide Timing: Set how long the received message is displayed.
Messaging press the [Options] Soft key to use the following [Editor Options]. •Add Object: Add an image, sound, other files and slide objects. •Preview: Show the message as it appears on the recipient’s phone, and you can return to the Editor to press the [Back] soft key. •Delete Text/Image/Sound: Delete the selected text, image, or sound from the slide page. •Delete Slide: Delete the selected slide. NOTE When more than one slide exists, this menu appears. •Edit Subject: Edit the subject.
Messaging •New Voice Memo: Create a new recording memo •Voice Memo: Already recorded sound •Audio: Downloaded sound ❺ When you have finished creating the message, press the [o] key to send the message. If you want to send a Multimedia Message to a new number or an e-mail address that is not stored, press the [Up] key to move to Add Contact, and then just enter the number or e-mail address (Add Contact is only for entering numbers or email addresses that are not searched).
Messaging list of messages. In the case of multimedia messages, the list of messages appears with the sender phone number or name and the message subject.
Messaging 50 •Save Numbers & E-mail: Extract a number & e-mail from the message text. You can save it as an Address Book entry. - Press the [o] key, or the [Options] Soft key. •Save New: Create a new entry. •Add to Old: Add to the existing entry and save the entry. •Call back: you can call the person that number. •Send Message: Send a message to a selected recipient. •Save URLs: Extract a URL address from the message text. You can save it as a MEdia Net bookmark and connect to the URL.
Messaging •Delete: Delete the selected message. •Delete All: Delete all messages in Sent. Outbox Outbox contains all messages you have not yet sent. Press [Menu] Soft key, select 2.Messaging, select 4.Outbox, and press the [o] key. To manage messages in Outbox: ❶ Press the [Send] Soft key ([)]) at the bottom right corner to send the failed message again. ❷ Press the [Options] Soft key ([(]) at the bottom left corner to select the following functions. •Delete: Delete the message.
Messaging User created Templates: •Create New: Make a new template. Not available if the template space is full. •Delete: Delete a template you have defined. •Delete all: Delete all messages in the templates box. •Edit: Edit the selected template. Preloaded Templates: You cannot edit or delete a preloaded template. •Create New: Make a new template. Not available if the template space is full. •Send Text Message: Send a text message with the selected template. •Send Multimedia Msg.
Messaging your message center that is required when sending a message. •E-mail Gateway: Store or change the number of your email gateway required when sending an e-mail. •Save to: Set the text message storage to SIM or phone. This option might not be available depending on your SIM card. your message has been read. •Message Lifetime: Set the duration of time your message is stored at the message center while attempting to deliver it.
Messaging & Recent Calls ·View: View a SI(Service Indication) message ·Go To URL: Enter the browser. ·Delete: Delete the received message. •Off Do not accept messages When the user receives an SL (Service Load) message •Prompt On the Browser Message Alerting screen, ·Accept: it attempts a connection with the corresponding URL. ·Close: Close the Browser Message Alerting screen. The message is placed in the inbox.
Recent Calls select 1.Missed Calls. Press the [Up] or [Down] scroll key to select the missed call. To manage your missed calls, press the [Options] Soft key ([(]) to select from the following functions. •Call: Call the selected number. •Save Number: If the selected number is not saved on the SIM or the phone, this option appears. Saves the selected number to the SIM or the phone. •Delete: Delete the selected number. •Delete All: Delete all missed call records from the list.
Recent Calls number to the SIM or the phone. •Delete: Delete selected number. •Delete All: Delete all the dialed call records from the list. Press the [Message] Soft key ([)]) to send a message to the person if you missed the call. Delete Call Logs This function allows you to choose to delete all missed, received, or dialed call records or delete all call records. Press the [Menu] Soft key, select 3.Recent Calls, and then select 4.Delete Call Logs. Select All Calls to delete all the call records.
MEdia Net MEdia Net Home You can access the Internet with MEdia Net. This means you can connect to the Internet anywhere and anytime you have network coverage. This function contacts your network to load your Wireless Web service provider’s homepage. You can also press the [o] key in standby mode. Press the [Menu] Soft key, select 4.MEdia Net, and then select 1.MEdia Net Home. The context of the MEdia Net startup homepage depends on your Wireless Web service provider.
MEdia Net ❸ Press the [o] key to go to the related site. Go to URL This function allows you to directly input the address of a URL and connect to it. ❶ Press the [Menu] Soft key, select 4.MEdia Net, and then select 3.Go To URL. ❷ Input the URL you want to go to, then press the [o] key. Profiles This function selects or edits WAP connection profiles on your phone. NOTE The settings for your WAP service are already entered as required by your service provider. You cannot modify these default profiles.
MEdia Net Gateway IP is displayed. Press the [o] key to edit Gateway IP address. •Gateway Port : If you set the Connection Type to WAP, Gateway Port is displayed. Press the [o] key to edit Gateway Port. •Gateway Login ID : If you set the Connection Type to WAP, Gateway Login ID is displayed. Press the [o] key to input the appropriate login ID. •Gateway Password : If you set the Connection Type to WAP, Gateway Password is displayed. Press the [o] key to input the appropriate password.
MEdia Net & AT&T Mall Version This function displays the software version of your phone’s WAP browser. Press the [Menu] Soft key, select 4.MEdia Net, then select 7.Version. AT&T Mall Shop Tones Selecting this menu launches the Web browser to AT&T’s Tones menu. Press the [Menu] Soft key, select 5. AT&T Mall, and then select 1. Shop Tones. Shop Games Selecting this menu launches the Web browser to AT&T’s Game menu. Press the [Menu] Soft key, select 5. AT&T Mall, and then select 2. Shop Games. Graphics.
Games & Apps You can experience the latest full-color, console-style games in full effect on your phone. Get ready for a gripping gaming experience that takes your breath away. We’ve also included a range of useful tools to keep you organized and connected on the move. Shop Games Selecting this menu launches the Web browser to AT&T’s Game Arcade menu and select to choose from a wide range of games to download. Welcome to the era of fast and furious mobile gaming.
Games & Apps & My Stuff •Permissions: Set the permission regarding each function when the selected game accomplishes a specific function. •Connections: Set the Connection profile for Java •VM version: Show the JAVA version that the built-in Java VM (Virtual Machine) supports. My Stuff DRM/ Forward Lock Your phone supports a Digital Rights Management (DRM) system to protect acquired content.
My Stuff your phone. ❷ Press the [o] key to play the selected melody. ❸ Press the [Back] Soft key to return to the list. Press the [Set as] Soft key to set the selected sound as a preferred ringtone. NOTE You can not set an audio file as a ringtone, if it is larger than 600Kb. Press the [Options] Soft key ([(]) to apply the options to the sound concerned. The [Options] Soft key is active when the downloaded sound is selected. •Send as Multimedia Message: Send the selected sound in a multimedia messages.
My Stuff •Send as Multimedia Message: Send the selected image to a multimedia message. This option is available only for non-forward locked graphics. •Send via Bluetooth: Transmit the selected image via Bluetooth. •Rename: Rename an image. (For further details about renaming a file, see 8. Entering text on page 35.) •Delete: Delete an image •Delete All: Delete all images in the image list. •File Info: View the information about an image.
My Stuff •Delete All: Delete all photos in the album. •File Info: View the information on a photo Video Album This function allows you to view or edit the video saved on your phone. Press [Menu] Soft key, select 7.My Stuff, and then select 4.Video Album Viewing the saved videos ❶ Press the [Menu] Soft key, select 7.My Stuff, and then select 4.Video Album in the menu to access the video album list. ❷ Select a video from the list and press the [o] key to display the video list in the album.
My Stuff the multimedia message. •Send via Bluetooth: Transmit the selected file via Bluetooth . •Rename: Rename the selected file. •Delete: Delete the selected file. •Delete All: Delete all files in your Other Files. •File info: View details of the selected file. Tools Tools provides various functions such as Camera, Alarm, Calendar, Notepad, Voice Memo, World Time, Calculator, Converter, and Stopwatch. Press the [Menu] Soft keys, select 7.My Stuff, and then select 6.Tools.
My Stuff NOTE You cannot zoom in VGA(640x480) mode. Press [Album] Soft key to display the Photo Album. Using the camera’s photo options When your phone’s camera is in Photo Capture mode, press the [Options] Soft key [(] to select the following options adjusting how the photo is taken or appears. •Take a Video: Switch to Video Capture mode. •Image Size: Specify the size of photo you want to take. You can choose 128X160, 320X240 or 640X480. •Image Quality: Low, Medium or High.
My Stuff •Go to Album: Move to the Photo Album. •Press the [Send] Soft key [)] to transmit the photo with the multimedia message. Take a Video ❶ Press the [Menu] Soft key then select 7.My Stuff then select 6.Tools then select 1.Camera then select 2.Take a Video to enter your phone’s Video Camera mode. The image taken by your phone’s internal camera is displayed. Tip You can press and hold the [S] key in Standby mode to prepare to take a video directly.
My Stuff •Rename: Rename a video. (For more information about renaming a photo, see 8. Entering text on page 35.) •Go to Album: Move to the Video Album. ❷ Press the [Send] Soft key to transmit the video with the multimedia message. Alarm This function allows you to set an alarm to sound at up to five different times. Press [Menu] Soft key, select 7.My Stuff, select 6. Tools, and then select 2. Alarm to display the current alarm list.
My Stuff Monthly View Calendar is displayed in this view by default. Press the [Menu] Soft key, select 7.My Stuff, select 6. Tools, and then select 3. Calendar from the menu to display the Monthly View. Press the following keys to move in Monthly View.
My Stuff NOTE You can create 50 events and event can be made up to 5 perday. Also setting date cover from 01/01/2000 to 12/31/2049. Notepad This function enables you to create text memos on your phone. Press the [Menu] Soft key, select 7. My Stuff, select 6. Tools, and then select 4.Notepad to display the current notepad list. Press the [New] Soft key ([)]), and compose a new memo in the Notepad edit screen. To manage text memos, press the [Options] Soft key ([(]) to select from the following functions.
My Stuff •Delete: Delete the selected voice memo. •Delete All: Delete all voice memos. •File Info: View the information about a file. To play a voice memo: ❶ Select an item in the voice memo list, and press the [o] key to play immediately. ❷ Press the [ ] key or [ ] key to rewind or fast forward. ❸ Press the [ ] key to play or pause a voice memo. ❹ Press the [ ] key to stop a voice memo. World Time 72 This function allows you to view the world time. Press the [Menu] Soft key, select 7.My Stuff, select 6.
My Stuff Tip To input a decimal, press the [(()] key. Press and hold the [c], or press the Soft key ([)]) to reset the formula. Press the [c] key briefly to delete the text of a formula and press and briefly hold the [c] key to delete the whole formula. Converter Converter converts a figure between different units, i.e. length, area, volume, weight and temperature. ❶ Press the [Menu] Soft key, select 7.My Stuff, select 6. Tools, and then select 8.Converter.
Address Book You can store your personal entries, which can be added or deleted at any time, on your phone. You can save up to 800 contacts in your phone memory. Entries that can be stored on the SIM card depend upon the storage capacity of the card. Contact List Press the [Menu] Soft key, select 8.Address Book, and then select 1.Contact List. To search for a phone number from Address Book, do the following procedure. ❶ Input a name.
Address Book •SIM Card: Name( ), Mobile( ), Group( ), Picture( ), and Melody( ) Speed Dial This function enables you to use the Speed Dialing function to dial the entry by pressing a Speed Dial number in Standby mode. The Speed Dial numbers range from 2 to 9, totaling 8 Speed Dial numbers. NOTE Pressing and holding the [0] or the [1] key is the prefix for international calls or the Voice Mail service, respectively. Setting Speed Dial Press the [Menu] Soft key, select 8.Address Book, and then select 3.
Address Book Group This function is used to configure the settings for the four predefined caller groups: Family, Friends, Business, and VIP Press the [Menu] Soft key, select 8.Address Book, and then select 4.Groups. To manage the Groups, press the [Options] Soft key ([(]) to select from the following functions. •Group Ringtones: Set a Group, Melody, and Photo. •Rename: Rename a group in the user defined group. •Delete: Delete the selected groups in the user defined group.
Address Book & Settings My Phone Number This function displays your phone numbers stored in the SIM card. The number for My Phone Number can vary depending on the SIM. Press the [Menu] Soft key, select 8.Address Book, and then select 9. My Phone Number. Memory Info Press the [Menu] Soft key, select 8.Address Book, and then select 10.Memory Info. Select Memory Info and press the [o] key to display the usage and free memory space in Phone and SIM memory.
Settings displayed in Startup or Idle mode. Press the [Menu] Soft key, select 9.Settings, select 1.Display, and then select 3.Greeting. Backlight This function allows you to specify for how long your phone’s displays are backlight. ❶ Press the [Menu] Soft key, select 9.Settings, select 1.Display, and then select 4.Backlight. ❷ Choose how long you want backlighting of your phone’s displays to remain on if you do not touch any key. You can choose 5 Secs, 10 Secs, 20 Secs, 1 Min, and 10 Mins.
Settings Press the [Menu] Soft key, select 9.Settings, select 2.Audio, and then select 3.Volume. •Ring Volume: Control the volume in seven levels. •Key Volume: Control the volume in seven levels. Alert Tones This function allows you to specify how your phone alerts when you receive messages. Press the [Menu] Soft key, select 9.Settings, select 2.Audio, and then select 4.Alert Tones. You can personalize the following.
Settings receive a call or a message, and specifies how calls are to be answered on your phone. Press the [Menu] Soft key, select 9.Settings, and then select 3.Call. Call Forward 80 This function allows you to divert incoming calls to another phone number. Press the [Menu] Soft key, select 9.Settings, select 3.Call, and then select 1.Call Forward. Choose Forward Always, When Busy, On No Answer, When not Found, or Cancel All, all of which divert the call as required.
Settings forwards all of the subscriber’s calls to the indicated number. •Activate: Set up Call Forwarding When not Found. •Deactivate: Cancel the preset Call Forwarding When not Found. •Status: Inform the setup condition. •By Service: Set up Call Forwarding When not Found for each service (All Services, Voice calls, Data and Fax) Cancel All Cancel the Call Forward options. Answer Type This function allows you to specify how calls are to be answered on your phone. ❶ Press the [Menu] Soft key, select 9.
Settings and then select 5.Caller ID. Phone Language This function allows you to select which language is displayed on your phone. Press the [Menu] Soft key, select 9.Settings, select 4.Phone, and then select 1.Language to select a language for the display. NOTE Select Automatic to set the language as English. Time & Date This function allows you to set the time and date displayed on your phone. Press the [Menu] Soft key, select 9.Settings, select 4.Phone, and then select 2.Time & Date.
Settings wirelessly various devices such as computers, mobile phones and home appliances, which are located within a short distance, and then enabling real time, bidirectional communication among them, or the products complying to those specifications.
Settings •Delete All : Delete all devices from the Paired Device List. •Set Authorized/Unauthorized : If the relevant device has been set for Authorized, it is possible to access your phone with any permission. On the other hand, if it is set for “Unauthorized, the device must have the privilege to access your phone. This menu is displayed only when the registered device type is PC/PDA.. Press the [New] Soft key [(] to: The menu allows you to select the device to be newly registered.
Settings Device. when it is saved, it will be saved in the phone memory. Visibility Network Connection •Shown to All: Permit search to all other cell phones with Bluetooth technology. •Hidden: Permit access only to cell phones listed in the Paired device list This menu shows the Network Profile. You can register, delete and edit the Network Profiles. However, you cannot delete or edit default configurations provided by AT&T.
Settings PIN1 Check Phone Barring Press the [Left] or [Right] scroll key and [o] key for setup. If you input the incorrect PIN1 code three consecutive times, you will be prompted to input the PUK1 number. The default is Disabled. •Enabled: Input PIN1 whenever the power is turned on. •Disabled: Do not input PIN1 whenever the power is turned on. This function offers multiple methods to limit incoming or outgoing calls.
Settings •Off: Cancel Fixed Dialing service. •Fixed Dial List: Display the numbers recorded in the FDN Contact List. Change PIN2 This function allows you to change your phone’s PIN2 code. Software Version This function allows you to display your phone’s current software version. Press the [Menu] Soft key, select 9.Settings, and then select 7.Software Version. Reset This function allows you to delete all user settings and data from your phone and returns it to factory-default settings.
Settings Press the [Menu] Soft key, select 9.Settings, and then select 9.TTY. ❶ Connect a TTY connector into the Headset/Adapter jack (on the left side of the phone). ❷ Select the desired TTY mode by pressing the [Left] or [Right] scroll key. (For a TTY mode, see below) •TTY Full: Users who cannot talk and hear send and receive a text message through TTY equipment. •TTY Talk: Users who can talk but cannot hear receive a text message and send voice messages through TTY equipment.
Appendix 1 Access Codes 2. Troubleshooting checklist 3. Performance and safety 4. Safety Information for Battery Usage 5. Glossary 6. Safety precautions 7. FCC & Industry Canada Regulatory Compliance 8. Warranty 070703_C150_EN(00)�‚�¬.indd 89 4 2007.7.
Access codes The following section describes various security codes used on your phone. PIN1 code (4 to 8 digits) The PIN1 (Personal Identification Number) code protects your SIM card against unauthorized use. The PIN1 code is usually supplied with the SIM card. If you input the incorrect PIN1 code entry three times in a row, the PIN1 code will be blocked. If the PIN1 code is blocked, you need the PUK 1 code to unblock before you can use the SIM card again. See information on the PUK1 code.
Troubleshooting checklist If you experience any problem while using your mobile phone, please refer to the following checklist. If the problem still persists, contact your dealer or nearest carrier. When the “Insert SIM Card” message appears: Make sure the SIM card is correctly installed. Check to see if the SIM card is working properly. If it does not work, try to clean the contact points of the card. If it is out of order, take it to the nearest carrier.
Troubleshooting checklist & Performance and safety When you are unable to charge the battery: This may be the result of one of the following three cases. ❶ Your charger may be out of order. Contact your nearest dealer. ❷ You may be attempting to use the phone in an overly hot/cold temperature. Try changing the charging environment. ❸ Your battery may have not been connected to the charger properly. Check the connector.
Performance and safety & Safety Information for Battery Usage •Ensure that the earthing points of the battery and battery charger do not come in contact with conductive objects. Safety Information for Battery Usage •Do not disassemble or open crush, bend or deform, puncture or shred. •Do not modify or remanufacture, attempt to insert foreign objects into the battery, immerse or expose to water or other liquids, expose to fire, explosion or other hazard.
Glossary 94 To help you understand the main technical terms and abbreviations used in this booklet and take full advantage of the features of your mobile phone, here are a few definitions. Call Barring Ability to restrict outgoing and incoming calls. Call Forwarding Ability to re-route calls to another number. Call Holding Ability to put one call on Standby while answering or making another call; you can then switch between the two calls, as required.
Glossary & Safety precautions PUK (PIN Unblocking Key) Security code used to unlock the phone when an incorrect PIN has been entered three times in succession. The eightdigit number is supplied by the service provider with the SIM card. Roaming Use of your phone when you are outside your home area (when travelling for example).
Safety precautions dangerous materials (such as fuels, fuel stations or areas containing chemical goods) and obey any instructions or signals. Do not remove your mobile phone’s battery in such areas. Switch off in aircraft Always switch your phone off or select Flight Mode On (press the [Menu] Soft key, select 9. Settings, select 4. Phone, and then select 3. Flight Mode) when you are in an aircraft.
FCC & Industry Canada Regulatory Compliance FCC & Industry Canada Regulatory Compliance This device complies with Part 15 of the FCC Rules. Operation is subject to the following two conditions: (1) this device may not cause harmful interference, and (2) this device must accept any interference received, including interference that may cause undesired operation. Your mobile device is a low power radio transmitter and receiver. When it is ON, it receives and also sends out radio frequency (RF) signals.
FCC & Industry Canada Regulatory Compliance of 15mm (0.6 inches) to the body. Use of other accessories may violate FCC RF exposure guidelines and should be avoided. This device and its antenna must not be co-located or operating in conjunction with any other antenna or transmitter. Health and Safety Information FCC This EUT has been shown to be capable of compliance for localized specific absorption rate (SAR) for uncontrolled environment/general population exposure limits specified in ANSI/IEEE Std. C95.
Warranty Protect Your Warranty Read your Warranty carefully, with the special consideration to paragraph seven of the Limited Warranty for your unit. “Warranty does not apply to... or to any product or part thereof which has suffered through alteration... mishandling, misuse, neglect or accident”. Many companies are making look alike accessories and in some cases, promoting that their product is equal to or better than the Pantech product. Be careful.
Warranty blown fuse, theft or improper usage of any electrical source. 100 The Company disclaims liability for removal or reinstallation of the product, for geographic coverage, for inadequate signal reception by the antenna or for communications range or operation of the cellular system as a whole. To obtain repairs or replacement within the terms of this Warranty, the product should be delivered with proof of Warranty coverage (e.g.
MANUAL DEL USUARIO C150 Gracias por elegir Pantech C150, nuestro último teléfono celular GSM tribanda. El C150 posee muchas características que enriquecerán su experiencia con teléfonos celulares. Desde el poco peso y la confiabilidad, hasta la cámara incorporada, estamos seguros de que usted disfrutará de todas las características que el C150 tiene para ofrecer. La guía del usuario del C150 contiene información importante acerca de cómo usar el teléfono. 1 070703_C150_SP(00)�‚�¬.indd 1 2007.7.
Especificaciones del teléfono Diseño Dimensiones y peso Teléfono tipo barra con una pantalla única •Peso: 73 g •Dimensiones: 4,13” x 1,65” x 0,5” pulgadas Pantallas •Pantalla LCD de 28.032 mm x 35.04 mm por 1.
Un vistazo al Pantech C150 Headset Jack Auricular Pantalla LCD Camera Tecla programable derecha Realiza las funciones de la parte inferior derecha de la pantalla Ítem del menú seleccionado Tecla programable izquierda Realiza las funciones de la parte inferior izquierda de la pantalla Camera key 4-wap Navigation Access/ Confirm key Presione para entrar al sistema del menú. Presione lateclaopara desplazarse entre los menus y listas.
Árbol de menús Uso de los accesos directos Se puede tener acceso rápido a los elementos del menú numerados, tales como menús, submenús y opciones, usando sus números de acceso directo. En el modo de Menú, puede ingresar a los menús principales presionando las teclas numéricas (de la 1 a la 0) correspondientes a su ubicación en la pantalla. Ejemplo: Para tener acceso al menú Idioma. 4 1. Presione la tecla suave Menú. 2. Presione la tecla [9] para Ajustes. 3. Presione la tecla [4] para Teléfono.
Árbol de menús 4.5.1 Eliminar caché 4.5.2 Eliminar las cookies 4.5.3 Eliminar autorización 4.6 Seguridad 4.7 Versión 5 AT&T Mall 5.1 5.2 5.3 5.4 5.5 Comprar timbres Comprar juegos Comprar gráficos Comprar multimedia Comprar aplicaciones 5.6 Inicio de MEdia Net 6 Juegos y aplic. 7 Mi material 7.1 7.2 7.3 7.4 Audio Gráficos Álbum de fotos Álbum de video 070703_C150_SP(00)�‚�¬.indd 5 7.5 Otros archivos 7.6 Herramientas 7.6.1 Cámara 7.6.2 Alarma 7.6.3 Calendario 7.6.4 Bloc de notas 7.6.5 Nota de voz 7.6.
Rápido y fácil Tecla Función ( ) Ejecuta las funciones que aparecen en la parte inferior de la pantalla utilizando las teclas programables. Se desplaza a través de las opciones de menú en el modo Menú.
Rápido y fácil Tecla Función 0 ~9 Ingresa números, letras o caracteres especiales. Al presionarla en modo de espera, pasa a la pantalla de marcación. * Al mantenerla presionada en modo de espera, ingresa o sale del modo vibrador. Muestra la pantalla de ingreso de símbolos si se mantiene presionada en el modo de entrada de texto. Funciona en modo de búsqueda de palabras al presionarla en el modo de entrada de texto predictivo. 0 Ingresa un prefijo de marcación internacional.
Contenidos Inicio Contenido del paquete .........................................................16 Tarjeta SIM.............................................................................17 Acerca de la tarjeta SIM .........................................................17 Instalación y extracción de la tarjeta SIM ...............................17 Batería ...................................................................................17 Inserción de la batería .........................................
Contenidos •Volver a una llamada retenida. ...........................................30 •Realizar una llamada mientras tiene otra en curso.............30 •Intercambiar entre dos llamadas.........................................30 •Finalizar una llamada ..........................................................30 Transferencia de llamadas .....................................................30 Llamadas multipartitas............................................................
Contenidos Uso del modo 123 ..................................................................40 Uso de modo de símbolos ......................................................40 Aplicaciones 10 Correo electrónico y MI........................................................42 Correo de celular ....................................................................42 MI............................................................................................42 •Inicio del Mensajero Instantáneo .............
Contenidos •Eliminar autorización...........................................................61 Seguridad ...............................................................................61 Versión....................................................................................62 AT&T Mall ..............................................................................62 Comprar timbres .....................................................................62 Comprar juegos .....................................
Contenidos Añadir contacto.......................................................................78 Marcación rápida ....................................................................79 •Programar la Marcación rápida...........................................79 •Añadir a Marcación rápida ..................................................79 •Editar una Marcación rápida ...............................................79 •Eliminar de marcación rápida .............................................
Contenidos •Cambiar contraseña............................................................91 •Restricc. teléfono ................................................................91 •Marc. fija (Números de marcación fija) ...............................92 •Cambiar PIN2 .....................................................................92 Versión de software ................................................................92 Reiniciar............................................................................
14 070703_C150_SP(00)�‚�¬.indd 14 2007.7.
Inicio 1. Contenido del paquete 2. Tarjeta SIM 3. Batería 4. Pantallas interna y externa 5. Selección de funciones y opciones 070703_C150_SP(00)�‚�¬.indd 15 1 2007.7.
Contenido del paquete Teléfono Batería Cargador de viaje Manual del usuario 16 070703_C150_SP(00)�‚�¬.indd 16 2007.7.
Tarjeta SIM & Batería Acerca de la tarjeta SIM Cuando se suscribe a un operador de red, usted recibe una tarjeta SIM (Módulo de identidad del abonado) que contiene información de registro, un código PIN, etc. Al igual que una tarjeta de crédito, debe mantenerla en un lugar seguro y manejarla con cuidado. No debe doblarla, rayarla ni tampoco exponerla a la humedad. Evite la electricidad estática.
Batería 2 de utilizar solamente baterías y cargadores autorizados. Para obtener más detalles, comuníquese con el distribuidor más cercano. Puede utilizar el teléfono mientras recarga la batería. Cuando la batería se encuentra instalada en el teléfono, abra la cubierta protectora ubicada en la parte superior del teléfono y conecte el cargado.
Batería & Pantalla LCD verano o invierno, puede reducir su vida útil. Manténgala siempre a temperaturas normales. •Elimine y recicle las baterías utilizadas según las leyes locales. No queme las baterías; podrían explotar. •Para evitar lesiones, mantenga los objetos metálicos alejados de los terminales + y – de la batería. Disposición de la pantalla Área de texto y gráficos Teclas programables Pantalla LCD Su teléfono tiene una sola pantalla.
Pantalla LCD Icono(s) Descripción Recibió uno o más mensajes de texto, multimedia o correo electrónico. se visualiza si la memoria de mensajes está llena. Una señal GPRS está disponible. se visualiza cuando hay una sesión de GPRS activa. Señal EDGE disponible. se visualiza cuando hay una sesión EDGE activa. La característica de transferencia de llamadas está activada. La alarma está programada.
Pantalla LCD Icono(s) Descripción Icono(s) Descripción Nivel de la batería. Las barras indican la carga disponible de la batería. Si la carga de su batería es baja, se visualiza . Estado de YAHOO: Disponible, Ocupado e Invisible Se está recibiendo un mensaje. Aparece cuando el Auricular/ Manos Libres Bluetooth están conectados. Se está enviando un mensaje. El modo de altavoz telefónico está activado. Aparece cuando la función Bluetooth está activada.
Pantalla LCD Icono(s) Descripción AT&T Mall Juegos y aplic. Mi material Contactos Configuración Apagado automático de la pantalla Si usted no presiona ninguna tecla durante diez segundos (dependiendo de la configuración del usuario) mientras la pantalla está atenuada, la pantalla interna se apaga automáticamente para ahorrar energía. Para restablecer la pantalla, presione cualquier tecla. 22 070703_C150_SP(00)�‚�¬.indd 22 2007.7.
Selección de funciones y opciones El teléfono ofrece varias formas de seleccionar la función deseada. Puede acceder a todas las funciones del teléfono cuando el mismo está activo. Selección de funciones y opciones El teléfono ofrece varias funciones de operación y personalización dispuestas en menús y submenús. Cada menú y submenú le permite ver y cambiar la configuración de una función en particular.
Selección de funciones y opciones & Teclado bloqueado •Disminuye el volumen del audífono durante una llamada. S •Regula el volumen del sonido de timbre y fija el modo vibración y el modo completamente silencioso en el modo de espera. Lateral hacia •Baja el tono del timbre de una llamada abajo entrante. •Rechaza la llamada entrante si se mantiene presionada cuando usted recibe una llamada •Enciende el modo de captura de la cámara. U •Funciona como disparador de la cámara en modo de captura.
Funciones básicas 1. Encendido y apagado del teléfono 2. Realización y finalización de llamadas 3. Contestación de llamadas 4. Opciones durante una llamada 5. Uso del auricular 6. Uso del altavoz telefónico 7. Selección de funciones del menú 8. Ingreso de texto 070703_C150_SP(00)�‚�¬.indd 25 2 2007.7.
Encendido y apagado del teléfono & Realización y finalización de llamadas Encender el teléfono ❶ Presione la tecla [e] hasta que el teléfono se encienda. ❷ Si se le solicita que ingrese su PIN (Número de identificación personal), ingrese el PIN de su tarjeta SIM y pulse la tecla [o]. (Para obtener más detalles, consulte Seguridad en la página 90.) El teléfono comienza a buscar una red disponible y en la pantalla LCD aparecen la fecha y la hora actuales.
Realización y finalización de llamadas Realizar una llamada usando los Registros de llamadas El teléfono registra hasta 30 números de llamadas marcadas, recibidas y perdidas. El número de la última llamada se guarda en la primera posición. Si marca el mismo número más de una vez, sólo se guarda la última. ❶ Presione la tecla [s] para mostrar la lista de números de llamadas marcadas, recibidas y perdidas de los Registros de llamadas en orden cronológico inverso.
Realización y finalización de llamadas & Cómo contestar una llamada Marcación rápida. (Para obtener más detalles, consulte Marcación rápida en la página 79.) Realizar llamadas de emergencia Responder una llamada perdida Puede realizar llamadas de emergencia incluso si el teléfono no tiene una tarjeta SIM. ❶ Seleccione Número de emergencia, o presione la tecla programable [SOS] si el teléfono no tiene una tarjeta SIM. ❷ Presione la tecla [o].
Cómo contestar una llamada & Opciones durante una llamada •Mantenga presionada la tecla Arriba] o [Abajo] Lateral durante la llamada entrante. La persona que llama escucha un tono de ‘ocupado’. Contestar una segunda llamada Usted puede contestar una llamada entrante mientras tiene una llamada en curso si el proveedor de servicios de red admite este servicio y usted tiene activada la opción Llamada en espera . (Para obtener más detalles, consulte Llamada en espera en la página 86.
Opciones durante una llamada Desactivar el micrófono del teléfono Presione la tecla programable [Mudo]. Activar nuevamente el micrófono del teléfono Presione la tecla programable [No mudo]. Colocar una llamada en espera y volver a una llamada retenida Usted puede retener llamada cuando lo desee. Puede realizar otra llamada cuando está con una en curso, si su proveedor de servicio de red admite este servicio.
Opciones durante una llamada ambas llamadas. ❶ Durante una llamada, realice o conteste otra como y luego presione la tecla programable [Opciones]. ❷ Presione la tecla de desplazamiento [Arriba] o [Abajo] para resaltar la opción [Transferir] luego presione la tecla programable [Seleccionar] o la tecla [o]. Las dos personas que llaman se conectarán entre sí.
Opciones durante una llamada [Retener todas las llamadas]. ❷ Conteste o realice una llamada. ❸ Para reactivar la llamada multipartita, presione la tecla programable [Opciones] luego seleccione la opción [Recuperar todas las llamadas]. ❹ Para finalizar la llamada multipartita, presione la tecla [e]. Mantener una conversación privada con un participante 32 ❶ Presione la tecla programable [Opciones] luego seleccione la opción [Privada]. ❷ Presione la tecla [o].
Opciones durante una llamada Buscar un nombre en los Contactos Escriba las primeras letras del nombre para Buscar por nombre. Los contactos aparecen a partir de la primera entrada que coincide con lo ingresado. Encontrar un nombre manualmente en los Contactos Presione la tecla de desplazamiento [Arriba] o [Abajo]. Ver la entrada resaltada en los Contactos Presione la tecla [o]. (Para obtener más detalles, consulte 8. Contactos en la página 78.
Opciones durante una llamada & Uso del auricular Bluetooth durante una llamada, seleccione [Opción] -> [Recuperar Auricular] o [Recuperar Manos libres]. Por otro lado, seleccionando [Opción] -> [Recuperar teléfono] le permite hablar utilizando el teléfono nuevamente. NOTA Mientras se encuentra hablando por su teléfono celular, un botón determinado del Auricular/Manos Libres Bluetooth le permite hablar usando el Auricular/Manos Libres Bluetooth.
Uso de la función del altavoz telefónico & Selección de funciones del menú Uso de la función del altavoz telefónico Para utilizar la función del altavoz telefónico durante una llamada, presione la tecla [o] luego [Altavoz activado].. Para desactivar la función de altavoz telefónico, presione la tecla [o] luego [Altavoz desactivado]. Selección de funciones del menú Visualización de las funciones del menú del teléfono.
Selección de funciones del menú & Ingreso de texto Tecla Menú seleccionado cuando se presiona Si se mantiene presionada Modo de ingreso [ ] Tecla Visualiza MI derecha En muchas ocasiones, es necesario ingresar texto en el teléfono, por ejemplo: cuando almacena un nombre en los Contactos, cuando escribe un nuevo mensaje, cuando crea un saludo o cuando programa eventos en el calendario. Puede seleccionar entre los siguientes métodos (modos) para ingresar el texto en el teléfono.
Ingreso de texto para la tercera y así sucesivamente hasta que aparezca la letra deseada. Ejemplo: Ingreso de un mensaje de texto. Modo 123 Opciones → del editor En este modo se pueden ingresar números. Modo de símbolos ← El icono del número de página y la cantidad de caracteres restantes que puede escribir Área de → edición Usted puede ingresar caracteres especiales como letras griegas, unidades monetarias, o un punto en este modo.
Ingreso de texto Desplazamiento Tecla Función Para mover el cursor hacia la izquierda o la derecha dentro del texto, presione la tecla de desplazamiento [Izquierda/ Derecha]. Y además, para mover el cursor hacia arriba o hacia abajo entre las líneas, pulse la tecla de desplazamiento [Arriba/ Abajo]. Mantenga presionada la tecla [*] Presione la tecla [0] NOTA Al presionar la tecla [Arriba/ Abajo], el cursor puede moverse muy rápidamente hacia el comienzo o el final del texto.
Ingreso de texto La palabra que está escribiendo aparece en la pantalla. Puede cambiar probablemente con cada tecla que presione. ❷ Ingrese la palabra completa antes de editar o borrar alguna pulsación. ❸ Al buscar una palabra, ingrese el siguiente texto. ❹ Si la búsqueda no tiene éxito, presione la tecla [*] qué texto se puede escribir. El teléfono visualiza primero las opciones que se utilizan con mayor frecuencia. ❺ Continúe con el ingreso de la siguiente palabra.
Ingreso de texto [Inglés] Tecla Caracteres, en el orden que aparecen 1 2 3 4 5 1 : @ ‘ ! ? - , . 6 7 m n o 6 8 9 0 a b c 2 d e f 3 g h i 4 j k l 5 p q r s 7 t u v 8 w x y z 9 Space 0 Uso del modo 123 Uso de modo de símbolos El modo de símbolos le permite ingresar símbolos en el texto. Para visualizar más símbolos, presione las teclas de desplazamiento [Arriba] o [Abajo]. Para ingresar un símbolo, presione el número para un símbolo y éste aparecerá en la pantalla de ingreso.
Aplicaciones 1. Correo electrónico y MI 2. Mensajería 3. Llamadas recientes 4. MEdia Net 5. AT&T Mall 6. Juegos y aplic. 7. Mi material 8. Contactos 9. Configuración 3 Consulte el apéndice para obtener información acerca del árbol de menús. 070703_C150_SP(00)�‚�¬.indd 41 2007.7.
Correo electrónico y MI Correo de celular El teléfono puede recibir correos electrónicos provenientes del proveedor de servicios. Presione la tecla programable [Menú], seleccione 1. Correo electrónico y MI, y luego seleccione1. Correo de celular, donde se muestra la cantidad de correos electrónicos no leídos. Cuando usted se encuentre en la lista de correos electrónicos, presione la tecla [Opciones] para seleccionar las siguientes funciones. •Eliminar: Elimina un mensaje.
Mensajería Esta función le permite crear, enviar, leer y guardar un mensaje usando el Servicio de mensajes cortos (SMS: mensajes de texto), Servicio de mensajes multimedia (MMS: mensajes que admiten presentación de varios tipos de medios, como imágenes a todo color, sonidos de timbre polifónicos y videos) proporcionados por el operador de red o un servicio de correo electrónico. Los correos de voz también están disponibles. Presione la tecla programable [Menú] y luego seleccione 2.Mensajería.
Mensajería Borrador, Enviado y Plantillas comparten una cantidad determinada de memoria en el teléfono. En el Buzón de entrada, los mensajes de texto (SMS) se pueden guardar en el teléfono o en la tarjeta SIM, dependiendo de la configuración de Mensajes de texto. Cuando “Guardar en” en la configuración de Mensajes de texto se programa en SIM, los mensajes recibidos se guardan en la memoria del teléfono si la capacidad de la tarjeta SIM está completa.
Mensajería •Configuración: Configura el entorno para los mensajes. •Info. Memoria: Visualiza el espacio libre o usado de la tarjeta SIM o de la memoria del teléfono. Escribir nuevo Presione la tecla programable [Menú] , seleccione 2. Mensajería, seleccione1. Escribir nuevo, y luego presione la tecla [o]. Seleccione el tipo de mensajes que desea ingresar. •Mensajes de texto: escriba un nuevo mensaje SMS. •Mensajes multimedia: Escribe un nuevo mensaje MMS.
Mensajería NOTA Cuando usted selecciona una dirección que no está almacenada en la Lista de Contactos, aparece el menú Editar y Eliminar. Luego de seleccionar el número correcto, presione la tecla programable [Marcar] para verificarlo. Cuando haya terminado de ingresar la información del receptor, presione la tecla [o]. Mensajes multimedia 46 ❶ Cuando se visualiza la página [Escribir nuevo] , presione la tecla programable [Opciones] para utilizar las siguientes [Opciones del editor].
Mensajería mensaje se ha entregado exitosamente o no (Esto depende de la red). •Leer informes: Cuando esta opción se configura como [Activada], el teléfono del receptor le envía una respuesta para hacerle saber que el mensaje se ha leído. (si la red de soporte admite esta funcionalidad) •Prioridad: Establece Normal, Alta, o Baja. •Guardar como borrador: Almacena los mensajes en la carpeta Borrador. ❷ Cuando se visualiza la página [Escribir nuevo], presione la tecla programable [Añadir] para agregar objetos.
Mensajería •Eliminar texto/ imagen/ sonido: Elimina el texto, la imagen o el sonido seleccionado de la página de diapositiva. •Eliminar diapositiva: Elimina la diapositiva seleccionada. NOTA Cuando existe más de una diapositiva, aparece este menú. 48 •Editar asunto: Edita el asunto. •Configuración: El usuario solamente puede cambiar la configuración para el mensaje que se está escribiendo sin tener en cuenta las configuraciones generales.
Mensajería con un sonido diferente seleccionado del submenú. •Nueva nota de voz: Crea una nota de voz nueva •Nota de voz: Sonido ya grabado •Audio: Sonido descargado ❺ Cuando haya terminado de crear el mensaje, presione la tecla [o] para enviar el mensaje.
Mensajería Puede recibir un aviso de mensaje multimedia a través de la red y leer sólo el mensaje multimedia descargado. También puede recibir un mensaje de texto y correo de voz. En el caso de los mensajes de texto, si está disponible en los Contactos, el nombre la persona que envía y el texto inicial aparecen con la lista de mensajes. En el caso de los mensajes multimedia, la lista de mensajes aparece con el número telefónico de la persona que lo envía y el asunto del mensaje.
Mensajería •Respon.: Responde al remitente del mensaje. ❸ Seleccione la tecla programable [Opciones] en la parte inferior de la vista del mensaje para seleccionar una de las siguientes opciones. •Dev. llam.: Llama al remitente del mensaje. •Eliminar: Elimina el mensaje seleccionado. •Guardar objetos: Extrae un objeto del mensaje multimedia. Puede guardarlo en una de las categorías de Mi material. (Sólo aparece en el mensaje multimedia.
Mensajería Mensaje SMS enviado (normal) Los iconos que se presentan a continuación indican el estado del mensaje SMS guardado en Enviados: Mensaje MMS enviado (normal) Mensaje MMS entregado Mensaje MMS leído Mensaje MMS borrado sin leer Para administrar mensajes en Enviados: ❶ Presione la tecla programable [Editar] en el extremo inferior derecho para editar y enviar un mensaje Enviado utilizando el número del destinatario.
Mensajería •Eliminar: Elimina el mensaje. •Eliminar todos: Elimina todos los mensajes en Borrador. Correo de voz Si está ocupado o no puede contestar cuando alguien llama, puede transferir la llamada al servicio de mensajes de correo de voz. Una vez que la persona que llama deja un mensaje, el servicio de correo de voz indica que hay un mensaje. Presione la tecla programable [Menú], seleccione2.Mensajería, seleccione6.Correo de voz, y presione la tecla [o].
Mensajería normalmente la ingresa previamente en el teléfono el proveedor de servicio. Presione la tecla programable [Menú] , seleccione2.Mensajería, y luego seleccione 8.Configuraciones. Config. común Seleccione [Menú], luego 2.Mensajería, a continuación 8.Configuraciones, finalmente 1.Configuración común, y presione la tecla [o]. Para programar una configuración común de mensajes, use las siguientes funciones: •Modo Edición predet.
Mensajería programada en [Activada], la red le informa si su mensaje se ha entregado exitosamente o no. •Leer informe: Cuando esta opción está configurada como [Activada], el teléfono del receptor le envía una respuesta para hacerle saber que el mensaje se ha leído. •Validez de msj.: Programa el tiempo que el mensaje se almacena en el centro de mensajes mientras intenta la entrega. Usted puede seleccionar 1 Hora, 2 Horas, 6 Horas, 1 Día, 2 Días, 1 Semana, 4 Semanas, 6 Meses, o Máximo.
Mensajería & Llamadas recientes •Desactivado No acepta los mensajes Info. Memoria Esta función muestra la cantidad de memoria utilizada y disponible en el teléfono y en la tarjeta SIM. Presione la tecla programable [Menú] , seleccione2. Mensajería, y luego 9.Info. Memoria para visualizar el espacio libre de la memoria de los mensajes multimedia y los mensajes de texto. Llamadas recientes Esta función visualiza las llamadas perdidas, las llamadas recibidas, y las llamadas marcadas.
Llamadas recientes •Llamar: Llama al número seleccionado. •Guardar número: Si el número seleccionado no está guardado en la SIM o en el teléfono, aparece esta opción. Guarda el número seleccionado en la tarjeta SIM o en el teléfono. •Eliminar: Elimina el número seleccionado. •Eliminar todos: Elimina todos los registros de llamadas perdidas de la lista. Presione la tecla programable [Mensaje] ([)]) para enviar un mensaje a la persona de la llamada perdida.
Llamadas recientes o en el teléfono. •Eliminar: Elimina el número seleccionado. •Eliminar todos: Elimina todos los registros de llamadas marcadas de la lista. Presione la tecla programable [Mensaje] ([)]) para enviar un mensaje a la persona si la llamada falló. Eliminar registros de llam. Esta función le permite optar por eliminar todos los registros de las llamadas perdidas, recibidas, o marcadas o eliminar todos los registros de llamadas. Presione la tecla programable [Menú] , seleccione 3.
MEdia Net Inicio de MEdia Net Puede acceder a Internet con MEdia Net. Esto significa que puede conectarse a Internet en cualquier momento y lugar, siempre que tenga cobertura de red. Esta función contacta la red para cargar la página principal de su proveedor de servicio Web inalámbrico. También puede presionar la tecla [o] en el modo de espera. Presione la tecla programable [Menú] , seleccione 4.MEdia Net y luego 1.Inicio de MEdia Net.
MEdia Net Ir a URL Esta función le permite ingresar directamente la dirección de un URL y conectarse a éste. ❶ Presione la tecla programable [Menú] , seleccione4. MEdia Net y luego 3.Ir a URL. ❷ Ingrese el URL al que desea ir y presione la tecla [o]. Perfiles Esta función selecciona o edita los perfiles de conexión WAP en el teléfono. NOTA La configuración para el servicio WAP ya está ingresada según lo solicitado por su proveedor de servicio. No puede modificar estos perfiles predeterminados.
MEdia Net •IP de pta. de enlace : Si configura el Tipo de conexión en WAP, se muestra elIP de pta. de enlace . Presione la tecla [o] para editar la dirección IP de pta. de enlace. •Puerto de pta. de enlace : Si configura el Tipo de conexión en WAP, se muestra elPuerto de pta. de enlace . Presione la tecla [o] para editar la dirección del Puerto de pta. de enlace. •ID de inicio de sesión de pta. de enlace : Si configura el Tipo de conexión en WAP, se muestra elID de inicio de sesión de pta. de enlace .
MEdia Net & AT&T Mall seleccione 4.MEdia Net y luego 6.Seguridad. •1. Certificados: Muestra una lista de los certificados disponibles. Presione la tecla [o] para ver los detalles sobre la conexión, el estado de la codificación e información acerca del servidor y la autenticación de usuario. •2. Advertencia: Oculta o muestra las notificaciones de seguridad. Versión Esta función muestra la versión de software del navegador WAP del teléfono. Presione la tecla programable [Menú], seleccione 4.
AT&T Mall & Juegos y aplic Presione la tecla programable [Menú] , seleccione 5. AT&T Mall, y luego 4. Comprar Multimedia. Comprar aplicaciones Al seleccionar este menú se inicia el navegador Web en el menú de Aplicaciones AT&T. Presione la tecla programable [Menú] , seleccione 5. AT&TMall y luego 5. Comprar aplicaciones. Inicio de MEdia Net Para obtener más detalles sobre 4. MEdia Net , consulte la página 59.
Juegos y aplic estrenados, los más vendidos o puede hacer clic en todos los juegos para ver nuestro catálogo completo. Todos estos juegos están disponibles en la Galería de juegos, es posible que algunos no estén disponibles para todos los dispositivos. •Seleccione la categoría que desee y en la pantalla aparecerá una lista de todos los juegos disponibles. •Tan sólo seleccione el juego que desee y cuando se resalte presione la tecla [o] para obtener una descripción detallada.
Mi material DRM/ Bloqueo de transferencia El teléfono admite un sistema de Administración de derechos digitales (DRM) para proteger el contenido adquirido. Una parte del contenido (por ejemplo, timbres, papeles tapiz) puede protegerse usando Bloqueo de transferencia, que significa que los contenidos protegidos no pueden ser transferidos a otros dispositivos incluidos otros teléfonos y computadoras de escritorio.
Mi material •Eliminar: Elimina un sonido. •Eliminar todos: Elimina todos los sonidos de la lista de sonidos. •Info. de archivo: Muestra la información sobre un sonido. Gráficos Comprar gráficos Al seleccionar este menú se inicia el navegador Web en el menú de Gráficos AT&T. Gráficos 66 En este menú puede ver o editar la imagen o la información grabada en el teléfono. Los formatos de imagen admitidos son JPEG, GIF, BMP, WBMP y PNG. ❶ Presione la tecla programable [Menú] , seleccione 7.
Mi material Álbum de fotos Esta función le permite ver o editar las fotos guardadas en el teléfono. Presione la tecla programable [Menú] , seleccione 7.Mi material y luego 3.Álbum de fotos. Visualización de las fotos guardadas ❶ Presione la tecla programable [Menú] , seleccione 7.Mi material y luego 3.Álbum de fotos en el menú para acceder a las fotos. ❷ Seleccione una foto de la lista y presione la tecla [o] para que aparezca la lista de fotos en el álbum.
Mi material acceder a la lista de álbum de video. ❷ Seleccione un video de la lista y presione la tecla [o] para que aparezca la lista de videos del álbum. ❸ Use la tecla programable [Pequeño] o [Lista] para cambiar el tipo de lista (Pequeño/Lista). ❹ Seleccione un video y presione la tecla [o] para reproducir automáticamente la imagen de video. Use la tecla programable [Parar] para detener la reproducción.
Mi material •Info. de archivo: Muestra detalles del archivo seleccionado. Herramientas Herramientas proporciona varias funciones como Cámara, Alarma, Calendario, Bloc de notas, Nota de voz, Hora mundial, Calculadora, Conversor y Cronómetro. Presione la tecla programable [Menú] , seleccione 7.Mi material y luego 6.Herramientas. Cámara NOTA En el modo de Captura múltiple, automáticamente se puede dar un nombre a la foto si una foto se define como Marcada. Seleccione [Marcar] o [Desmar.
Mi material 70 Uso de las opciones fotográficas de la cámara Cuando la cámara del teléfono esté en el modo de Captura de fotos, presione la tecla programable [Opciones] [(] para seleccionar las siguientes opciones que ajustan la manera en que se toma o aparece la foto. •Tomar un video: Cambiar al modo de Captura de video. •Tamaño de imagen: Especifica el tamaño de la foto que desea tomar. Puede elegir entre 128X160, 320X240 ó 640X480. •Calidad de imagen: Baja, Media o Alta.
Mi material •Renombrar: Cambia el nombre de una foto. (Para obtener más información sobre cómo renombrar una foto, vea 8. Ingreso de texto en la página 36). •Ir a álbum: Lo lleva al Álbum de fotos. •Presione la tecla programable [Enviar] [)] para transmitir la foto con el mensaje multimedia. Tomar un video ❶ Presione la tecla programable [Menú] , seleccione 7.Mi material, luego 6.Herramientas, posteriormente 1.Cámara y por último 2.Tomar un video para ingresar al modo Cámara de video del teléfono.
Mi material Pantalla de video guardado. ❶ Presione la tecla programable [Opciones] en el modo Guardado para seleccionar la siguiente información, que se aplica al video. •Eliminar: Elimina el video que se guarda. •Enviar vía Bluetooth: Transmite el video seleccionado vía Bluetooth. •Atrás a Vista prev.: Regresa a la pantalla de vista previa de la cámara. •Renombrar: Cambia el nombre de un video. (Para obtener más información sobre cómo renombrar una foto, vea 8. Ingreso de texto en la página 36).
Mi material Desplace el joystick ([ ]) hacia la derecha para seleccionar el ícono AM o PM en la ventana de edición de la Hora. Cuando el ícono esté seleccionado, puede cambiar de AM a PM presionando el joystick hacia la derecha. Calendario El Calendario le ayuda a administrar sus horarios, incluidas horas para llamadas o días especiales. Con esta función puede definir el servicio de alarmas en una fecha establecida.
Mi material 74 deseada y luego presione la tecla [o]. Para las fechas que contienen eventos, cambie a Vista diaria para verificar lo programado. Los eventos registrados para una fecha aparecen en la parte inferior de la pantalla, como un ícono. Vista diaria Esta función muestra los eventos registrados para una fecha. Seleccione una fecha y luego presione la tecla [o] para ver o editar los detalles de los eventos específicos.
Mi material •Eliminar todos: Elimina todos los bloc de notas. Nota de voz La función Nota de voz graba sus mensajes de voz. Puede usar Grabar, Parar, Repro. y Guardar para grabar voz y reproducirla. Presione la tecla programable [Menú], seleccione 7. Mi material, luego 6. Herramientasy por último 5. Nota de voz. Para grabar una nota de voz: ❶ Presione la tecla programable [Nuevo] ([)]) para comenzar a grabar de inmediato.
Mi material 6. Herramientas y por último 6. Hora mundial. La Hora de inicio se muestra en la parte superior del área de texto y la Hora local se ubica en la parte inferior. Puede cambiar la Zona de inicio y la Zona local. Cuando la actualización automática de la hora y la fecha está activada: •La Zona de inicio está configurada como un Área de servicio de Actualización autom. •La Zona de inicio no se puede cambiar. •Para seleccionar la Zona local, use la tecla de desplazamiento [Izquierda] o [Derecha] .
Mi material [c] para borrar toda la fórmula. Conversor El Conversor convierte una cifra entre unidades diferentes, por ejemplo, longitud, área, volumen, peso y temperatura. ❶ Presione la tecla programable [Menú] , seleccione 7.Mi material, luego 6. Herramientas y por último 8.Conversor. ❷ Seleccione Longitud, Área, Volumen, Peso o Temperatura.
Contactos En el teléfono, puede guardar sus contactos personales, los cuales se pueden añadir o eliminar en cualquier momento. Puede guardar hasta 800 contactos en la memoria del teléfono. La cantidad de contactos que se puede guardar en la tarjeta SIM depende de la capacidad de almacenamiento de la tarjeta. Lista de contactos Presione la tecla programable [Menú] , seleccione 8.Contactos y luego 1.Lista de contactos. Para buscar un número de teléfono en los Contactos, realice el siguiente procedimiento.
Contactos Luego agregue la información del contacto para otras personas. Según la configuración de la tarjeta SIM o del teléfono en la ventana emergente Guardar en , aparecen los siguientes campos. •Teléfono: Nombre( ), Celular( ), Casa( ), Oficina ( ), Grupo( ), Imagen( ), Melodía( ), Correo1( ), Correo2( ) y Nota( ) •Tarjeta SIM: Nombre( ), Celular( ), Grupo( ), Imagen( ) y Melodía( ) para moverse a una entrada vacía y presione la tecla [Añadir].
Contactos la tecla programable [Elimin.] ([(]) para eliminarlo. Programar Marcación rápida en Buscar por nombre Presione la tecla programable [Menú] , seleccione 8.Contactos y luego 1.Lista de contactos. ❶ Presione la tecla de desplazamiento [Arriba] o [Abajo] para seleccionar una persona. ❷ Para añadir una marcación rápida, presione la tecla [Opciones] y seleccione la opción [Añadir a Marcación rápida] en la lista. ❸ Presione la tecla de desplazamiento [Arriba] o [Abajo] para moverse a una entrada vacía.
Contactos Memoria en uso Esta función le permite especificar si desea guardar la información del contacto en el Teléfono, en la Tarjeta SIM o ya sea en el Teléfono o SIM. Presione la tecla programable [Menú] , seleccione 8.Contactos y luego 6.Memoria en uso. Eliminar todos Esta función borra toda la información de los contactos guardada en el teléfono o en la tarjeta SIM. Presione la tecla programable [Menú] , seleccione 8.Contactos y luego 7.Eliminar todos.
Configuración Esta función le permite personalizar la manera de operar el teléfono. Pantalla Usted puede definir la forma en que aparece la información en su teléfono. Presione la tecla programable [Menú] , seleccione 9.Configuración y luego 1.Pantalla. Comprar gráficos Al seleccionar este menú el navegador Web se inicia en el menú de Gráficos AT&T. Pantalla principal Esta función le permite cambiar la imagen de la pantalla en espera que aparece en la pantalla principal del teléfono.
Configuración seleccione 9.Configuración y luego 2.Audio. Los sonidos definen cómo reacciona el teléfono cuando recibe una llamada o un mensaje, cómo suena el teclado cuando presiona una tecla, entre otros. Puede conservar el sonido de timbre, el tono de las teclas y otras configuraciones predeterminadas o puede personalizarlos de acuerdo a sus necesidades. Comprar timbres Al seleccionar este menú el navegador Web se inicia en el menú de Tonos AT&T.
Configuración en Timbre 1, Timbre 2 o Timbre 3. Tono de teclas Esta función le permite seleccionar el sonido que se escuchará cuando se presionen las teclas del teléfono. Presione la tecla programable [Menú] , seleccione 9.Configuración, luego 2.Audio y por último 5.Tono de teclas. Puede personalizar lo siguiente. •Tipo de Tono: Especifica si los tonos de las teclas están activados o desactivados. •Sonido: Especifica si el tono de las teclas suena en Bip, DTMF o Timbre 1~3.
Configuración •Activar: Activa la Transf. de llamada siempre. •Desactivar: Cancela la Transf. de llamada siempre. •Estado: Informa sobre el estado de configuración. •Por servicio: Activa la Transf. de llamada siempre para cada servicio (Todos los servicios, Llamadas de voz, Datos y Fax). Si está ocupada Esta función transfiere sólo aquellas llamadas que reciben una conexión ocupada o que de lo contrario hubieran transmitido la indicación de ocupado a la persona que llama. •Activar: Activa la Transf.
Configuración ❶ Presione la tecla programable [Menú] , seleccione 9.Configuración, luego 3.Llamada y por último 2.Tipo de contestar. ❷ Use la tecla de desplazamiento [Izquierda] o [Derecha] para configurar el método de recepción de llamadas. Presione la tecla [o] para guardar. •Tecla enviar: Las llamadas entrantes se contestan presionando la tecla [s]. •Cualquier tecla: Las llamadas entrantes se contestan presionando cualquier tecla, excepto la tecla [e] y la tecla programable [Rechaz.]. Remarc. autom.
Configuración Hora y Fecha Auto bloq. teclado Esta función le permite programar la hora y fecha que aparecerá en su teléfono. Presione la tecla programable [Menú] , seleccione 9.Configuración, luego 4.Teléfono y por último 2.Hora y fecha. Puede configurar la hora, el formato de hora y el formato de fecha presionando la tecla [o]. Si elige Autom. Act., la hora y la fecha se actualizan automáticamente y no puede editar la hora y fecha.
Configuración - Perfil de Conexión de Redes Dial-Up (DUN) - Perfil de Manos libres (HFP) - Perfil de auricular (HSP) - Perfil de Carga de Objetos (OPP) como cliente y servidor - Perfil de Transferencia de Archivos (FTP) como servidor únicamente La tecnología Bluetooth permite conexiones inalámbricas gratuitas entre dispositivos electrónicos a una distancia máxima de 33 pies (10 metros).
Configuración posible acceder a su teléfono con cualquier permiso. Por otro lado, si está definido como “No autorizado“, el dispositivo debe tener el privilegio de acceder a su teléfono. Este menú sólo aparece cuando el tipo de dispositivo registrado es PC/PDA. Presione la tecla programable [Nuevo] [(] para: El menú le permite seleccionar el dispositivo que fue registrado recientemente.
Configuración siempre puede realizar una llamada con el mismo, independientemente del Dispositivo de llamadas salientes. Visibilidad •Mostrado a todos: Permite la búsqueda a todos los demás teléfonos celulares con tecnología Bluetooth. •Oculto: Sólo permite el acceso a los teléfonos celulares que aparecen en la lista de dispositivos emparejados Nombre Le permite editar el nombre de su teléfono, que se mostrará a otros teléfonos con tecnología Bluetooth.
Configuración Presione la tecla programable [Menú] , seleccione 9.Configuración y luego 6.Seguridad. Verif. PIN1 Presione la tecla de desplazamiento [Izquierda] o [Derecha] y la tecla [o] para la configuración. Si ingresa el código PIN1 incorrecto tres veces consecutivas, se le indicará que ingrese el número PUK1. El predeterminado está deshabilitado. •Habilitado: Ingresa el PIN1 cuando se conecta la energía. •Deshabilitado: No ingresa el PIN1 cuando se conecta la energía.
Configuración Marc. fija (Números de marcación fija) Restablecimiento general Marcación fija es un servicio que limita el acceso a números específicos en la lista de Contactos registrados en la tarjeta SIM. Ingrese el PIN2 para configurar o cancelar este servicio. (El PIN 2 debe ser ingresado correctamente en 3 intentos). •Activado: Configura el servicio de Marcación fija. •Desactivado: Cancela el servicio de Marcación fija.
Configuración ❸ Ingrese la contraseña del teléfono y presione la tecla [o] para eliminar. La contraseña predeterminada es 1234. TTY TTY (también conocido como TDD o Teléfono de prueba) es un dispositivo de telecomunicaciones que permite comunicarse vía telefónica a las personas que presentan problemas de audición, o que tienen dificultades para hablar o de idioma. Su teléfono es compatible con los dispositivos TTY que poseen un CTM interno.
070703_C150_SP(00)�‚�¬.indd 94 2007.7.
Apéndice 1. Códigos de acceso 2. Lista de control de solución de problemas 3. Desempeño y seguridad 4. Información de seguridad para el uso de la batería 5. Glosario 6. Medidas de seguridad 7. Conformidad regulatoria de FCC e Industria Canadá 8. Garantía 070703_C150_SP(00)�‚�¬.indd 95 4 2007.7.
Códigos de acceso La siguiente sección describe diversos códigos de seguridad utilizados en el teléfono. Código PIN1 (4 a 8 dígitos) El código PIN1 (Número de identificación personal) protege a la tarjeta SIM contra el uso no autorizado. Por lo general, el código PIN1 se suministra con la tarjeta SIM. Si este código es ingresado en forma incorrecta tres veces seguidas, se bloqueará. Si el código PIN1 está bloqueado, necesitará desbloquear el código PUK 1 antes poder volver a utilizar la tarjeta SIM.
Códigos de acceso & Lista de control de solución de problemas Puede cambiar esta contraseña usando la función Restricc. de llam. (Para obtener más detalles, consulte Seguridad en la página 90.) Lista de control de solución de problemas Si experimenta algún problema mientras usa su teléfono celular, consulte la siguiente lista de control. Si el problema persiste, comuníquese con el distribuidor o el portador más cercano.
Lista de control de solución de problemas 98 esté en uso. Cambie la batería cuando la energía de ésta se haya agotado. Cuando el teléfono celular no se encienda: Asegúrese de que la batería esté cargada. Verifique que el teléfono funcione mientras recarga la batería. Cuando no pueda enviar un mensaje: Puede que no esté registrado para recibir servicio SMS o bien, puede estar en un área en la que el proveedor de servicio de red no puede proporcionar dicho servicio.
Desempeño y seguridad La siguiente lista muestra cómo mantener el teléfono celular, junto con las precauciones que se deben tomar. •Mantenga el teléfono celular y sus accesorios fuera del alcance de los niños. •Mantenga el teléfono celular en condiciones secas y dentro de temperaturas de funcionamiento normales. Las temperaturas por sobre los 55°C (131°F) o inferiores a -20°C (-4°F) podrían dañar el teléfono. •No use o guarde el teléfono celular en lugares polvorientos y sucios.
Información de seguridad para el uso de la batería •No la desarme o abra, no la aplaste, doble o deforme, ni perfore o destruya. •No la modifique o reensamble, no intente insertar objetos extraños en la batería, no la sumerja ni exponga al agua u otros líquidos, no la exponga al fuego, explosiones u otros peligros. •Use la batería sólo con el sistema para el cual está especificada. •Use la batería sólo con un sistema de carga que haya sido aprobado para el mismo según esta norma.
Glosario Para ayudarlo a comprender los principales términos técnicos y abreviaturas utilizados en este folleto y así poder aprovechar al máximo las funciones del teléfono celular, a continuación aparecen algunas definiciones. Restricc. Llamada Capacidad de restringir las llamadas salientes y entrantes. Transf. de llamada Capacidad de redirigir las llamadas a otro número.
Glosario 102 cuatro a ocho dígitos y se puede cambiar si se requiere. PUK (Clave de desbloqueo de PIN) Código de seguridad utilizado para desbloquear el teléfono cuando se ingresa un PIN incorrecto tres veces seguidas. El número de ocho dígitos lo suministra el proveedor de servicio con la tarjeta SIM. Roaming Uso del teléfono cuando se encuentra fuera de su área local (por ejemplo, cuando viaja).
Medidas de seguridad Es posible que el uso de teléfonos celulares no esté permitido cuando se conduce un automóvil. Revise las leyes y regulaciones locales relacionadas con la prohibición del uso de teléfonos celulares mientras se conduce y obedézcalas siempre. El uso del teléfono mientras conduce puede interrumpir su concentración y provocar un accidente. Siempre apáguelo lo antes posible.
Conformidad regulatoria de FCC e Industria Canadá Cumplimiento con las normas de la FCC y de Industry Canada Este dispositivo cumple con la parte 15 de las normas de la FCC. El funcionamiento está sujeto a las siguientes dos condiciones: (1) este dispositivo puede no causar interferencia dañina, y (2) este dispositivo debe aceptar cualquier interferencia recibida, incluida una interferencia que pueda provocar un funcionamiento no deseado.
Conformidad regulatoria de FCC e Industria Canadá Exposición a RF según la FCC En el caso de utilizarlo en el cuerpo, para mantener el cumplimiento con las pautas de exposición a la RF de la FCC, use sólo accesorios que contengan componentes no metálicos y deje una distancia de 15mm (0,6 pulgadas) con el cuerpo. El uso de otros accesorios podría violar las pautas de exposición a RF de la FCC y debe evitarse.
Garantía Proteja su Garantía Lea cuidadosamente su Garantía, con especial consideración al párrafo siete que trata la Garantía Limitada para su unidad. “La Garantía no se aplica a... o a cualquier producto o parte del mismo que haya sufrido a través de alteración... mal trato, mal uso, negligencia o accidente”. Muchas compañías están haciendo accesorios parecidos y en algunos casos, están promocionando que sus productos son iguales o mejores que los productos de Pantech. Tenga cuidado.
Garantía la batería, fusible quemado, robo o uso inapropiado de alguna fuente de suministro eléctrico. La Compañía deslinda toda responsabilidad por la remoción o la reinstalación del producto, por la cobertura geográfica, por inadecuada recepción de la señal por parte de la antena o por el rango de las comunicaciones o la operación del sistema de telefonía celular en su conjunto.
Garantía PANTECH WIRELESS, INC. 11240 Warland Drive, Cypress, CA 90630 (800) 962-8622 108 070703_C150_SP(00)�‚�¬.indd 108 2007.7.