
Submittal


EASY-MARK
22
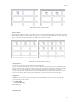
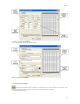
For example, if you wish to take the example from above and make labels the first 6 labels have a 10-point font, you
simply select the range of labels to group. Groups can be selected by clicking the first label in the group, then while
holding the ‘Shift’ key, click the last label in the desired group. The entire range of labels will then be selected. Once
the group is selected, click Edit->Group. These labels will now be grouped and a change made to one label in the group
will be applied to all labels in the group.
Setting a group
Groups are how you specify blocks of labels. You can set a group manually by clicking on the first label and then
clicking on the last label you want in the group.
For example, if you want text in a specific block of labels, such as labels 1-12, you set them as the group. Then when
you type the text, the text appears on all twelve labels.
Note: Once you specify a group and begin typing, what you type appears on all labels in the group. This includes any
edit actions you perform, such as deleting text.
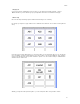
To create a group from blank labels, simply click in the first label you wish to include in the group, and then click on the
last label you wish to include in the group. When you begin typing, all the selected labels will show the label legend.
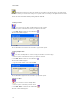
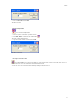
To create a group from labels already containing legends:
1. Click in the first label to include in the group.
2. Hold down the CTRL key and click in the last label to include.
3. Either click Edit | Group from the toolbar, or press CTRL-G.
4. Type the text you want.
It appears on the labels you specified as the group.
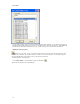
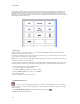
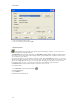
Using Modify Existing Group
You can set one group or multiple groups within a file of labels. Use Modify Existing Groups to work with the
groups you have set. This function lists the group you have specified and lets you update the starting and/or stopping
point of any group.
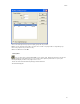
1. Click Edit | Modify Existing Groups or click the Modify Group toolbar button .
The Modify Existing Groups window appears.