
Operating Instructions


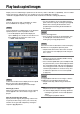


Table Of Contents
- Preface
- Before using this product
- Use an SD memory card
- Operation window
- Basic operation
- Login operation at startup
- Monitor live images
- Record images
- Play recorded images
- Play images from a designated point
- Search and play
- Play back copied images
- Event function
- Copy recorded images
- About the face matching function
- Operate the camera
- Configure the network settings
- Network security of the recorder
- Display the operation window
- About the operation window
- Monitor live images from cameras
- Play recorded images
- Play image recorded at a designated date & time
- Search and play recording events (REC event search)
- Motion detection search and playback (VMD search)
- Check a list of copied recorded images
- Event function
- Copy recorded images
- Download recorded images currently being played
- Play the copied/downloaded recorded images
- Operate the camera
- Setup
- Notification by e-mail
- Troubleshooting
- Glossary

34
35
About captured images
When the captured image button (☞ page 27) is clicked to display data saved on SD memory card on a PC, the
data format and destination to save are as follows:
File format for recorded images: JPEG (DPOF-compatible)
Destination to save: SD memory card
[DCIM]\100_PANA\ P1000001.JPG
P1000002.JPG, ...
* The folder will be created from 100_PANA to 999_PANA. If the folder already contains the file P1000999.
JPG, a folder with a new number will be created.
Step 4
If VMD search takes too much time or the search pro-
duces too many results, set a mask duration to
reduce the search frequency. When mask duration is
set, no motion detection will be performed from the
time motion is detected to the time mask duration is
set.
To set, click the [C] button next to [Mask duration
setup] on the advances setup panel.
Mask duration: 1 s/ 5 s/ 10 s/ 30 s/ 1 min/ 5 min/
10min
Default: 1 s
Step 5
Click the [Back] button or the [x] button.
→ The display returns to the VMD search panel.