
Operating Instructions


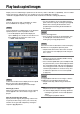


Table Of Contents
- Preface
- Before using this product
- Use an SD memory card
- Operation window
- Basic operation
- Login operation at startup
- Monitor live images
- Record images
- Play recorded images
- Play images from a designated point
- Search and play
- Play back copied images
- Event function
- Copy recorded images
- About the face matching function
- Operate the camera
- Configure the network settings
- Network security of the recorder
- Display the operation window
- About the operation window
- Monitor live images from cameras
- Play recorded images
- Play image recorded at a designated date & time
- Search and play recording events (REC event search)
- Motion detection search and playback (VMD search)
- Check a list of copied recorded images
- Event function
- Copy recorded images
- Download recorded images currently being played
- Play the copied/downloaded recorded images
- Operate the camera
- Setup
- Notification by e-mail
- Troubleshooting
- Glossary

34
35
Step 3
On the displayed image, click the upper left and lower
right corner of the square that will become the VMD
area.
→ The area set up for VMD search turns gray.
Note:
• Asthedetectionareaswillbesetuptomatchthe
image display area divided into 16x16 segments,
the top left and bottom right detection areas may
not be exactly as designated.
• Itisimpossibletodeletethedetectionareathat
has been set. To change the detection area set-
ting, perform Step 3 again.
Set up VMD areas, etc. [VMD search setup]
Set up VMD areas within images and a mask duration.
Step 1
Display the images from the camera to search on a
1-screen. (☞ Page 20)
Step 2
Click the [Setup] button next to [Detection area /
Mask duration].
→ The "VMD search setup" panel will be displayed.
• TheVMDsearchfunctionsearchestheentire
camera image by default. To designate a search
area, click the [Setup] button next to [Detection
area / Mask duration] on the "VMD search setup"
panel. (☞ Page 34)
• Itmaytakesometimeuntilthesearchresultsare
displayed.
Step 5
Select the line with the desired list, and click the play-
back button on the playback operation panel.
(☞ Page 26)
→ Playback will start from the date & time selected.
Note:
• Playbackcanalsobestartedbydouble-clicking
the desired date & time line.
Step 6
To stop playback and return to live images, click the
stop button on the playback operation panel.
→ Playback will stop, and live images will be dis-
played.
Note:
• Playbackcanalsobestoppedandliveimages
can also be displayed by the following operations:
• Clickingthe[x]buttononthedate&timeoper-
ation panel (playback display)
• Changingtheplaybackmedium