
Operating Instructions


Table Of Contents
- Preface
- Before using this product
- Use an SD memory card
- Operation window
- Basic operation
- Login operation at startup
- Monitor live images
- Record images
- Play recorded images
- Play images from a designated point
- Search and play
- Play back copied images
- Event function
- Copy recorded images
- About the face matching function
- Operate the camera
- Configure the network settings
- Network security of the recorder
- Display the operation window
- About the operation window
- Monitor live images from cameras
- Play recorded images
- Play image recorded at a designated date & time
- Search and play recording events (REC event search)
- Motion detection search and playback (VMD search)
- Check a list of copied recorded images
- Event function
- Copy recorded images
- Download recorded images currently being played
- Play the copied/downloaded recorded images
- Operate the camera
- Setup
- Notification by e-mail
- Troubleshooting
- Glossary
32
33
Step 1
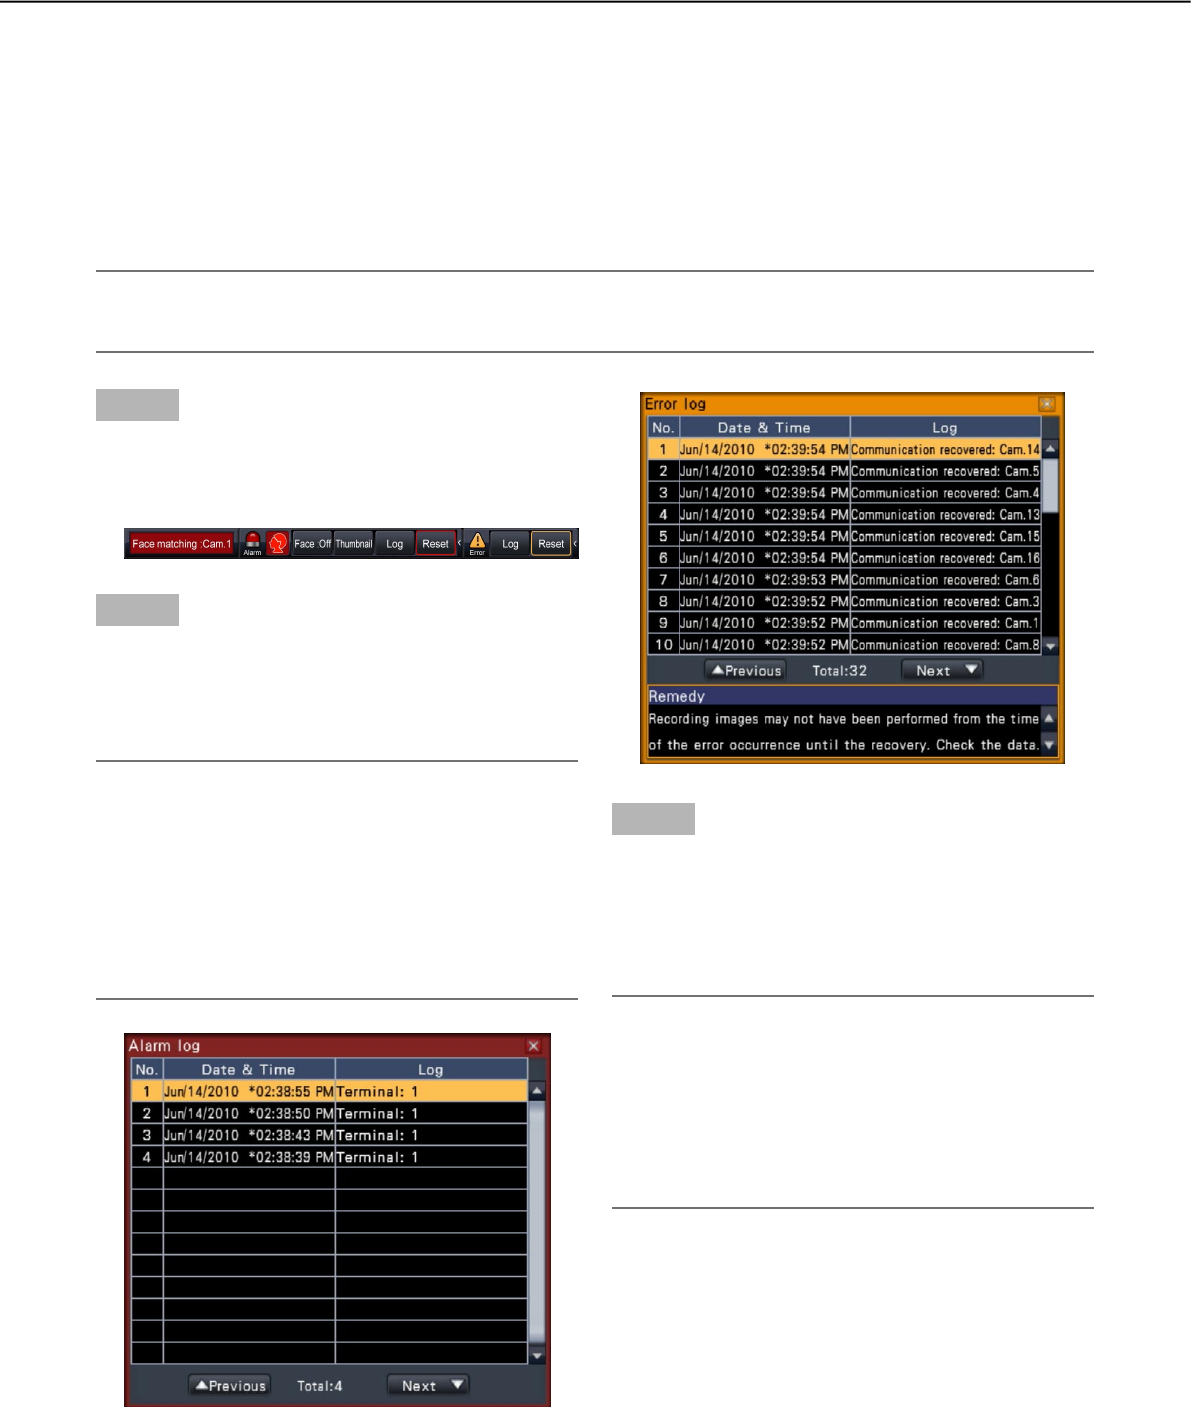
Click the [Alarm] button or [Error] button on the status
display panel.
→ The corresponding [Log] buttons will be displayed.
Step 2
Click the [Log] button.
→ The alarm log panel or error log panel will be dis-
played. It is possible to switch between list pages
by clicking the [Previous]/[Next] buttons.
Note:
• Upto750alarmlogsaresaved.Whenmorethan
750 logs are filed, the older logs will be overwrit-
ten by the newer logs. In this case, the oldest log
is the first to be overwritten.
• Upto1000errorlogsaresaved.Whenmorethan
1000 logs are filed, the older logs will be overwrit-
ten by the newer logs. In this case, the oldest log
is the first to be overwritten.
Search and play
Search a desired recorded image and play it. There are the following 2 searching methods.
• Playimagesselectedfromalarmanderrorlogs(Logsearch)
• Searchandplayimagesrecordedtriggeredbythemotiondetectionofthecamera(VMDsearch)
Play images selected from logs (log search)
Display the alarm log list or error log list, and click a date & time to play the corresponding recorded images.
Note:
• Thecorrespondingrecordeddatathatisdisplayedintheselectedloglistcannotbeplayedifthedatahas
already been overwritten or erased.
Step 3
Select the line with the desired date & time, and click
the playback button on the playback operation panel.
(☞ Page 26)
→ Playback will start from a point approx. 5 seconds
before the date & time selected.
Note:
• Playbackcanalsobestartedbydouble-clicking
the desired date & time line.
• Tostartplaybackfromthebeginningofthepre-
event recording when the "Pre-event duration"
setting is longer than 5 seconds, click the play-
back button, and then click the previous record
button.