LCD Projector Commercial Use Operating Instructions Model No. PT-LB10NTU PT-LB10U PT-LB10VU PT-LB10SU POWER INPUT VIDEO AUTO SETUP RGB MENU ENTER SHUTTER FREEZE STD VOLUME D.ZOOM INDEX WINDOW PROJECTOR Before operating this product, please read the instructions carefully and save this manual for future use.
Dear Panasonic Customer: This instruction booklet provides all the necessary operating information that you might require. We hope it will help you to get the most out of your new product, and that you will be pleased with your Panasonic LCD projector. The serial number of your product may be found on its bottom. You should note it in the space provided below and retain this booklet in case service is required.
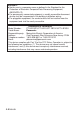
Do not remove WARNING: This equipment has been tested and found to comply with the limits for a Class B digital device, pursuant to Part 15 of the FCC Rules. These limits are designed to provide reasonable protection against harmful interference in a residential installation. This equipment generates, uses, and can radiate radio frequency energy and, if not installed and used in accordance with the instructions, may cause harmful interference to radio communications.
WARNING: B Not for use in a computer room as defined in the Standard for the Protection of Electronic Computer/Data Processing Equipment, ANSI/NFPA 75. B For permanently connected equipment, a readily accessible disconnect device shall be incorporated in the building installation wiring; B For pluggable equipment, the socket-outlet shall be installed near the equipment and shall be easily accessible.
Preparation IMPORTANT SAFETY NOTICE ...2 Precautions with regard to safety .........................................6 Accessories ...............................10 Before use ..................................11 Location and function of each part...........................................13 Inserting the wireless card .......18 Getting started Setting-up...................................19 Projection methods, Projector position, Projection distances Connections...............................
Precautions with regard to safety WARNING If you notice smoke, strange smells or noise coming from the projector, disconnect the power cord plug from the wall outlet. B Do not continue to use the projector in such cases, otherwise fire or electric shocks could result. B Check that no more smoke is coming out, and then contact an Authorized Service Center for repairs. B Do not attempt to repair the projector yourself, as this can be dangerous.
ENGLISH-7 Preparation B If the power cord is used while damaged, electric shocks, short-circuits or fire may result. B Ask an Authorized Service Center to carry out any repairs to the power cord that might be necessary. Do not handle the power cord plug with wet hands. B Failure to observe this may result in electric shocks. Insert the power cord plug securely into the wall outlet. B If the plug is not inserted correctly, electric shocks or overheating could result.
Do not look into the lens while the projector is being used. B Strong light is emitted from the projector’s lens. If you look directly into this light, it can hurt and damage your eyes. B Be especially careful not to let young children look into the lens. In addition, disconnect the power cord when you are away from the projector. Do not place your hands or other objects close to the air outlet port. B Heated air comes out of the air outlet port.
ENGLISH-9 Preparation Do not short-circuit, heat or disassemble the batteries or place them into water or fire. B Failure to observe this may cause the batteries to overheat, leak, explode or catch fire, and burns or other injury may result. When inserting the batteries, make sure the polarities (+ and -) are correct. B If the batteries are inserted incorrectly, they may explode or leak, and fire, injury or contamination of the battery compartment and surrounding area may result.
NOTICE: B This product has a High Intensity Discharge (HID) lamp that contains a small amount of mercury. It also contains lead in some components. Disposal of these materials may be regulated in your community due to environmental considerations. For disposal or recycling information please contact your local authorities, or the Electronics Industries Alliance: Accessories Check that all of the accessories shown below have been included with your projector.
Caution when moving the projector Be sure to attach the lens cover before moving the projector. The projection lens is extremely susceptible to vibration and shocks. When moving the projector, use the accessory carrying bag. When placing the projector inside the carrying bag, position it so that the lens is facing upward. Do not put anything else in the bag other than the projector and the cables. Cautions regarding setting-up Avoid setting up in places which are subject to vibration or shocks.
Notes on use In order to get the best picture quality Draw curtains or blinds over any windows and turn off any fluorescent lights near the screen to prevent outside light or light from indoor lamps from shining onto the screen. Do not touch the surfaces of the lens with your bare hands. If the surface of the lens becomes dirty from fingerprints or anything else, this will be magnified and projected onto the screen.
Projector # Preparation Location and function of each part $ % + ' & * ) ' ( # Projector control panel (page 16) $ Zoom ring (page 25) % Focus ring (page 25) & Security lock This can be used to connect a commercially-available theft-prevention cable (manufactured by Kensington). This security lock is compatible with the Microsaver Security System from Kensington. ' Leg adjuster buttons (L/R) (page 25) These buttons are used to unlock the front adjustable legs.
Projector $ %$ # ( ' & # Connector panel (page 15) $ Air outlet port Do not cover this port. % Speaker & Front adjustable legs (L/R) (page 25) ' Air inlet port, Air filter (page 52) Do not cover this port. ( Lamp unit holder (page 53) NOTE: B During projection of an image, the cooling fan will operate, emitting a small noise as it operates. Turning the lamp on or off will cause this noise to increase a little.
Preparation Connector panel $ % # & ' ) * ( # Power input socket (AC IN) (page 24) The accessory power cord is connected here. Do not use any power cord other than the accessory power cord. $ SERIAL connector (pages 21, 22 and 62) This connector is used to connect a personal computer to the projector in order to control the projector externally. (RS-232C compatible) % RGB IN connector (pages 21 and 22) This connector is used to input RGB signals and YPBPR signals.
Projector control panel Menu operation # $ % & ' ( * ) +, Remote control unit ' ) POWER ( INPUT VIDEO RGB * + AUTO SETUP MENU , ENTER . / FREEZE SHUTTER 0 STD VOLUME D.
ENGLISH-17 Preparation # RGB INPUT indicator This indicator illuminates when a signal is being input to the RGB IN connector. $ LAMP indicator (page 51) This indicator illuminates when it is time to replace the lamp unit. It flashes if a circuit abnormality is detected. % TEMP indicator (page 50) This indicator illuminates if an abnormally high temperature is detected inside the projector or around it.
(PT-LB10NTU only) Wireless card $ # # Connector This connector is for connecting the wireless card to the projector’s card slot. Be careful not to touch the connector. $ Wireless card access indicator Flashes while the projector is being accessed with personal computers by means of a wireless network. Inserting the wireless card (PT-LB10NTU only) Insert the wireless card before using the PT-LB10NTU. The card lock is already installed at the factory default setting.
Setting-up Projection methods BFront-desk projection BFront-ceiling projection Menu items Setting Menu items Setting FRONT/REAR FRONT FRONT/REAR FRONT DESK/CEILING DESK DESK/CEILING CEILING BRear-desk projection (Using a translucent screen) BRear-ceiling projection (Using a translucent screen) Menu items Setting Menu items Setting FRONT/REAR REAR FRONT/REAR REAR DESK/CEILING DESK DESK/CEILING CEILING NOTE: B You will need to purchase the separate ceiling bracket (ET-PKC80) when
Projector position SH Top edge of screen L: Projection distance SH: Image height SW:Image width H1: Distance from center of lens to bottom edge of projected image Screen H1 L 81.2 (3-3/16) Bottom edge of screen SW L Screen Projection distances Projection distance (L) 4:3 Screen PT-LB10NTU/PT-LB10U/ PT-LB10SU size (diagonal) Wide Telephoto (LW) (LT) 0.84 m(33˝) 1.02 m(40˝) 1.27 m(50˝) 1.52 m(60˝) 1.78 m(70˝) 2.03 m(80˝) 2.29 m(90˝) 2.54 m(100˝) 3.05 m(120˝) 3.81 m(150˝) 5.
Connections B Read the instruction manual for each peripheral device carefully before connecting it. B Turn off the power supply for all peripheral devices before making any connections. B If the cables necessary for connection are not included with the peripheral device or available as an option, you may need to prepare a proper cable for the device concerned. B If there is a lot of jitter in the video signal, the projected image may flicker.
Connecting to video equipment Computer for control use DIN 8-pin (male) D-sub15-pin (male) - BNCx5 (male) adapter cable Red (connect to PR signal connector) Blue (connect to PB signal connector) Green (connect to Y signal connector) DVD player (with component video connectors) Serial adapter (ET-ADSER : sold separately) BNC/RCA adapter DVD player Video deck NOTE: B If the signal cables are disconnected or if the power supply for the computer or video deck is turned off while “D.
Preparation for the remote control unit Insert the accessory lithium battery while making sure that the polarities are correct. # While pushing the battery holder tab to the right, pull out the battery holder. Back side Pull out $ Insert the battery into the battery holder so that the + side is facing upward. Match the “+” surface of the battery with the “+” marked side of the battery holder. % Insert the battery holder. NOTE: B Do not drop the remote control unit.
Turning on the power Before turning on the power 1, Ensure that all peripheral devices are connected properly. 2, Remove the lens cover. POWER $ INPUT VIDEO # Power cord RGB & AUTO SETUP MENU ENTER ) SHUTTER FREEZE STD VOLUME D.ZOOM * ( INDEX WINDOW Power indicator PROJECTOR Lens cover ' the accessory power cord to the AC IN # Connect socket. BThe power indicator on the projector will illuminate red. the POWER button. $ Press BThe power indicator on the projector will flash green.
Input select buttons Changing signals VIDEO RGB VIDEO S-VIDEO VIDEO RGB NETWORK RGB S-VIDEO NETWORK BA picture will be projected in accordance with the selected input signal. BWhen a YPBPR signal is being input, “YPBPR” will be displayed instead of “RGB”. B“NETWORK” is for PT-LB10NTU only. Follow the procedure below when you set the projector up first, and when you change the setup place.
Turning off the power Power indicator # POWER INPUT VIDEO AUTO SETUP RGB MENU ENTER FREEZE $ SHUTTER STD VOLUME D.ZOOM INDEX WINDOW PROJECTOR % Power cord the POWER button. # Press B“POWER OFF” is displayed on the screen. POWER OFF OK CANCEL the I or H button to select “OK”, and $ Press then press the ENTER button. BThe lamp unit will switch off and the picture will stop being projected. (The power indicator on the projector will illuminate orange while the cooling fan is still operating.
You can disconnect the power cord during projection or immediately after use and move the projector. The cooling fan will operate by the internal power supply to cool down the lamp. B When this function is used, it may take more time for the lamp to turn back on again compared to when the lamp cools down with the power cord connected. B Do not put the projector in a bag while the cooling fan is operating.
Correcting keystone distortion and automatic positioning (AUTO SETUP) This projector detects its degree of tilt and the input signal. Keystone distortion and the position of the image can then be corrected automatically in accordance with the input signal. POWER Press the AUTO SETUP button. (When the projected image has caused keystone distortion) INPUT VIDEO AUTO SETUP RGB MENU Screen ENTER SHUTTER FREEZE Projected image STD VOLUME D.
Turning off the picture and sound momentarily (SHUTTER) The “SHUTTER” function can be used to momentarily turn off the picture and sound from the projector when the projector is not being used for short periods of time, such as during breaks in meetings or when carrying out preparation. The projector uses less power in “SHUTTER” mode than it does in normal projection mode. POWER INPUT VIDEO RGB AUTO SETUP MENU Press the SHUTTER button. B The picture and sound will be turned off.
Enlarging the picture (D.ZOOM) POWER Press the D.ZOOM +/- button. INPUT VIDEO AUTO SETUP RGB MENU ENTER FREEZE SHUTTER STD D.ZOOM VOLUME INDEX WINDOW B The picture will then be enlarged to 1.5 times the normal size. [ PROJECTOR The remote control unit functions during D.ZOOM (digital zoom) Press the F,G,IandHbuttons to move the enlarged area which you want to project. Press the D.ZOOM +/- buttons to change the enlargement ratio. Press the MENU button to return to the normal screen.
Displaying two screens (INDEX WINDOW) This function lets you store a picture which is being projected into memory, so that you can display a still picture and a moving picture on the screen. Press the INDEX WINDOW button. B The aspect ratio of the screen changes and the image is vertically elongated in comparison to a normal image. B When “NETWORK” is selected, screen display will be switched between four window style and index style. (PT-LB10NTU only. Refer to the accessory CD-ROM for details.
On-screen menus Menu screens The various settings and adjustments for this projector can be carried out by selecting the operations from on-screen menus. The general arrangement of these menus is shown below. MAIN MENU MENU KEYSTONE PICTURE POSITION INDEX WINDOW SHUTTER VOLUME LANGUAGE OPTION1 OPTION2 SECURITY NETWORK SELECT ENTER PICTURE menu (page 37) When an RGB signal is being input or NETWORK is selected PICTURE PICTURE MODE DYNAMIC CONTRAST 32 BRIGHT 32 SHARPNESS 0 COLOR TEMP.
POSITION POSITION DOT CLOCK 32 CLOCK PHASE 16 ASPECT 4:3 RESIZING ON FRAME LOCK OFF STANDARD SELECT ENTER RETRN When an S-VIDEO/VIDEO signal is being input POSITION POSITION ASPECT 4:3 RESIZING ON STANDARD SELECT ENTER RETRN INDEX WINDOW function (page 31) SHUTTER function (page 29) VOLUME adjustment Press the ENTER button, and then press the I or H button to adjust the volume.
Menu operation guide POWER INPUT VIDEO AUTO SETUP RGB MENU ENTER SHUTTER FREEZE STD VOLUME D.ZOOM INDEX WINDOW PROJECTOR Menu operation (on connector panel) NOTE: B Press the MENU button to return to the previous screen. 34-ENGLISH # Press the MENU button. The “MAIN MENU” MENU will be displayed. KEYSTONE PICTURE POSITION INDEX WINDOW SHUTTER VOLUME LANGUAGE OPTION1 OPTION2 SECURITY NETWORK SELECT ENTER EXIT $ Press the F or G button to select an item.
& Press the F or G button to select an item, and then press the I or H button to change or adjust the setting. An individual adjustment screen such as the one shown below will be displayed for bar scale items. BRIGHT 32 The bar scale will turn green when any adjustment changes the setting from the factory set value. Unavailable on-screen menu items This projector has unadjustable items and unusable functions depending on the signal being input.
Correcting keystone distortion Keystone distortion is corrected automatically when the projector’s automatic setup function is used, but this correction will not apply if the screen itself is tilted. In such cases, you can correct the keystone distortion manually with the following procedure. Vertical keystone distortion correction only. KEYSTONE 0 Vertical keystone distortion correction Operation Press the H button. Press the I button.
Adjusting the picture When an RGB signal is being input or NETWORK is selected PICTURE PICTURE MODE DYNAMIC CONTRAST 32 BRIGHT 32 SHARPNESS 0 COLOR TEMP. STANDARD W-BAL R 32 W-BAL G 32 W-BAL B 32 AI ON SIGNAL MODE XGA STANDARD SELECT ADJ RETRN When NETWORK is selected, “WBAL R/G/B” settings will not be displayed. (PT-LB10NTU only) When an YPBPR signal is being input PICTURE PICTURE MODE STANDARD CONTRAST 32 BRIGHT 32 COLOR 32 TINT 32 SHARPNESS 6 COLOR TEMP.
CONTRAST This adjusts the contrast of the picture. (Adjust the “BRIGHT” setting first if required before adjusting the “CONTRAST” setting.) The picture is bright: I button The picture is dark: H button BRIGHT This adjusts the darker areas (black areas) in the picture. Black areas are too light: I button Dark areas are too solid: H button COLOR (S-VIDEO/VIDEO/YPBPR only) The color is too deep: I button The color is too pale: H button TINT (NTSC/NTSC 4.
TV-SYSTEM SIGNAL MODE (S-VIDEO/VIDEO only) TV-SYSTEM AUTO (RGB/YPBPR/NETWORK only) This displays the type of signal which is currently being projected. Refer to the list on page 60 for details on each type of signal. [ NTSC [ NTSC4.43 [ PAL [ PAL-N [ SECAM This should normally be set to “AUTO”. If the signal is of such poor quality that the correct format cannot be automatically distinguished, change the setting manually to the required TV system.
Adjusting the position When an RGB signal is being input, press the AUTO SETUP button first to initiate automatic positioning. If the optimum setting is not obtained when “AUTO SETUP” is carried out, adjust by the following procedure. Press the F or G button on the projector or remote control unit to select an item, and then press the I or H button to change the setting.
ASPECT (S-VIDEO/VIDEO/480i, 576i, 480p, and 576p YPBPR only) ASPECT AUTO [ S4:3 The size of the input signal is compressed to 75% and projected. (This is useful for projecting a picture with a 4:3 aspect ratio onto a 16:9 screen.) 4:3 [ 16:9 [ S4:3 When a 4:3 signal is being input. [ When using the 16:9 screen When a horizontally squeezed signal is being input. [ S1 video signals B S1 video signals are a type of video signal with an aspect ratio of 16:9 which include a detector signal.
NOTE: B If a selected mode does not match the aspect ratio of the input signal, it may affect the quality of viewing of the original picture. Keep this in mind when selecting the aspect ratio.
Changing the display language Press the F or G button on the projector or remote control unit to select a language, then press the ENTER button to accept the setting. LANGUAGE ENGLISH DEUTSCH FRANÇAIS ESPAÑOL ITALIANO SELECT ENTER ENGLISH Indicates the language which is currently set.
AUTO SEARCH RGB/YPBPR This should normally be set to “ON” ON When the power is turned on and “AUTO SETUP” is running, the projector detects which signals are being input and uses these signals for projection. (If a picture is being projected, the signal source is not automatically changed.) OFF Use this setting when you do not want the signal source to be changed automatically when the power is turned on and “AUTO SETUP” is running. RGB/YPB PR AUTO SIGNAL This should normally be set to “ON”.
Noise Reduction (NR) DESK/CEILING (S-VIDEO/VIDEO only) If noise occurs from the projector because of a poor input signal, set “NR” to “ON”. To turn off the “NR” feature, set it to “OFF”. DESK/CEILING (PT-LB10NTU/PT-LB10U/PTLB10SU only) Set to “ON” when “PICTURE MODE” is set to “BLACK-BD”. (Refer to page 37.) BACK COLOR BACK COLOR BLUE [ BLACK This sets the color which is projected onto the screen when no signal is being input to the projector.
LAMP RUNTIME CONTROL KEY This setting displays the usage time for the lamp unit which is currently being used. When replacing the lamp unit, follow the instructions on page 54, and reset “LAMP RUNTIME” to “0”. To disable the buttons on the projector, set “CONTROL KEY” to “OFF”. A confirmation screen will then be displayed. Select “OK” by using I or H button. To use the buttons on the projector, set to “ON” by using the remote control unit.
Setting up the security function This projector is equipped with a security function. A password input screen can be displayed, or a company URL can be set up and displayed at the bottom of the projected image. Press the F or G button on the projector or remote control unit to select “SECURITY”, then press the ENTER button. AMEND PASSWD EXIT Passwords can be changed. Press the ENTER button to display the “AMEND PASSWD” screen.
NOTE: B The entered password will appear as . It will not be displayed on the screen. B If you enter the wrong password, the letters “PASSWORD” and “NEW” will become red. Enter the correct password again. TEXT DISPLAY You can set text to be displayed at the bottom of the projected image at all times. ON “TEXT DISPLAY” is enabled. OFF “TEXT DISPLAY” is disabled. TEXT CHANGE The text which is displayed when “TEXT DISPLAY” is set to “ON” can be changed.
Network setup (PT-LB10NTU only) You need to make adjustments on some items when controlling the projector with a personal computer by means of the wireless network. Refer to the accessory CD-ROM for details. NETWORK NETWORK 1 NAME CHANGE LB10NT INPUT PASSWD OFF AMEND PASSWD WEB CONTROL ON DEFAULT SELECT ENTER RETRN INPUT PASSWD Set to “ON” if you want password confirmation to be used when controlling the projector with a personal computer by means of the wireless network.
When the TEMP indicator and the LAMP indicator are illuminated There are two indicators on the control panel of the projector which give information about the operating condition of the projector. These indicators illuminate or flash to warn you about problems that have occurred inside the projector, so if you notice that one of the indicators is on, turn off the power and check the table below for the cause of the problem.
LAMP indicator Indicator display Illuminated (red) It is nearly time to Problem replace the lamp unit. Flashing (red) An abnormality has been detected in the lamp circuit. B This occurs when B Wait for a while B Disconnect the the operation time until the lamp unit power cord by for the lamp unit is cools down before following the nearing 1 800 turning the power procedure on hours (when back on again. page 26, and then “LAMP POWER” contact an has been set to Authorized Remedy “HIGH”).
Cleaning and replacing the air filter If the air filter becomes clogged with dust, the internal temperature of the projector will rise, the TEMP indicator will illuminate and the projector’s power will turn off (the TEMP indicator will flash after the power is turned off). The air filter should be cleaned every 100 hours of use. Cleaning Replacement procedure Use a vacuum cleaner to clean off any accumulated dust. # Turn off the power and disconnect the power cord.
Replacing the lamp unit The lamp unit should only be replaced by a qualified technician. When replacing the lamp, allow it to cool for at least one hour before handling it. B The lamp cover gets very hot, and contact with it can cause burns. Notes on replacing the lamp unit B The light generating lamp is made of glass, so dropping it or allowing it to hit hard objects may cause it to burst. Be careful when handling the lamp.
On-screen display LAMP indicator Displayed for 30 seconds. Pressing any More than 1 800 hours button will clear the display. More than 2 000 hours Illuminates red during image projection and standby mode. Remains displayed until any button is pressed. Lamp unit replacement procedure NOTE: B If the lamp usage time has passed 2 000 hours (when “LAMP POWER” has been set to “HIGH” and when “AI” has been set to “OFF”), the projector will switch to standby mode after approximately 10 minutes of operation.
NOTE: B Be sure to install the lamp unit and the lamp unit cover securely. If they are not securely installed, it may cause the protection circuit to operate so that the power cannot be turned on. ( Connect the power cord. ) Press the POWER button so that a picture is projected onto the screen.
Before calling for service Before calling for service, check the following points. Problem Possible cause Power does not B The power cord may not be connected. turn on. B The main power supply is not being supplied to the wall outlet. B TEMP indicator is illuminated or flashing. B LAMP indicator is illuminated or flashing. B The lamp unit cover has not been securely installed. No picture B The video signal input source may not be appears. connected properly. B The input selection setting may not be correct.
Problem Possible cause Page The picture does B The signal format (“TV-SYSTEM”) may not be set 39 not display correctly. correctly. – B There may be a problem with the video tape or other signal source. B A signal which is not compatible with the projector 60 may be being input. Picture from B The cable may be too long. – computer does B The external video output for the laptop computer – not appear. may not be set correctly.
Specifications Power supply: Power consumption: 100 V - 240 V ~, 50 Hz/60 Hz 220 W [During standby (when fan is stopped): Approx. 6 W] 2.5 A - 1.0 A Amps: LCD panel: Panel size (diagonal): 0.7 type (17.78 mm) Aspect ratio: 4:3 Micro lens array: Available Display method: 3 transparent LCD panels (RGB) Drive method: Active matrix method Pixels: PT-LB10NTU/PT-LB10U/PT-LB10VU: 786 432 (1 024 x 768) x 3 panels PT-LB10SU: 480 000 (800 x 600) x 3 panels Lens: Manual zoom (1 - 1.
VD: VIDEO IN: S-VIDEO IN: AUDIO IN: SERIAL: Cabinet: Dimensions: Width: Height: Length: Weight: PT-LB10NTU: PT-LB10U/PT-LB10VU/PT-LB10SU: Operating environment: Temperature: Humidity: Certifications: Power supply: Operating range: Weight: Dimensions: Width: Length: Height: Ceiling bracket Wireless remote control unit Serial adapter (DIN 8-pin/D-sub 9-pin) Wireless card 0.7 V [p-p], 75 Ω 1.
Appendix List of compatible signals Mode Scanning Picture Resizing*3 Display Dot clock frequency quality*2 resolution frequency LB10NTU Format LB10NTU H V (dots)*1 (MHz) LB10U LB10SU LB10U LB10SU (kHz) (Hz) LB10VU LB10VU NTSC/NTSC4.
Pin assignments # Pin No. # $ % & $ % & S-VIDEO IN Appearance - ( Signal Earth (Luminance signal) Earth (Color signal) Luminance signal Color signal Pin No. # $ % . / 0 1 1 , # ' RGB IN/RGB OUT Appearance Signal R/PR G/G·SYNC/Y B/PB SDA HD/SYNC VD SCL Pin & and + are spare. Pins '-*, , and - are for earth. Pins . and 1 functions are only valid when supported by the computer.
Using the SERIAL connector The serial connector which is on the connector panel of the projector conforms to the RS-232C interface specification, so that the projector can be controlled by a personal computer which is connected to this connector. Connection Communications settings Computer SERIAL(female) DIN 8-pin (male) Serial adapter (ET-ADSER : sold separately) You must use only RS-232C Serial Interface Cable with ferrite core, type ET-ADSER.
Control commands The commands which the personal computer can use to control the projector are shown in the following table. Command Control Contents PON Power ON POF Power OFF AVL Volume IIS Q$S Remarks In standby mode, all commands other than the PON command are ignored. B The PON command is ignored during lamp ON control.
Dimensions 81.2(3-3/16) 297(11-11/16) 73(2-27/32) 7(-1/4) 41.8(1-5/8) 210(8-1/4) 196(7-11/16) Trademark acknowledgements B VGA and XGA are trademarks of International Business Machines Corporation. B Macintosh is a registered trademark of Apple Computer, Inc. B S-VGA is a registered trademark of the Video Electronics Standards Association. All other trademarks are the property of the various trademark owners. These Operating Instructions are printed on recycled paper.
NOTES IMPORTANTES CONCERNANT LA SECURITE AVERTISSEMENT: POUR REDUIRE LES RISQUES DE FEU OU DE CHOC ÉLECTRIQUE, NE PAS EXPOSER CE PRODUIT À L’EAU OU À L’HUMIDITÉ Alimentation: Ce projecteur LCD est conçu pour fonctionner sur secteur de 100 V - 240 V, 50 Hz/60 Hz seulement. ATTENTION: Le cordon d’alimentation secteur fourni avec le projecteur peut être utilisé uniquement pour une alimentation électrique de 125 V, 7 A maximum.
AVERTISSEMENT: B Ne peut être utilisé dans une salle d’ordinateurs telle que définie dans la norme ANSI/NFPA 75 Standard for Protection of Electronic Computer/Data Processing Equipment. B Pour l’équipement branché en permanence, un dispositif de disconnexion d’accès facile doit être incorporé dans le câble d’installation du bâtiment; B Pour l’équipement branchable, une prise secteur d’accès facile doit être installée près de l’équipement.
FRANÇAIS-67 Others B Pour toute inspection, réglage ou réparation, s’adresser à un centre technique agréé. Nettoyer la fiche du cordon d’alimentation régulièrement afin d’éviter toute accumulation de poussière. B Si de la poussière s’accumule sur la fiche du cordon d’alimentation, l’humidité peut endommager l’isolant et entraîner un incendie. Débrancher la fiche du cordon d’alimentation de la prise de courant et l’essuyer avec un tissu sec.
Garder les piles hors de portée des enfants. B Si les piles sont ingérées, il y aura risque de décès par étouffement. En cas d’ingestion des piles, consulter immédiatement un médecin. Veiller à ce que les bornes + et - des piles n’entrent pas en contact avec des objets métalliques tels que colliers ou épingles à cheveux. B Sinon, les piles risquent de fuir, de surchauffer, d’exploser ou de prendre feu. B Ranger les piles dans un sac en plastique, et ne pas les ranger à proximité d’objets métalliques.
FRANÇAIS-69 Others B Ne pas installer le projecteur dans des endroits étroits, mal ventilés tels que des placards ou des étagères. B Ne pas placer le projecteur sur des tissus ou du papier, ces matériaux peuvent être aspirés dans l’orifice d’entrée d’air. Ne pas installer le projecteur dans des endroits humides ou poussiéreux ou dans des endroits où le projecteur peut entrer en contact avec de la fumée ou la vapeur.
B Ce projecteur continue de consommer environ 6 W de courant, même lorsque l’alimentation électrique est coupée. Débrancher la fiche du cordon d’alimentation de la prise de courant comme mesure de sécurité avant d’effectuer tout nettoyage. B Sinon cela peut causer des chocs électriques. Ne pas installer la carte sans fil fournie dans un dispositif autre que la fente de carte du projecteur (PT-LB10NTU seulement). B Le dispositif risquera d’être endommagé.
Notes sur l’utilisation Afin d’obtenir la meilleure qualité d’image Fermer les rideaux ou les volets de toutes les fenêtres et éteindre les lampes fluorescentes situées à proximité de l’écran afin que la lumière extérieure ou la lumière des lampes intérieures n’éclaire pas l’écran. Ne pas toucher aux surfaces de l’objectif avec les mains nues. Si la surface de l’objectif est salie par des empreintes digitales ou autre, ceci sera agrandi et projeté sur l’écran.
Remplacement du bloc de lampe AVERTISSEMENT Le bloc de lampe ne devrait être remplacé que par un technicien qualifié. Lors du remplacement de la lampe, la laisser refroidir pendant au moins une heure avant de la manipuler. B Le couvercle de la lampe devient très chaud, et on risque de se brûler si on le touche. Notes sur le remplacement du bloc de lampe B La lampe produisant la lumière est en verre; il ne faut donc pas la laisser tomber ou la cogner contre des objets rigides, car elle risquerait d’éclater.
Affichage à l’écran Plus de 1 800 heures Plus de 2 000 heures Indicateur LAMP Affiché pendant 30 secondes. L’affichage disparaît si l’on appuie sur S’allume en rouge n’importe quelle touche. pendant que l’image est projetée et en mode Reste affiché jusqu’à ce d’attente. qu’une touche quelconque soit pressée. Méthode de remplacement du bloc de lampe REMARQUE: B Si la durée d’utilisation de la lampe a dépassée 2 000 heures (lorsque “PUIS.
' Installer le couvercle du bloc de lampe, puis utiliser un tournevis Phillips pour resserrer fermement les vis de fixation du couvercle du bloc de lampe. + Appuyer sur la touche ENTER pour faire apparaître le menu “OPTION2”, puis appuyer sur la touche F ou G pour sélectionner “DURÉE LAMPE”. REMARQUE: B S’assurer de bien installer le bloc de lampe et le couvercle du bloc de lampe. S’ils ne sont pas bien installés, cela peut déclencher le circuit de protection et le projecteur ne pourra pas être allumé.
R Proyector LCD Para uso comercial Instrucciones de funcionamiento PT-LB10NTU PT-LB10U PT-LB10VU PT-LB10SU POWER ESPAÑOL Modelo INPUT VIDEO AUTO SETUP RGB MENU ENTER SHUTTER FREEZE STD VOLUME D.ZOOM INDEX WINDOW PROJECTOR Antes de usar este producto, lea cuidadosamente las instrucciones y guárdelas en un lugar seguro para futuras consultas.
Estimado cliente de Panasonic: Este manual de instrucciones le brinda toda la información necesaria para usar su proyector. Esperamos que pueda obtener el máximo rendimiento de este nuevo producto y que esté muy conforme con su proyector LCD de Panasonic. El número de serie de su producto se puede encontrar en la parte de abajo del mismo. Anótelo en el espacio brindado a continuación y conserve este folleto en caso de que necesite servicio.
No quite ADVERTENCIA: Este equipo ha sido probado y se encuentra que cumple con los límites para un dispositivo digital Clase B, que cumple con la Parte 15 de las reglas FCC. Estos límites fueron establecidos para proveerle protección razonable contra las interferencias dañinas en una instalación residencial. Este equipo genera, usa y puede irradiar energía de radiofrecuencia y, si no se instala y usa de acuerdo con las instrucciones, puede provocar interferencias dañinas a las comunicaciones de radio.
ADVERTENCIA: B Este producto es para ser usado en un cuarto de ordenadores tal como se define en el estándar para Protección de equipos de procesamiento de datos/ordenadores, ANSI/NFPA 75. B Para equipos conectados continuamente, se debe de agregar un dispositivo de desconexión accesible en el cableado de instalación de la construcción; B Para equipos enchufables, el tomacorriente de la pared debe estar instalado cerca del equipo y debe ser fácilmente accesible.
Preparativos Conecte la alimentación ...........24 Desconexión de la alimentación ...26 Ajuste de la imagen...................37 MODO IMAGEN, CONTRASTE, BRILLO, COLOR, TINTE, DEFINICION, TEMP. COLOR, Balance del blanco R/G/B, AI, SISTEMA TV, IMAGEN FIJA, MODO SEÑAL, Proyectando imágenes sRGB compatibles Ajuste de la posición.................40 POSICION, RELOJ, FASE RELOJ, ASPECTO, REDIMENSION, BLOQU. CUADRO Cambio del idioma de exhibición...43 Ajuste de las opciones..............43 MENU EN PAN., BUSQU.
Precauciones respecto a la seguridad ADVERTENCIA Si nota la presencia de humo, olores extraños o ruidos que salen desde el proyector, desenchufe el cable de alimentación del tomacorriente de la pared. B No continúe usando el proyector en tales casos, de lo contrario podrían producirse choques eléctricos o un incendio. B Verifique que no salga más humo, y luego contacte a un Centro de servicio autorizado para la reparación. B No intente reparar el proyector usted mismo, ya que esto puede ser peligroso.
ESPAÑOL-7 Preparativos B No dañe el cable de alimentación, no le realice ninguna modificación, no lo coloque cerca de objetos calientes, no lo doble excesivamente, no lo tuerza, no tire de él, no coloque objetos pesados sobre él ni lo enrolle. B Si se usa el cable de alimentación dañado, pueden producirse choques eléctricos, cortocircuitos o un incendio. B Pida a un Centro de servicio autorizado que realice cualquier reparación necesaria del cable de alimentación.
No use el proyector en un baño o ducha. B Podría ocasionar un incendio o sufrir golpes eléctricos. No mire hacia la lente mientras se usa el proyector. B La lente del proyector emite luz fuerte. Si mira directamente hacia esta luz, ésta puede herir sus ojos. B Tenga mucho cuidado de que los niños no miren directamente la lente. Además, cuando deje sin cuidado el proyector desenchufe el cable de alimentación del tomacorriente de la pared.
ESPAÑOL-9 Preparativos B Si no observa esto podría ocasionar que el proyector se desequilibre y caiga, lo cual podría ocasionar daños o heridas. No cortocircuite, caliente o desarme las pilas ni las coloque en agua o fuego. B Si no observa esto podría causar que las pilas se sobrecalienten, tengan pérdidas, exploten o se incendien, lo cual podría ocasionar quemaduras u otras heridas. Cuando inserte las pilas, asegúrese que la polaridad (+ y -) es correcta.
Accesorios Verifique que todos los accesorios mostrados a continuación hayan sido incluidos con su proyector. Mando a distancia (TNQE239 x1) POWER Pila de litio para el mando a distancia (CR2025 x 1) Cable de señal RGB [1,8 m (5´10˝), K1HA15DA0002 x1] INPUT VIDEO AUTO SETUP RGB MENU ENTER FREEZE SHUTTER STD VOLUME Cable de alimentación Bolsa de transporte para Europa continental (TPEP013 x 1) (K2CG3DR00005 x 1) D.
Precaución al mover el proyector Asegúrese de colocar la cubierta de la lente antes de mover el proyector. La lente de proyección es extremadamente susceptible a las vibraciones y golpes. Cuando mueva el proyector, use la bolsa de transporte accesoria. Cuando coloque el proyector dentro de la bolsa de transporte, debe colocarlo de manera que la lente quede mirando hacia arriba. No ponga ninguna otra cosa en la bolsa que no sea el proyector y los cables.
Notas sobre el uso A fin de obtener la mejor calidad de imagen Cierre las cortinas o persianas de cualquier ventana y apague cualquier luz fluorescente que esté cerca a la pantalla para evitar que la luz del exterior o la luz de luces interiores se refleje en la pantalla. No toque la lente con sus manos descubiertas. Si la lente se ensucia con huellas de los dedos o con cualquier otra cosa, esto será ampliado y proyectado en la pantalla.
Preparativos Ubicación y función de cada parte Proyector # $ % + ' & * ) ' ( # Panel de control del proyector (página 16) $ Anillo de zoom (página 25) % Anillo de enfoque (página 25) & Bloqueo de seguridad Se puede usar para conectar un cable antirrobo comercialmente disponible (fabricado por Kensington). Este bloqueo de seguridad es compatible con el sistema de seguridad Microsaver de Kensington. ' Botones del ajustador de patas (Izq./Der.
Proyector $ %$ # ( ' & # Panel de conectores (página 15) $ Puerto de salida de aire No cubra esta puerto. % Altavoz & Patas ajustables delanteras (Izq./Der.) (página 25) ' Puerto de entrada de aire, Filtro de aire (página 52) No cubra esta puerto. ( Situación de la lámpara (página 53) NOTA: B Durante la proyección de una imagen, el ventilador de enfriamiento funcionará, emitiendo un pequeño ruido. Al apagar o encender la lámpara este ruido aumentará un poco.
Preparativos Panel de conectores $ % # & ' ) * ( # Enchufe de entrada de alimentación (AC IN) (página 24) El cable de alimentación accesorio se conecta aquí. No use ningún otro cable de alimentación que no sea el cable de alimentación accesorio. $ Conector SERIAL (páginas 21, 22 y 62) Este conector se usa para conectar un ordenador personal al proyector de manera de controlar externamente el proyector.
Panel de control del proyector Funcionamiento del menú # $ % & ' ( * ) +, Mando a distancia ' ) POWER ( INPUT VIDEO RGB * + AUTO SETUP MENU , ENTER . / FREEZE SHUTTER 0 STD VOLUME D.ZOOM INDEX WINDOW 1 PROJECTOR 2 # Indicador RGB INPUT Este indicador se ilumina cuando una señal está ingresando en el conector RGB IN.
ESPAÑOL-17 Preparativos $ Indicador LAMP (página 51) Este indicador se ilumina cuando es tiempo de reemplazar la lámpara. Destella si se detecta algo anormal en los circuitos. % Indicador TEMP (página 50) Este indicador se ilumina si se detecta una temperatura anormalmente alta dentro del proyector o alrededor de él. Si la temperatura sube encima de cierto nivel, la fuente de alimentación se apagará automáticamente y el indicador destellará.
(Sólo PT-LB10NTU) Tarjeta inalámbrica $ # # Conector Este conector es para conectar la tarjeta inalámbrica a la ranura de la tarjeta del proyector. Tenga cuidado de no tocar el conector. $ Indicador de acceso de tarjeta inalámbrica Destella mientras se accede al proyector con ordenadores mediante una red inalámbrica. Insertando la tarjeta inalámbrica (Sólo PT-LB10NTU) Inserte la tarjeta inalámbrica antes de usar el PT-LB10NTU.
Configuración Métodos de proyección BProyección frontal desde la mesa BProyección frontal desde el techo Items del menú Ajuste Items del menú Ajuste INSTALACION FRONTAL INSTALACION FRONTAL MESA/TECHO MESA MESA/TECHO TECHO BRetroproyección desde la mesa (Usando una pantalla translúcida) BRetroproyección desde el techo (Usando una pantalla translúcida) Items del menú Ajuste Items del menú Ajuste INSTALACION RETRO INSTALACION RETRO MESA/TECHO MESA MESA/TECHO TECHO NOTA: B Debe comp
Posición del proyector Borde superior de la pantalla SH L: Pantalla H1 L 81,2 (3-3/16) Borde inferior de la pantalla Distancia de proyección SH: Altura de la imagen SW:Ancho de la imagen H1: Distancia desde el centro de la lente hasta el borde inferior de la imagen proyectada SW L Pantalla Distancias de proyección Distancia de proyección (L) 4:3 PT-LB10NTU/PT-LB10U/ PT-LB10VU Tamaño de PT-LB10SU la pantalla (diagonal) Amplitud Telefoto Amplitud Telefoto (LW) (LT) (LW) (LT) 0,84
Conexiones B Lea cuidadosamente el manual de instrucciones para cada dispositivo periférico antes de conectarlo. B Apague el suministro de alimentación para todos los dispositivos periféricos antes de realizar cualquier conexión. B Si los cables necesarios para la conexión no estuvieran incluidos con el dispositivo periférico o disponible como una opción, deberá preparar un cable adecuado para el dispositivo correspondiente.
Conexión al equipo de vídeo Ordenador para control DIN 8 clavijas (macho) Cable del adaptador D-sub de 15 clavijas - BNCx5 (macho) Rojo (conectar al conector de señal PR) Azul (conectar al conector de señal PB) Verde (conectar al conector de señal Y) Reproductor de DVD (con conectores de video componente) Adaptador serial (ET-ADSER:en venta por separado) Adaptador BNC/RCA Reproductor de DVD Videograbador NOTA: B Si los cables de señales están desconectados o si la fuente de alimentación del ordenado
Preparación del mando a distancia Empuje la lengüeta Tire $ Inserte la pila en el soporte de la pila de manera que el lado + quede mirando hacia arriba. Haga coincidir la superficie “+” de la pila con el lado marcado “+” del soporte de la pila. % Inserte el soporte de la pila. NOTA: B No deje caer el mando a distancia. B Mantenga el mando a distancia lejos de líquidos. B Quite la pila si no va a usar el mando a distancia por un largo periodo de tiempo. B Use solamente pilas CR2025 como pilas de reemplazo.
Conecte la alimentación Antes de conectar la alimentación 1. Asegúrese que todos los dispositivos periféricos estén conectados correctamente. 2. Retire la cubierta de la lente. POWER # Cable de alimentación $ INPUT RGB VIDEO & AUTO SETUP MENU ENTER ) SHUTTER FREEZE STD VOLUME D.ZOOM * ( INDEX WINDOW Indicador de alimentación PROJECTOR Cubierta de la lente ' el cable de alimentación accesorio al # Conecte enchufe AC IN. BEl indicador de alimentación en el proyector se iluminará de rojo.
Botones de selección de entrada Señales cambiantes VIDEO RGB VIDEO S-VIDEO VIDEO RGB NETWORK RGB S-VIDEO NETWORK B Se proyectará una imagen de acuerdo con la señal de entrada seleccionada. B Cuando ingresa una señal YPBPR, se exhibirá “YPBPR” en vez de “RGB”. B “NETWORK” es sólo para PT-LB10NTU. Siga el procedimiento a continuación cuando ajuste el proyector por primera vez, y cuando cambie el lugar de instalación.
Desconexión de la alimentación Indicador de alimentación # POWER INPUT VIDEO AUTO SETUP RGB MENU ENTER FREEZE $ SHUTTER STD VOLUME D.ZOOM INDEX WINDOW PROJECTOR de % Cable alimentación el botón POWER. # Presione BAparecerá la indicación “DESCONECTA DESCONECTA LA ALIMENTACIÓN SÍ NO LA ALIMENTACIÓN” en la pantalla. el botón I o H para seleccionar “SÍ”, $ Presione y luego presione el botón ENTER. BLa lámpara se apagará y la imagen dejará de ser proyectada.
Puede desconectar el cable de alimentación durante la proyección o inmediatamente después de usar y mover el proyector. El ventilador de enfriamiento funcionará mediante la fuente de alimentación interna para enfriar la lámpara. B Cuando use esta función, podría tomar más tiempo para que la lámpara se vuelva a encender comparado con cuando la lámpara se enfría con el cable de alimentación conectado. B No ponga el proyector dentro de un bolso mientras el ventilador de enfriamiento está funcionando.
Corrección de la distorsión trapezoidal y el posicionamiento automático (AUTO SETUP) Este proyector detecta el grado de inclinación y la señal de entrada. La distorsión trapezoidal y la posición de la imagen se pueden corregir automáticamente de acuerdo con la señal de entrada. POWER INPUT VIDEO RGB AUTO SETUP Presione el botón AUTO SETUP. (Cuando la imagen proyectada haya causado una distorsión trapezoidal) MENU Pantalla ENTER Imagen proyectada SHUTTER FREEZE STD VOLUME D.
Apagando la imagen y el sonido momentáneamente (SHUTTER) La función “SHUTTER” se puede usar para apagar momentáneamente la imagen y el sonido del proyector cuando no se usa el proyector durante períodos de tiempo cortos, como durante descansos en reuniones o al realizar preparativos antes de la proyección. El proyector consume menos corriente en el modo “SHUTTER” que en el modo de proyección normal. POWER INPUT VIDEO RGB AUTO SETUP MENU Presione el botón SHUTTER. B Se apaga la imagen y el sonido.
Ampliando la imagen (D.ZOOM) POWER Presione el botón D.ZOOM +/-. INPUT RGB VIDEO AUTO SETUP MENU ENTER FREEZE SHUTTER STD D.ZOOM VOLUME INDEX WINDOW B La imagen va a ser ampliada a 1,5 veces el tamaño normal. [ PROJECTOR El mando a distancia funciona mientras se usa la función D. ZOOM (zoom digital) Presione los botones F,G,I y H para mover el área ampliada que desea proyectar. Presione los botones D.ZOOM +/- para cambiar el grado de ampliación.
Mostrando dos pantallas (INDEX WINDOW) Esta función le permite guardar en la memoria una imagen que está siendo proyectada, y luego exhibir una instantánea y una imagen en movimiento en la pantalla. AUTO SETUP Presione el botón INDEX WINDOW. B La relación de aspecto de la pantalla cambia y la imagen se alarga verticalmente en comparación con una imagen normal. MENU ENTER FREEZE Imagen en Instantánea movimiento SHUTTER STD VOLUME D.
Menús en pantalla Pantallas de menú Los diferentes ajustes y la configuración de este proyector se puede realizar seleccionando las funciones en los menús en pantalla. La organización general de estos menús se muestra a continuación. MENU PRINCIPAL MENÚ TRAPECIO IMAGEN POSICION INDICE OBTURACION VOLUMEN IDIOMA OPCIONES1 OPCIONES2 SEGURIDAD RED SEL. ENTR Menú IMAGEN (página 37) Cuando ingresa una señal RGB o se ha seleccionado NETWORK IMAGEN MODO IMAGEN DINAMICA CONTRASTE 32 BRILLO 32 DEFINICION 0 TEMP.
POSICION POSICION RELOJ 32 FASE RELOJ 16 ASPECTO 4:3 REDIMENSION SÍ BLOQU.CUADRO NO REINICIALIZA SEL. ENTR ESC Cuando ingresa una señal S-VIDEO/VIDEO POSICION POSICION ASPECTO 4:3 REDIMENSION SÍ REINICIALIZA SEL. ENTR ESC Función INDICE (página 31) Función OBTURACION (página 29) Ajuste de VOLUMEN Presione el botón ENTER, y luego presione el botón I o H para ajustar el volumen. Menú IDIOMA (página 43) IDIOMA ENGLISH DEUTSCH FRANÇAIS ESPAÑOL ITALIANO SEL.
Guía de funcionamiento de menú POWER INPUT VIDEO AUTO SETUP RGB MENU ENTER SHUTTER FREEZE STD VOLUME D.ZOOM INDEX WINDOW # Presione el botón MENU. Se exhibirá el MENÚ “MENU TRAPECIO PRINCIPAL”. IMAGEN POSICION INDICE OBTURACION VOLUMEN IDIOMA OPCIONES1 OPCIONES2 SEGURIDAD RED SEL. ENTR SALIR $ Presione el botón F o G para seleccionar un ítem. MENÚ El ítem T R A P E C I O Funcionamiento del menú seleccionado se I M A G E N (en el panel de conectores) exhibirá en azul.
& Presione el botón F o G para seleccionar un ítem, y luego presione el botón I o H para cambiar o ajustar el ajuste. Se exhibirá una pantalla de ajuste individual tal como la que se muestra a continuación para los ítems escalables. BRILLO 32 La escala de barras se vuelve verde cuando se cambia un ajuste del valor de ajuste de fábrica. Ítems del menú en la pantalla no disponibles Este proyector tiene ítems no ajustables y funciones que no se pueden usar dependiendo de la señal que ingresa.
Corrección de la distorsión trapezoidal La distorsión trapezoidal se corrige automáticamente cuando se usa la función de configuración automática del proyector, pero esta corrección no funcionará apropiadamente si la pantalla misma está inclinada. En tales casos, puede corregir la distorsión trapezoidal manualmente usando el siguiente procedimiento. Sólo corrección de distorsión trapezoidal vertical. TRAPECIO 0 Corrección de distorsión trapezoidal vertical Funcionamiento Presione el botón H.
Ajuste de la imagen Cuando ingresa una señal RGB o se ha seleccionado NETWORK IMAGEN MODO IMAGEN DINAMICA CONTRASTE 32 BRILLO 32 DEFINICION 0 TEMP.COLOR ESTÁNDAR BAL ROJO 32 BAL VERDE 32 BAL AZUL 32 AI SÍ MODO SEÑAL XGA REINICIALIZA SEL. AJUST ESC Cuando se ha seleccionado NETWORK, no se exhibirán los ajustes “BAL ROJO/VERDE/AZUL”. (Sólo PT-LB10NTU) Cuando ingresa una señal YPBPR IMAGEN MODO IMAGEN ESTÁNDAR CONTRASTE 32 BRILLO 32 COLOR 32 TINTE 32 DEFINICION 6 TEMP.
CONTRASTE TEMP. COLOR Sirve para ajustar el contraste de la imagen. (Ajuste el “BRILLO” primero si es necesario antes de ajustar el “CONTRASTE”.) La imagen es brillante: botón I La imagen es oscura: botón H TEMP.COLOR BRILLO Sirve para ajustar las áreas más oscuras (áreas negras) de la imagen.
SISTEMA TV MODO SEÑAL (Sólo S-VIDEO/VIDEO) SISTEMA TV AUTO (Sólo RGB/YPBPR/NETWORK) Esto exhibe el tipo de señal que actualmente está siendo proyectada. Consulte la lista en la página 60 para obtener detalles sobre cada tipo de señal. [ NTSC [ NTSC4.43 [ PAL [ PAL-M [ PAL-N Proyectando imágenes sRGB compatibles Normalmente se debe ajustar a “AUTO”.
Ajuste de la posición Cuando ingresa una señal RGB, presione primero el botón AUTO SETUP para iniciar el posicionamiento automático. Si no logra el ajuste ideal cuando realiza “AUTO SETUP”, ajuste de acuerdo con el siguiente procedimiento. Presione el botón F o G para seleccionar un ítem, y luego presione el botón I o H para cambiar el ajuste. Para ítems con escala de barras, presione el botón ENTER o el botón I o H para exhibir la pantalla de ajuste, y luego presione el botón I o H para realizar el ajuste.
ASPECTO (Sólo S-VIDEO/VIDEO/ 480i, 576i, 480p y 576p YPBPR) ASPECTO AUTO [ 4:3 S4:3 El tamaño de la señal de entrada se comprime al 75% y se proyecta. (Esto es útil para proyectar una imagen con una relación de aspecto 4:3 en una pantalla 16:9.) [ 16:9 [ S4:3 Cuando ingresa una señal 4:3. [ Al usar la pantalla 16:9 Cuando ingresa una señal comprimida horizontalmente.
NOTA: B Si un modo seleccionado no coincide con la relación de aspecto de la señal de entrada, esto puede afectar a la calidad de visualización de la imagen original. Tenga en mente esto cuando seleccione la relación de aspecto.
Cambio del idioma de exhibición Presione el botón F o G del proyector o del mando a distancia para seleccionar un idioma, luego presione el botón ENTER para aceptar el ajuste. IDIOMA ENGLISH DEUTSCH FRANÇAIS ESPAÑOL ITALIANO SEL. ESPAÑOL ENTR Indica el idioma actualmente ajustado. ESC Ajuste de las opciones OPCIONES1 MENU EN PAN. SÍ BUSQU.ENTR. SÍ SEÑAL AUTO SÍ TRAPECIO SÍ AUTO RGB/YPB PR VGA60/480p 480p MODO SXGA SXGA NR NO PIZARRA NO SEL. AJUST ESC MENU EN PAN.
BUSQU.ENTR. RGB/YPBPR Normalmente se debe ajustar a “SÍ” SÍ Cuando está conectada la alimentación y “AUTO SETUP” está funcionando, el proyector detectará que señales están ingresando, y usa las misma señales para la proyección. (Si se está proyectando una imagen, la fuente de señales no se cambia automáticamente.) NO Cuando está conectada la alimentación y “AUTO SETUP” está funcionando, use este ajuste cuando no desea que la fuente de señal cambie automáticamente.
(Sólo S-VIDEO/VIDEO) Si hay ruido del proyector a raíz de una señal de entrada débil, ajuste “NR” a “SÍ”. Para cancelar la función de “NR”, ajústela a “NO”. PIZARRA (Sólo PT-LB10NTU/PT-LB10U/ PT-LB10SU) Ajuste a “SÍ” cuando “MODO IMAGEN” ha sido ajustado a “PIZARRA”. (Consulte la página 37.) Este ajuste se debe cambiar de acuerdo con el método de configuración del proyector. (Consulte la página 19.) MESA Cuando se coloca el proyector sobre un escritorio o similar.
TIEMPO LAMP TECLA CTRL Este ajuste muestra el tiempo de uso de la lámpara que está siendo usada actualmente. Cuando se cambia la lámpara, siga las instrucciones en la página 54, y reponga “TIEMPO LAMP” a “0”. Para que los botones del proyector no funcionen, ajuste “TECLA CTRL” a “NO”. Se exhibirá una pantalla de confirmación. Seleccione “SÍ” usando el botón I o H. Para usar los botones en el proyector, ajuste a “SÍ” usando el mando a distancia.
Ajustando la función de seguridad Este proyector está equipado con una función de seguridad. Se puede exhibir una pantalla de contraseña, o se puede ajustar la URL de una compañía y se puede exhibir en la parte de debajo de la imagen proyectada. Presione el botón F o G en el proyector o mando a distancia para seleccionar “SEGURIDAD”, luego presione el botón ENTER. MENÚ TRAPECIO IMAGEN POSICION INDICE OBTURACION VOLUMEN IDIOMA OPCIONES1 OPCIONES2 SEGURIDAD RED SEL. ENTR ENT.
NOTA: B La contraseña introducida aparecerá como . No se exhibirá en la pantalla. B Si introduce mal la contraseña, las palabras “CONTRASEÑA” y “NUEVO” se mostrarán rojas. Introduzca nuevamente la contraseña correcta. TEXTO FUERA Puede ajustar el texto a exhibirse en todo momento en la parte de debajo de las imágenes proyectadas. SÍ “TEXTO FUERA” está activado. NO “TEXTO FUERA” está desactivado. CAMB. TEXTO Se puede cambiar el texto que se exhibe cuando “TEXTO FUERA” se encuentra en “SÍ”.
Instalación de red (Sólo PT-LB10NTU) Deberá ajustar algunos ítems al controlar el proyector con un ordenador mediante la red inalámbrica. Para más detalles consulte el CD-ROM accesorio. RED Seleccione el ajuste de red que desea usar. CAMB. NOMBRE Se puede ajustar el nombre del proyector. ENT.CONTRSÑ Ajuste a “SÍ” si desea usar una confirmación mediante contraseña cuando controle el proyector con un ordenador personal mediante una red inalámbrica. CAMB.CONTRSÑ Se puede cambiar la contraseña.
Cuando el indicador TEMP y el indicador LAMP están iluminados Hay dos indicadores en el panel de control del proyector que nos dan información acerca de las condiciones de funcionamiento del proyector. Estos indicadores se iluminan o destellan para advertirle acerca de problemas que hayan ocurrido dentro del proyector, de manera que si observa que uno de los indicadores está activado, desconecte la alimentación y verifique el cuadro mostrado a continuación para averiguar la causa del problema.
Indicador LAMP Exhibición del indicador Iluminado (rojo) Destellando (rojo) B Aparece “CAMBIO B La alimentación B Puede haber algo LAMP” en la puede haber sido anormal en el Causa pantalla después conectada justo circuito de la posible de encender el después de haber lámpara. proyector? sido desconectada.
Limpieza y reemplazo del filtro de aire Si el filtro de aire se tapa con polvo, la temperatura interna del proyector subirá, el indicador TEMP se iluminará y se desconectará la alimentación del proyector (el indicador TEMP destellará después que se desconecta la alimentación). El filtro de aire debe ser limpiado cada 100 horas de uso. Limpieza Procedimiento de cambio Use una aspiradora de polvo para limpiar el polvo acumulado. # Apague la alimentación y desconecte el cable de alimentación.
Reemplazo de la lámpara La lámpara debería ser reemplazada solamente por un técnico calificado. Al cambiar la lámpara, deje que se enfríe al menos durante una hora antes de manipularla. B La cubierta de la lámpara se calienta mucho, y el contacto con ella le puede quemar. Observaciones sobre el reemplazo de la lámpara B La lámpara generadora de luz está hecha de vidrio, por lo tanto golpearla o permitir que golpee objetos duros puede hacer que explote. Tenga cuidado al manipular la lámpara.
Exhibición en la pantalla Indicador LAMP Más de 1 800 horas Más de 2 000 horas Se exhibe durante 30 segundos. Presionando Se ilumina de rojo cualquier botón se mientras se proyecta borrará la exhibición. una imagen y en el Permanecerá modo de espera. exhibiéndose hasta presionar cualquier botón. Procedimiento de reemplazo de la lámpara NOTA: B Si el tiempo de uso de la lámpara es mayor a 2 000 horas (cuando “ALIM.
NOTA: B Asegúrese de instalar la lámpara y la cubierta de la lámpara firmemente. Si no son instaladas firmemente, esto puede causar la activación del circuito de protección de manera que no se pueda conectar la alimentación. ( Conecte el cable de alimentación. ) Presione el botón POWER de manera que una imagen sea proyectada en la pantalla.
Antes de solicitar servicio Antes de solicitar servicio, verifique los siguientes puntos. Problema Posible causa No se conecta B El cable de alimentación puede no estar la alimentación. conectado. B El suministro principal de alimentación no llega al tomacorriente de la pared. B El indicador TEMP está iluminado o destellando. B El indicador LAMP está iluminado o destellando. B La cubierta de la lámpara no ha sido instalada firmemente.
Limpieza y mantenimiento Antes de realizar cualquier limpieza o mantenimiento, asegúrese de desenchufar el cable de alimentación del tomacorriente de la pared. Limpie el gabinete con un paño suave y seco. Si el exterior está particularmente sucio, empape el paño con agua con una pequeña cantidad de detergente neutral, escurra el paño muy bien, y luego limpie el exterior. Después de la limpieza, seque el exterior con un paño seco.
Especificaciones Fuente de alimentación: Consumo de corriente: 100 V - 240 V ~, 50 Hz/60 Hz 220 W [en el modo de espera (cuando está detenido el ventilador): Aprox.
ESPAÑOL-59 Otros Durante la entrada/salida RGB: R.G.B.: 0,7 V [p-p], 75 Ω G.
Apéndice Lista de señales compatibles Modo Resolución Frecuencia Frecuencia Calidad de Cambio de de barrido del reloj de la imagen*2 tamaño*3 de la Formato LB10NTU exhibición H puntos LB10NTU V LB10U LB10SU LB10U LB10SU (puntos)*1 (kHz) (Hz) (MHz) LB10VU LB10VU NTSC/NTSC4.
Asignación de clavijas # $ % & S-VIDEO IN Aspecto exterior No. de clavija # $ % & Señal Tierra (Señal de luminosidad) Tierra (Señal de color) Señal de luminosidad Señal de color No. de clavija Señal # R/PR $ G/G·SYNC/Y ( , % B/PB . SDA # ' / HD/SYNC 0 VD RGB IN/RGB OUT Aspecto exterior 1 SCL Las clavijas & y + están libres. Las clavijas ' - *, , y - son para la tierra. Las funciones de las clavijas . y 1 son válidas solamente cuando están soportadas por el ordenador.
Uso del conector SERIAL El conector SERIAL que se encuentra en el panel de conectores del proyector está de acuerdo con la especificación de interfaz RS-232C, por lo tanto se puede controlar el proyector mediante un ordenador personal conectado a este conector. Conexión Ajuste de comunicaciones SERIAL (hembra) Ordenador DIN 8 clavijas (macho) Adaptador serial (ET-ADSER:en venta por separado) Sólo deberá usar el cable de interfaz serial RS-232C con núcleo de ferrita, tipo ET-ADSER.
Comandos de Control La siguiente tabla muestra los comandos que el ordenador personal puede usar para controlar el proyector. Comando PON POF AVL IIS Q$S Contenido de control Observaciones En el modo de espera, se ignoran todos los comandos excepto el comando PON. Alimentación ON B El comando PON se ignora durante el control ON de la lámpara.
Dimensiones 81.2(3-3/16) 297(11-11/16) 73(2-27/32) 7(-1/4) 41.8(1-5/8) 210(8-1/4) 196(7-11/16) Reconocimiento de marcas registradas B VGA y XGA son marcas registradas de la International Business Machines Corporation. B Macintosh es una marca registrada de Apple Computer Inc. B S-VGA es una marca registrada de Video Electronics Standards Association. Todas las otras marcas registradas son propiedad de sus respectivos dueños.
Otros ESPAÑOL-65
R Professional/Industrial Video Panasonic Broadcast & Television Systems Company Division of Matsushita Electric Corporation of America One Panasonic Way 4E-7 Secaucus, NJ 07094 (201) 392-4443 3330 Cahuenga Blvd West Los Angels, CA 90068 (323) 436-3500 Technical Support: (800) 524-1448 (800) 526-6610 FAX: (201) 392-6514 E-Mail: pbtssupport@panasonic.com Printed in Japan S0304-0A C 2004 Matsushita Electric Industrial Co., Ltd. All Rights Reserved.