
High Speed Color Scanner Operating Instructions
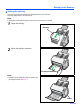

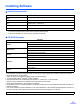
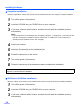
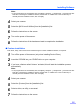
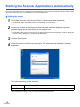
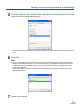
Table Of Contents
- Table of Contents
- Notice
- For Your Safety
- Component Identification
- Setting up the Scanner
- Installing Software
- Starting the Scanner Applications Automatically
- Document Specifications
- Loading Documents
- Clearing Paper Jams
- Mixed Batch Card Guide
- Cleaning the Unit
- Replacing Consumables
- Removing the Stand
- Repacking Instructions
- Specifications
- Troubleshooting
- Index

Installing Software
16
Application installation
RTIV and/or QuickScan Pro Demo can be installed as follows.
1
Insert the CD-ROM into your CD/DVD drive on your computer.
2
If you have a feature called ’Autorun’ activated, this will start the installation process
automatically.
Note:
• If the program does not automatically start, click [Start], click [Run...], click [Browse...], and select the CD/
DVD drive containing the installation software, double-click on “CDRun.exe” in the root directory to
manually start the installation routine, then click [OK].
3
Select your scanner.
4
Select the [RTIV] or the [Quick Scan Pro Demo] from the [Installation] list.
5
Follow the instructions on the screen.
Viewing manuals from the Drivers&Utilities CD-ROM
All manuals on the CD-ROM can be viewed using the Adobe Reader.
1
Insert the CD-ROM into your CD/DVD drive on your computer.
2
If you have a feature called ’Autorun’ activated, this will start the installation process
automatically.
Note:
• If the program does not automatically start, click [Start], click [Run...], click [Browse...], and select the CD/
DVD drive containing the installation software, double-click on “CDRun.exe” in the root directory to
manually start the installation routine, then click [OK].
3
Select your scanner.
4
Select a manual from the list.