
Owner's Manual

-
12
-
EN EN
EN EN
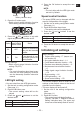
• After all the LED lamps have turned off,
the control panel will flash and change
to configuration mode.
See the illustration
13
NOTE:
• Tools ship from the factory set to “F”
mode (torque control function off).
• The control panel will turn off if the tool
is not operated for a period of 5 min
-
utes.
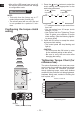
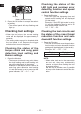
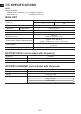
Configuring the torque clutch
setting
EYFA31
A
B
C D
(1)
(2)
Display
Battery indication lamp
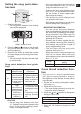
1. Press the and buttons to select the
clutch setting that is appropriate for the
work being performed.
3…28
1F30 229
As the button
is pressed
As the button
is pressed
• “F” indicates that the torque control func-
tion is off.
• You can select from 30 torque clutch
settings (1 to 30).
• Use figures from the Tightening Torque
Chart to guide your selection of torque
clutch setting. (See the following tighten-
ing torque chart)
2. Press the OK button to accept the select
-
ed torque clutch setting.
• The control panel will stop flashing and
light up.
CAUTION:
• You must press the OK button in order
for the selected setting to take effect.
• Be sure to verify the new value after
changing the setting.
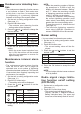
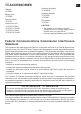
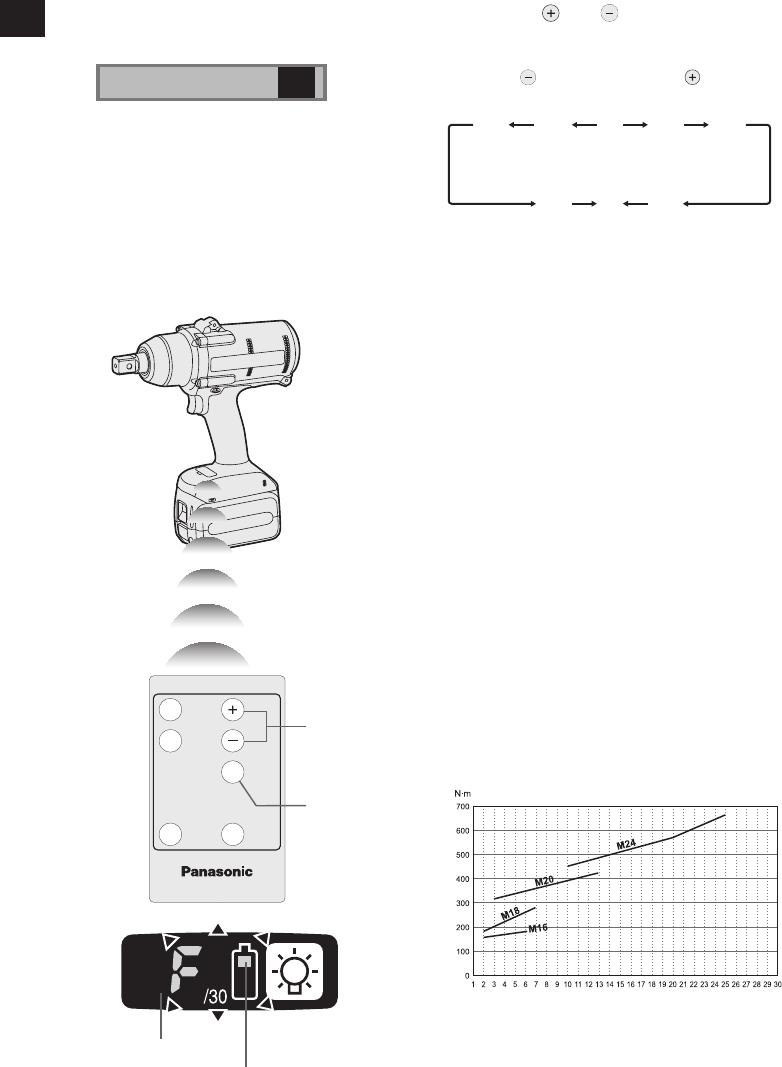
Tightening Torque Chart (for
reference use)
The values illustrated on this chart were mea-
sured under the conditions described below
and are provided for reference purposes.
Actual tightening torque varies with ambient
conditions (the particular bolt being tightened,
hardware being used, method of holding the
bolt in place, etc.).
Torque setting level
Tightening torque
EYFPA1J, EYFPA1JR