
Operating instructions


Table Of Contents
- PB013084 - ES-SL33_(01)GB_英文说明书_05-17-16
- PB013084 - ES-SL33_(02)D_德文说明书_05-16-16
- PB013084 - ES-SL33_(03)F_法语说明书_05-16-16
- PB013084 - ES-SL33_(04)I_意大利语说明书_05-16-16
- PB013084 - ES-SL33_(05)NL_荷兰语说明书_05-16-16
- PB013084 - ES-SL33_(06)E_西班牙语说明书_05-16-16
- PB013084 - ES-SL33_(07)DK_丹麦语说明书_05-17-16
- PB013084 - ES-SL33_(08)P_葡萄牙语说明书_05-17-16
- PB013084 - ES-SL33_(09)N_挪威语说明书_05-16-16
- PB013084 - ES-SL33_(10)S_瑞典语说明书_05-17-16
- PB013084 - ES-SL33_(11)FIN_芬兰语说明书_05-17-16
- PB013084 - ES-SL33_(12)PL_波兰语说明书_05-17-16
- PB013084 - ES-SL33_(13)CZ_捷克语说明书_05-17-16
- PB013084 - ES-SL33_(14)SK_斯洛伐克说明书_05-17-16
- PB013084 - ES-SL33_(15)H_匈牙利语说明书_05-17-16
- PB013084 - ES-SL33_(16)RO_罗马尼亚语说明书_05-17-16
- PB013084 - ES-SL33_(17)TR_土耳其语说明书_05-17-16
13
GBDFINLEDKPNSFINPLCZSKHROTR
While charging
Charging in progress
The charge status lamp (
) stays on in
red.
Charging complete
The charge status lamp (
) remains on
in red after charging is completed.
Notes
If there is crackling noise on radios or other devices while
charging, charge the shaver using a different household
outlet.
When the appliance is not used for 6 months or more, the
battery will weaken (leak battery uid, etc.). Fully charge the
battery once every 6 months.
Recommended ambient temperature for charging is 0
-
35
°C. Battery performance may decrease outside of the
recommended temperature.
When charging the shaver for the rst time or when it has
not been in use for more than 6 months, the lamp on the
main body may not glow for a few minutes, or the operating
time may shorten. Please charge it for more than 18 hours
in such cases.
You can charge the battery before it is completely discharged.
However, it is recommended to charge when the battery is
completely discharged. The battery life depends strongly on
factors such as how it is used and stored.
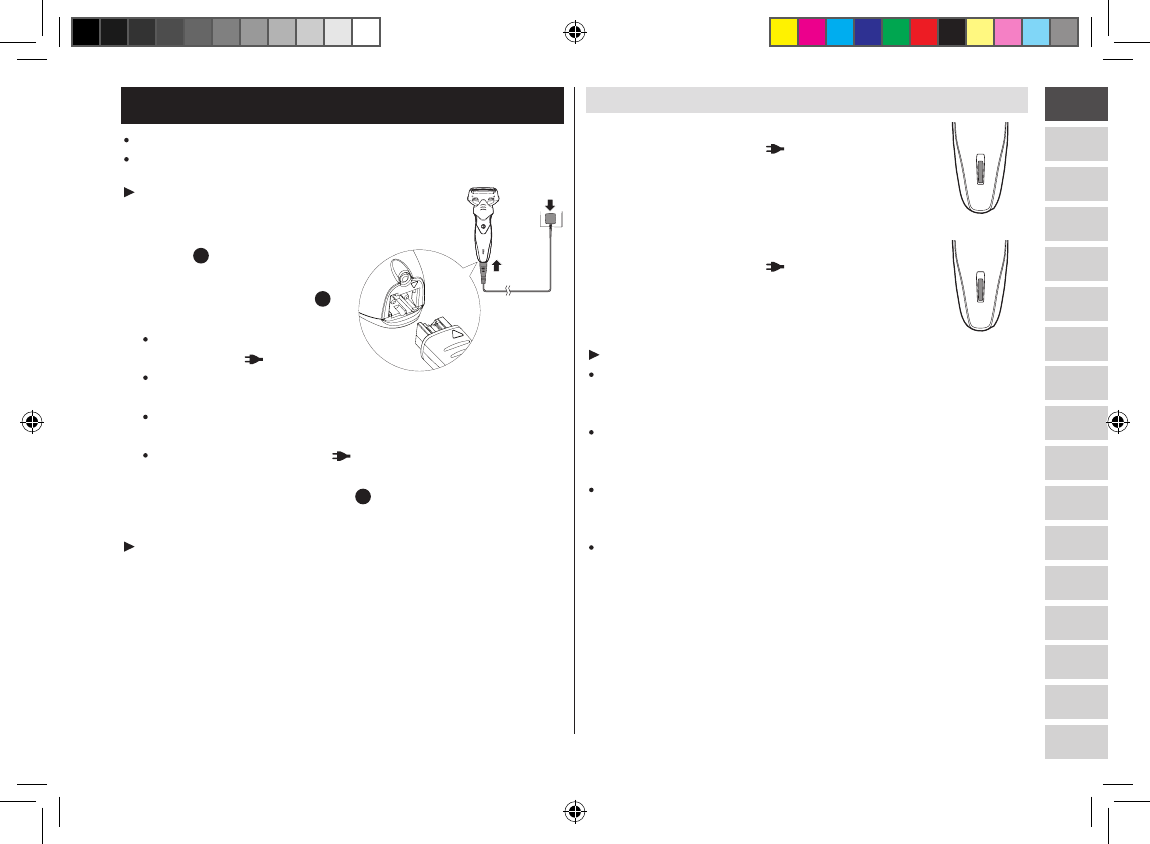
Charging the shaver
Turn the shaver off before inserting.
Wipe off any water droplets on the appliance socket.
Charging with the Appliance
plug
1. Insert the appliance
plug [
C
] into the
shaver.
2. Plug in the adaptor [
C
]
into a household outlet.
Make sure that the charge
status lamp ( ) is on in red.
The charging time in
approx. 10 hours.
2
1
Charging the battery for more than 10 hour will not affect
battery performance.
The charge status lamp ( ) glows and stays on until the
plug is disconnected from a household outlet.
3. Disconnect the adaptor [
C
] after charging is
completed.
Note
You cannot operate the shaver while charging.
PB013084 - ES-SL33_(01)GB_�����_05-13-16.indd 13 2016/5/17 9:01:08