
Digital Imaging Systems DP-8060 / 8045 / 8035 Operating Instructions


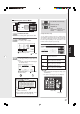


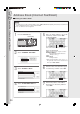
Table Of Contents
- Table of Contents
- Product Overview
- Copying
- Printing
- Network Scanning
- Facsimile / Internet Fax/Email
- Problem Solving
- Troubleshooting
- User (U) / Error Codes
- Removing Misfed Paper
- Locations/User Error Codes (J Codes)
- System Console (Option) (A)
- Paper Entry Area (B)
- Paper Transport Area (C)
- Paper Exit/Fuser Area (D)
- Automatic Duplex Unit (ADU) (E)
- Reverse Area (F)
- 3000-Sheet Tray (LCT) (Option) (G)
- 2-Bin Finisher (Option) (H) (DA-FS600/605)
- 2-Bin Finisher (Option) (H) (DA-FS330)
- 1-Bin Saddle-Stitch Finisher (Option) (H)
- 2-Bin Saddle-Stitch Finisher only (Option) (I)
- 1-Bin Saddle-Stitch Finisher (Option) (I/F)
- i-ADF (J)
- Replacing Consumables
- Appendix
- Specifications
- DP-8060/8045/8035 (Copier)
- i-ADF (Standard)
- Printer Unit
- System Console 1 (DA-DS603)
- System Console 2 (DA-DS604)
- For G3 Facsimile (Option) [DA-FG600]
- For Internet Fax (Email) [Standard]
- 3000-Sheet Tray (LCT) (DA-MA301)
- Letter-R/Legal Size Adaptor for 3000-Sheet Tray (LCT) (DA-TK31)
- 2-Bin Finisher (DA-FS600)
- 2-Bin Saddle-Stitch Finisher (DA-FS605)
- Punch Unit (DA-SP31) [for DA-FS600/605]
- 2-Bin Finisher (DA-FS330) (1/2)
- 2-Bin Finisher (DA-FS330) (2/2)
- 1-Bin Saddle-Stitch Finisher (DA-FS355A)
- Punch Unit (DA-SP41) [for DA-FS355A]
- Option and Supplies
- Multi-Tasking Job Table
- FCC Notice
- Index
- Glossary
- Specifications
Network Scanning
26
3
4
Network Scanner
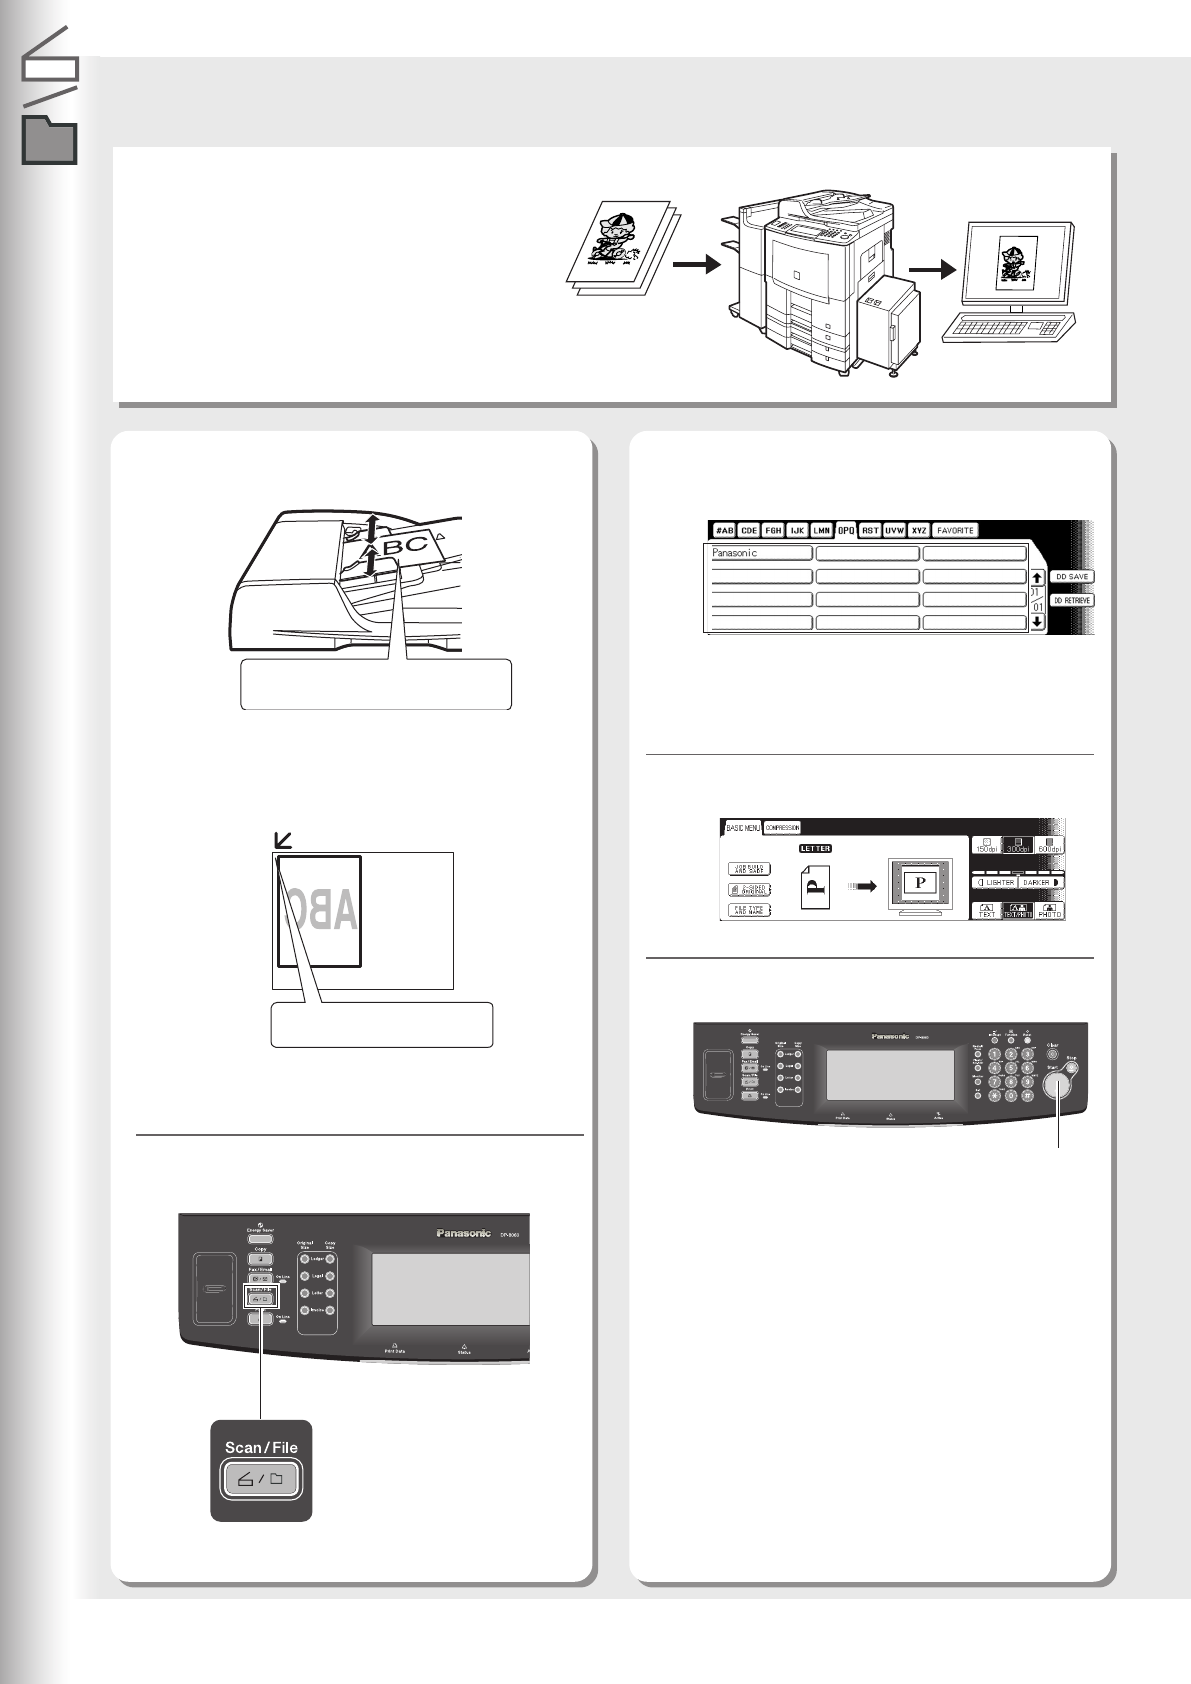
Scanning the Document to Your PC
Scanned data will be directly transferred to your
PC. By using the optional installed software
(Panasonic Document Management System), you
can view or edit the scanned data on your PC.
● If the Panasonic Communications Utility software
is not started on your PC, a destination is not shown
on the Touch Panel Display.
1
2
Place Original(s) on the ADF or Platen
Glass.
Press the Scan/File key.
● When scanning from the ADF, read the Notice
for ADF. (See page 21)
● When scanning from the Platen Glass, read the
Notice for Platen. (See page 21)
Select the destination (PC) for the
scanned data.
Press the Start key.
5
The scanned data will be transferred to the PC,
then the scanner reception notice appears on
the PC's monitor.
● For more details, refer to the operating
instructions (for Quick Image Navigator) on the
provided CD-ROM.
Select the Scanner mode setting.
*70 Sheets : Invoice/Legal/Ledger
Start Key
Face Up
Up to 85 sheets* (20 lb/Letter)
Face Down
Align with top left corner