
Digital Imaging Systems DP-8060 / 8045 / 8035 Operating Instructions

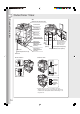
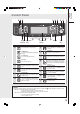
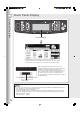
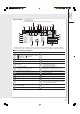
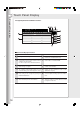
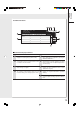
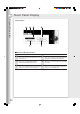
Table Of Contents
- Table of Contents
- Product Overview
- Copying
- Printing
- Network Scanning
- Facsimile / Internet Fax/Email
- Problem Solving
- Troubleshooting
- User (U) / Error Codes
- Removing Misfed Paper
- Locations/User Error Codes (J Codes)
- System Console (Option) (A)
- Paper Entry Area (B)
- Paper Transport Area (C)
- Paper Exit/Fuser Area (D)
- Automatic Duplex Unit (ADU) (E)
- Reverse Area (F)
- 3000-Sheet Tray (LCT) (Option) (G)
- 2-Bin Finisher (Option) (H) (DA-FS600/605)
- 2-Bin Finisher (Option) (H) (DA-FS330)
- 1-Bin Saddle-Stitch Finisher (Option) (H)
- 2-Bin Saddle-Stitch Finisher only (Option) (I)
- 1-Bin Saddle-Stitch Finisher (Option) (I/F)
- i-ADF (J)
- Replacing Consumables
- Appendix
- Specifications
- DP-8060/8045/8035 (Copier)
- i-ADF (Standard)
- Printer Unit
- System Console 1 (DA-DS603)
- System Console 2 (DA-DS604)
- For G3 Facsimile (Option) [DA-FG600]
- For Internet Fax (Email) [Standard]
- 3000-Sheet Tray (LCT) (DA-MA301)
- Letter-R/Legal Size Adaptor for 3000-Sheet Tray (LCT) (DA-TK31)
- 2-Bin Finisher (DA-FS600)
- 2-Bin Saddle-Stitch Finisher (DA-FS605)
- Punch Unit (DA-SP31) [for DA-FS600/605]
- 2-Bin Finisher (DA-FS330) (1/2)
- 2-Bin Finisher (DA-FS330) (2/2)
- 1-Bin Saddle-Stitch Finisher (DA-FS355A)
- Punch Unit (DA-SP41) [for DA-FS355A]
- Option and Supplies
- Multi-Tasking Job Table
- FCC Notice
- Index
- Glossary
- Specifications
Product Overview
16
Touch Panel Display
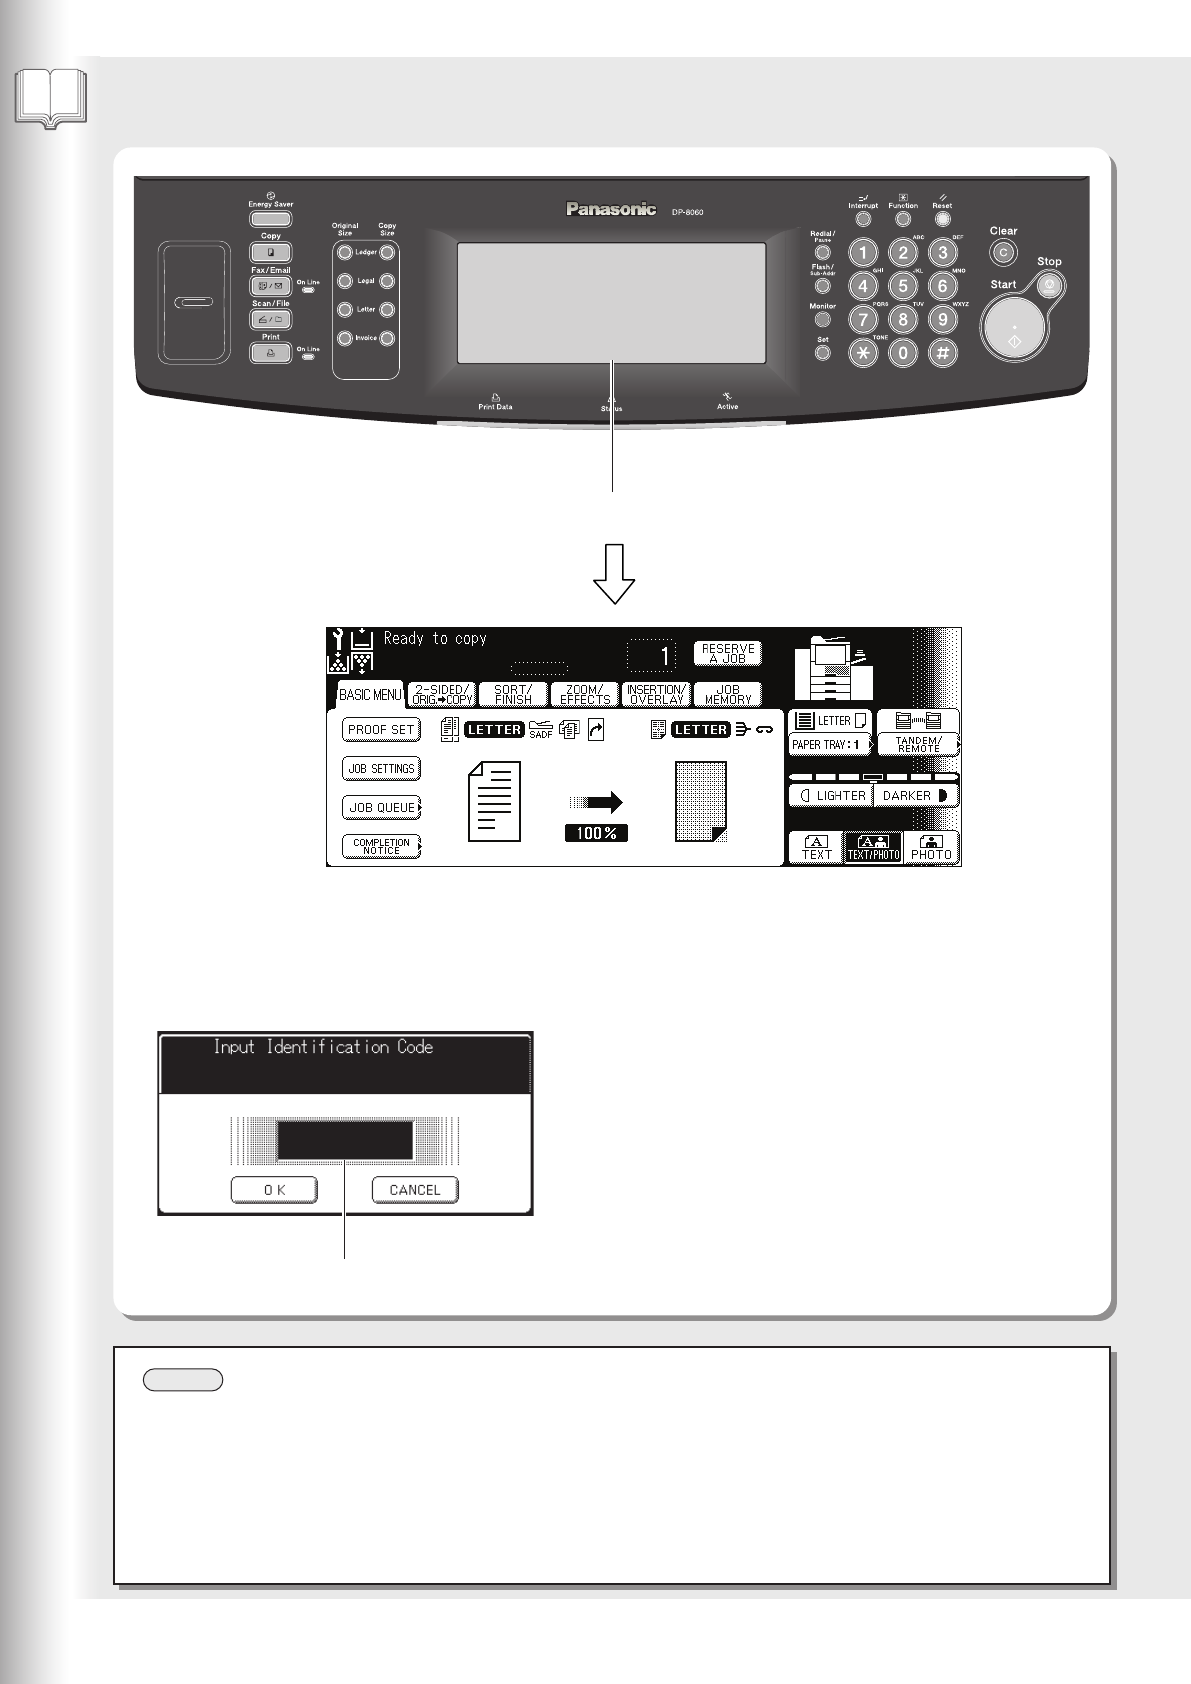
When the Department Counter function is set up, the
departmental Identification Code input screen is displayed on
the Touch Panel Display. A registered departmental
Identification Code (Max 8-digits) is required to gain access to
each secured function, or the secured Copy/Fax/Scanner
function(s) cannot be used. Please consult with the Key
Operator regarding the departmental Identification Code(s) for
the desired function.
● Use only gentle finger pressure to activate the Touch Panel Display. DO NOT USE SHARP OBJECTS such as
pens, fingernails etc., as this may damage the panel.
● Touch Panel Display Brightness Adjustment:
To adjust the brightness of the Touch Panel display, press and while holding down the "C" (Clear) key, keep
pressing the "Original Size/Ledger" or the "Copy Size/Ledger" keys until the desired brightness is achieved.
Original Size/Ledger : Dimmer
Copy Size/Ledger : Brighter
NOTE
Touch Panel Display
● The above image shows everything is lit at the same time. This is for
illustration purposes only, the machine will never have all icons, lit, or flashing
at the same time. Refer to pages 17 to 20 for details of each function's image.
Input an Identification Code
with the Keypad.