
User's Manual Part 2


150
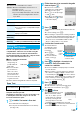
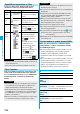
Camera
1
m
LifeKit
Text reader
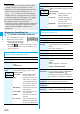
Saved data
Up to 22 half-pitch characters are
displayed for each stored data.
p
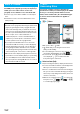
Select a data item to show the
Scanned Text Result display.
p
Press
l
( ) to compose i-mode mail to send to
the characters in the item set as a mail address. (See
step 3 on page 172)
Information
p
Hold the FOMA phone securely with your hands during
scanning so that you can scan characters correctly.
p
Characters you can scan are alphabet letters (uppercase
and lowercase), numerals, and symbols (#, &, (, ), -, ., /, :,
@, [, ], _,
~
, ?, =, %, and +). You cannot scan kanji and
hiragana characters. You might not be able to scan those
correctly depending on the surroundings such as lighting.
p
You cannot scan handwritten characters correctly.
p
You might not be able to scan the following:
Characters received by a FAX/Copied characters/Designed
characters/Characters having no certain space between
characters/Characters difficult to identify from the
background.
Display the Saved Data List
Text Reader List
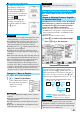
Function Menu of the Scanning Text Display/
Scanned Text Confirmation Display
Function menu
Operation/Explanation
Store
See page 149.
Edit
You can edit and store the scanned character
string.
Edit the text.
Recognition
mode
You can set this mode according to the type
of the character string you want to scan.
Select an item.
Auto setting
. . . Automatically recognizes
the type of characters.
URL
. . . . . . . . . . Select this when you scan
a URL. “http://” or “https://”
is automatically entered to
the head of the character
string when it is stored.
Mail address
. . . Select this when you scan
a mail address.
Phone number
. . . Select this when you scan
a phone number.
Number
. . . . . . . Select this when you scan
numerals.
Free character
. . . Select this when you scan
alphabetic characters that
are not especially specified.
At Text Reader
start-up
Auto setting
NEGA/POSI
mode
You can set this mode to fit to the printing
conditions of the character string you want to
scan.
Select an item.
Auto setting
. . .Automatically recognizes
printing conditions.
Positive fix
. . . . . Select this when deep color
characters are printed over
faint color ground.
Negative fix
. . . .Select this when faint color
characters are printed over
deep color ground.
Function Menu of the Scanned Text Result
Display/Text Reader List
Function menu
Operation/Explanation
At Text Reader
start-up
Auto setting
Function menu
Operation/Explanation
Edit
Edit the text.
Internet
See page 147.
Compose
message
You can compose i-mode mail to send to the
scanned mail address as a destination
address.
Go to step 3 on page 172.
Dialing
See page 148.
Store mail add.
See page 87.
Store phone No.
See page 87.
Add bookmark
You can bookmark the URL you have
scanned.
OK
p
Select “Page title” to edit the title.
Select a destination folder.
Search
phonebook
You can search for Phonebook entries using
the scanned phone number or mail address.
Select a search method
Bo
The Phonebook List that corresponds to the
phone number or mail address is displayed.
Display detail/
Display list
You can switch between the Scanned Text
Result display and Text Reader List.
Delete
(Delete this)
Delete this
YES
Delete
(Delete all)
Delete all
Enter your Terminal Security Code
YES