
User's Manual


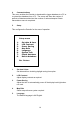
Table Of Contents
- Permalog®
- Patroller
- Scope
- Introduction
- Safety warning
- Battery installation
- Checking Battery voltage
- Connections and interfaces to the Patroller
- Operating the Patroller
- On-Screen Menus
- Specifications
- Fuse information
- Conditions of Use of Permalog® System
- Permalog 1 Deployment Instructions
- Redeployment
- Permalog 2 Deployment Instructions
- Redeployment
- Warranty
- Patents
12
The screen then shows the grid reference of the selected logger by
default. You may either use this grid reference or enter a different one.
Press Ent to search for the closest loggers. The display then shows a list
of loggers within 1000 m of this point. The list of loggers shows serial
number, distance from the reference point (in metres), noise level and
time/date last received. From this list of loggers, the up and down arrows
can be used to move a highlight bar. Press ENT to view logger details and
history for the highlighted logger. (This feature will only work if the correct
grid reference has been entered for each logger). Press Esc to return to
this list.
6. Patrol Setup
Press 6 to go to the Patrol Setup screen. Use the left/right arrows to
change the sounder options, allowing sound for both leak and no-leak,
leak only, or neither (sound disabled). Press Ent to return.
7. Clear Display
This option removes the highlighted logger and those below it from the
display (but not from the database) in order to keep only the most recent
acquisitions.
8. Restore display
Undoes the effect of Clear Display and restores all loggers to the display.
9. Print Results
Sends the Leak Patrol results to a connected printer. There are 4 options
to limit the number of loggers printed.
a. Display only – prints only those loggers in the display list.
b. Today – prints only results received today.
c. Date Range – prints only results received between the two dates
specified.
d. All Loggers – prints results from all loggers in the database.
0. Reset Logger Entry
When a leak has been repaired and the logger switches back to no-leak
mode (this happens automatically), it stops transmitting its serial number
information. This option is used to inform the Patroller that a particular
logger is no longer indicating leak mode. Press ESC to return to the main
menu.
NOTE: When no external power supply is connected, returning to the main
menu will switch off the radio receiver to conserve battery power.