
User guide


YOUR MICROSOFT OFFICE TOOLS
EXCEL MOBILE
183
10
CHAPTER
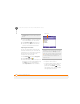
2 Press Menu (right action key)
and select Edit > Fill.
3 Select the Direction list, and then
select the direction you want to
populate.
4 Select the Fill type list, and then
select Series.
5 Select the Series type list, and then
select the type of series you want. If
you select Date or Number, enter a
Step value increment.
6 Select OK.
Adding cells, rows, and columns
1 Open the workbook you want to add to.
2 Highlight the area where you want to
insert elements.
3 Press Menu (right action key)
and select Insert > Cells.
4 Select how you want to insert the
elements:
Shift cells right: Inserts a new cell. The
highlighted cell and all cells on its right
move one column to the right.
Shift cells down: Inserts a new cell.
The highlighted cell and all cells below it
move down one row.
Entire row: Inserts a new row. The
entire row in which the highlighted cell
is located and all rows below it move
down one row.
Entire column: Inserts a new column.
The entire column in which the
highlighted cell is located and all
columns to its right move one column
to the right.
5 Select OK.
TIP
Select Autofill as the series type to
quickly fill cells with repetitive data such as
numbers or repeated text. Autofill takes the
content of the first cell in the highlighted row
or column and copies it down or across the
rest of the selection.
TIP
To add a new worksheet, press Menu and
select Format > Modify Sheets. Select
Insert, enter a name for the worksheet, and
then press OK. To change the order of the
worksheets, highlight a worksheet you want
to move, and then select Move Up or Move
Down. Press OK to finish.