
Installation manual
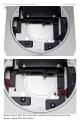
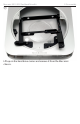


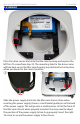

Place the drive carrier back into the Mac mini housing and replace the
left Torx T6 screw from step 25. The mounting tabs for the drive carrier
will line back up on the Mac mini housing top shell and lock into place
when you have it in the correct position.
4 ASSEMBLY
4. Assembly
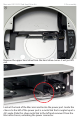
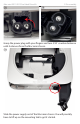
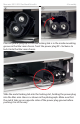
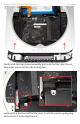
Slide the power supply back into the Mac mini chassis. Note when
inserting the power supply, there is a small metal guide pin on the back
of the power supply. This will go into a small receiver slot at the front of
the Mac mini chassis when properly inserted. You may need to adjust
the position of the power supply to line it up properly. Insert the right
T6 screw to secure the power supply to the chassis.
↑
①
② ③
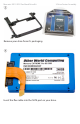
Mac mini 2011-2012 2nd Hard Drive Kit