
User Manual


OWC THUNDERBAY 4
DEVICE SETUP
3
DEVICE SETUP
If your OWC ThunderBay 4 was purchased with drives included, the four drives have been
installed into their drive trays and have been packed separately from the ThunderBay 4
enclosure. If you purchased the ThunderBay 4 enclosure by itself without drives, follow the
instructions in Section 2.1 to install your own drives into the ThunderBay 4. The drive trays
are labeled A, B, C, and D, but the arrangement of the drive trays when they are installed in
the ThunderBay 4 does not matter.
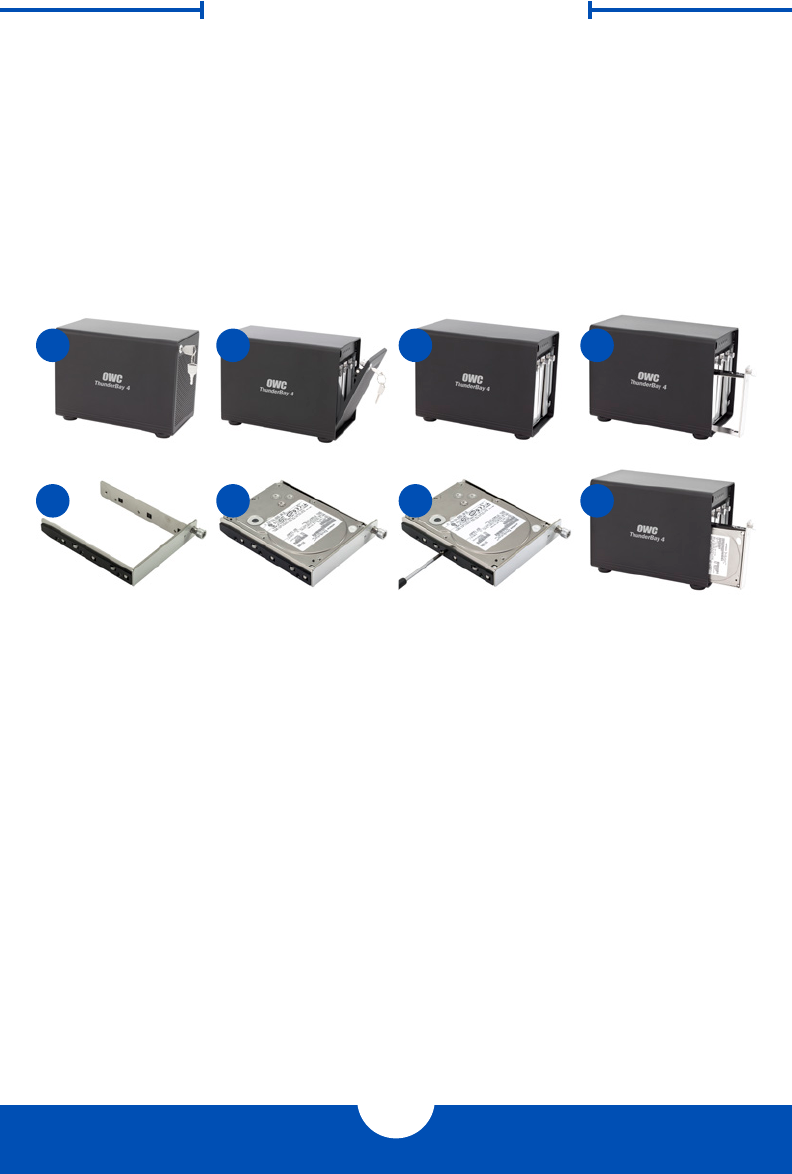
2.1 HARD DRIVE INSTALLATION
Follow these steps to install hard drives into your ThunderBay 4 enclosure, or to replace
existing drives. Repeat steps 1 through 8 as necessary for each drive you are installing.
1. Insert one of the included keys into the lock on the upper left of the faceplate.
2. Turn the key clockwise, then pull it towards you. The faceplate will swing open, as shown.
3. Once the faceplate has swung open as far as it will go, pull up to remove it.
4. On the drive tray you wish to remove, turn the thumbscrew counter-clockwise until you
no longer feel resistance. Then hold onto the thumbscrew and pull the drive tray out.
5. Set the drive tray as shown on your work surface. If you are replacing an existing hard
drive, unscrew it from the drive tray at this time. If your ThunderBay 4 was purchased
without drives, each drive tray will have a plastic bar to help the drive tray keep its shape
during shipping. Unscrew the plastic bar before proceeding.
6. Place the hard drive inside the drive tray as shown. The label should face up and the SATA
connectors should be on the far rear corner of the drive.
7. Fasten the drive into the drive tray using six of the included screws.
8. Slide the drive tray back into the rails in the ThunderBay 4 and push until it is seated
fully, then push in on the thumbscrew and turn it clockwise until it stops moving. If you
encounter resistance, do not force the drive tray. Remove it, check to make sure that there
are no obstructions and that the drive tray is lined up correctly, then slide it in again.
1 2 3 4
5 6 7 8