
User Manual
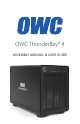


OWC THUNDERBAY 4
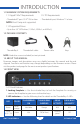
SYSTEM SETUP
4
2.2 QUICK START
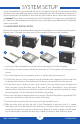
1. Install hard drives into the ThunderBay 4 according to the instructions in Section 2.1.
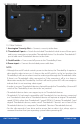
2. Connect the power cable between the ThunderBay 4 and a power outlet, then make sure
the on/off switch is set to the ‘on’ position.
3. Connect a Thunderbolt cable between the ThunderBay 4 and a computer. When you do
this, the ThunderBay 4 will turn on and the drives will be available for use on the computer.
4. If the ThunderBay 4 was purchased with drives, or if you are using new drives that have
not been used before, the drives will need to be formatted before they can be used. Go
to: www.macsales.com/format for information on how to format drives for Mac or
Windows.
5. Once the formatting is finished, the drives are ready to use.
2.3 SOFTWARE RAID
While the ThunderBay 4 has no built-in RAID capabilities, it is possible to use software to
configure the drives inside the ThunderBay 4 as members of a RAID array. OS X and Windows
both have software RAID capabilities natively through their disk management applications,
and there are third-party applications that offer expanded RAID support.
2.4 CHANGING DRIVES
You can add or remove any drive without needing to turn off the ThunderBay 4 or unmount
any of the other drives. Each drive operates independently of the others and is not affected
by the addition or removal of another drive unless you set them up as members of a RAID
array using software.
2.4.1 Drive Failure
The ThunderBay 4 does not monitor drive health, and it will not alert you to a drive
failure. You can monitor the health of your drives through software in order to determine
when a drive has failed or is in a pre-failure state. To replace a failed drive, simply remove
the drive from its bay and replace it with another drive, following the steps in Section
2.1. The ThunderBay 4 does not need to be turned off during this process.