
User Manual


Mercury Elite Pro mini Device Setup
4
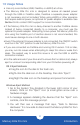
2.1 Quick Start
If you purchased the OWC Mercury Elite Pro mini as an empty
enclosure, proceed to Section 2.2 for assembly tips. If you purchased
the enclosure with a drive already installed, the OWC Drive Guide
formatting utility has been installed to assist with the setup. Follow the
steps below to use the OWC Drive Guide to format the drive for Mac
(OS X 10.4 and later) or Windows (XP and later).
1. Connect the Mercury Elite Pro mini to your computer using the
proper cable. If you prefer to use a dierent formatting utility, do so
at this time and skip the rest of these instructions.
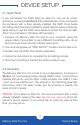
2. Your drive will appear as “OWC SETUP”. Double-click the disk icon.
3. Double-click the OWC Drive Guide application.
4. Follow the instructions to complete the formatting process.
5. Once the formatting is nished the drive is ready to use.
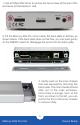
2.2 Assembly
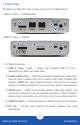
The Mercury Elite Pro mini comes in two congurations. As shown in
Section 1.4, one model provides a single USB 3.1 Gen 1 port and two
FireWire 800 ports, and the other model provides one USB 3.1 Gen
1 port and one eSATA port. The pictures in the following assembly
instructions show the latter model, but the process is exactly the
same for both models.
NOTICE: If your Mercury Elite Pro mini was purchased with a drive
already installed, opening the case will void your warranty. Once the
warranty period expires, if you would like to open the case at that
time, you may do so.
DEVICE SETUP