
Manual


OWC MERCURY ELITE PRO DUAL
INTRODUCTION
2
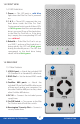
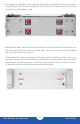
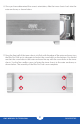
1.4 FRONT VIEW
1.4.1 LED Indicators
1. Power — This LED emits a solid blue
light when the Elite Pro Dual is powered
on.
2. 1 & 2 — These LEDs represent the two
hard drives inside the Elite Pro Dual.
During normal activity, each of these LEDs
will blink green when the corresponding
drive is accessed. If one of the hard drives
in the Elite Pro Dual fails, or if the drive
bay is empty, the corresponding LED will
turn solid red.
3. Rebuild — If the Elite Pro Dual is set up
as a RAID 1 and one of the hard drives is
being rebuilt, this LED will blink green
during the rebuild process. The LED that
corresponds to the hard drive being
rebuilt will also blink green.
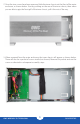
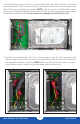
1.5 REAR VIEW
1.5.1 Rear Features
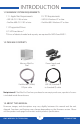
1. USB 3.0 port — Attach the included USB
3.0 (Standard-A to Standard-B) cable here.
2. RAID Dial — Set the desired RAID mode
here.
3. FireWire 800 ports — Attach the
included 9-9 pin FireWire 800 cable to one
of these ports and to your computer. Use
the other FireWire 800 port to daisy chain
other FireWire 800 devices.
4. DC IN — Connect the included power
supply here.
5. On/O Switch — Turn power to the Elite
Pro Dual on and off with this switch.
6. Kensington® Security Slot — Connect a
security tether here.
1 2 3
1
2
3
4
5
6