
Manual

OWC MERCURY ELITE PRO DUAL
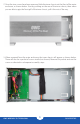
DEVICE SETUP
9
2.3 RAID SETTINGS
2.3.1 Changing the RAID Mode
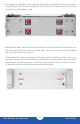
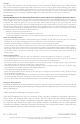
The RAID mode is controlled by a dial on the
rear of the unit, as shown at left. The dial has
four positions, each labeled with a different
RAID mode. In order to change the RAID
mode, follow the simple steps below.
Adjust the RAID dial so that the arrow is
pointing at the desired RAID mode. Each time
the arrow is aligned with a new mode, you will
feel a slight click. A small flathead screwdriver
works the best to adjust the dial.
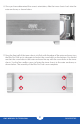
When starting from a power on state, rotate
the dial on the back of the enclosure to the
desired RAID mode, then unmount the drive
and power off the Elite Pro Dual. Next power
on the Elite Pro Dual. The LEDs on the front will
blink for a brief time; once the blinking stops
the drive is ready to use.
When starting from a power o state, rotate the dial on the back of the enclosure to the
desired RAID mode, then power on the Elite Pro Dual. The LEDs on the front will blink for a
brief time; once the blinking stops the drive is ready to use. NOTE: changing the RAID mode
for the Mercury Elite Pro Dual requires an active USB or FireWire connection.
See Section 2.3.2 - “RAID Modes” for more information on each RAID mode that can be
used, and how it differs from the others.
!
!
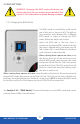
WARNING: Changing the RAID mode will destroy the
data on the drives. Be sure to back up your data rst! See
section 3.4 for information on proper backup strategies.