
Operation Manual
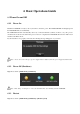
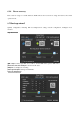
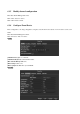

4.5.2 Operation Icons
:Not selected.
:Be selected.
:The drop - down button
:Leave the interface.
:Cancel the settings.
:Set parameters. :
Save parameters. :Restore the
factory settings.
:Apply current settings to the system.
:Copy current settings to other channels.
:Enter the configuration interface.
:Select and configure the processing operation triggered by video detection or alarm.
5
Installation
5.1
Unpacking Inspection
When you receive the product, check according to the packing list in the box.
5.2
HDD Installation
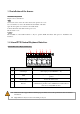
Installation Preparation
Prepare a Cross Screwdriver.
Note: HDD quantity by each model’s specifications shall be final, HDD capacity up to 64 TB.
Steps
Remove the metal top cover by removing two screws from the sides of the cover.
Place the hard disks on a flat table and tighten the screws.
Connect the power and the data lines to the HDD.
Reinstall the metal top cover and tighten the screws.
Caution
Only use the HDD specified by the manufacturer.
The HDD will be formatted automatically during booting and it may cause data loss.
The total duration of video data saved is decided by the HDD’s capability and the DVR’s parameters (recording
setup, encoding setup). Please refer to the form in chapter 11.5.