
User`s manual


Table Of Contents
- Copyright and Trademark Notice
- About This Manual
- Limited Warranty
- Safety Warnings
- Table of Contents
- Chapter 1: Introduction
- Chapter 2: Hardware Installation
- Chapter 3: First Time Setup
- Chapter 4: System Administration
- Overview
- Web Administration Interface
- Language Selection
- System Information
- System Management
- System Network
- FTP
- Media Server
- HTTP/ Web Disk
- UPnP
- Nsync Target
- Bonjour Setting
- Storage Management
- User and Group Authentication
- Application Server
- iTunes® Server
- Module Management
- Module Installation
- System Module
- User Module
- Backup
- Chapter 5: Using the N7700SAS
- Chapter 6: Tips and Tricks
- Chapter 7: Troubleshooting
- Chapter 8: Revision updated (FW 3.00.03 to 3.00.04)
- Chapter 9: Revision updated up to FW 3.00.08
- Chapter 10: Version 3.01.00 Firmware Updates
- Appendix A: Product Specifications
- Appendix B: Customer Support
- Appendix C: RAID Basics
- Appendix D: Active Directory Basics
- Appendix E: Licensing Information
Month Select the current month from the dropdown.
Username Enter a username.
Password Enter a password.
Password Confirm Reenter the chosen password
2. Designate the percentage to be allocated from the Allocation drag bar.
3. Enable the iSCSI Target Service by selecting Enable.
4. Choose to enable CHAP authentication or choose None.
5. Enter a Target Name. This will be used by the Stackable NAS function to
identify this export share.
6. Choose the current year from the Year dropdown.
7. Choose the current month from the Month dropdown.
8. If you’ve enabled CHAP authentication, enter a username and a password.
Confirm your chosen password be reentering it in the Password Confirm
box.
9. Click OK to create the iSCSI volume.
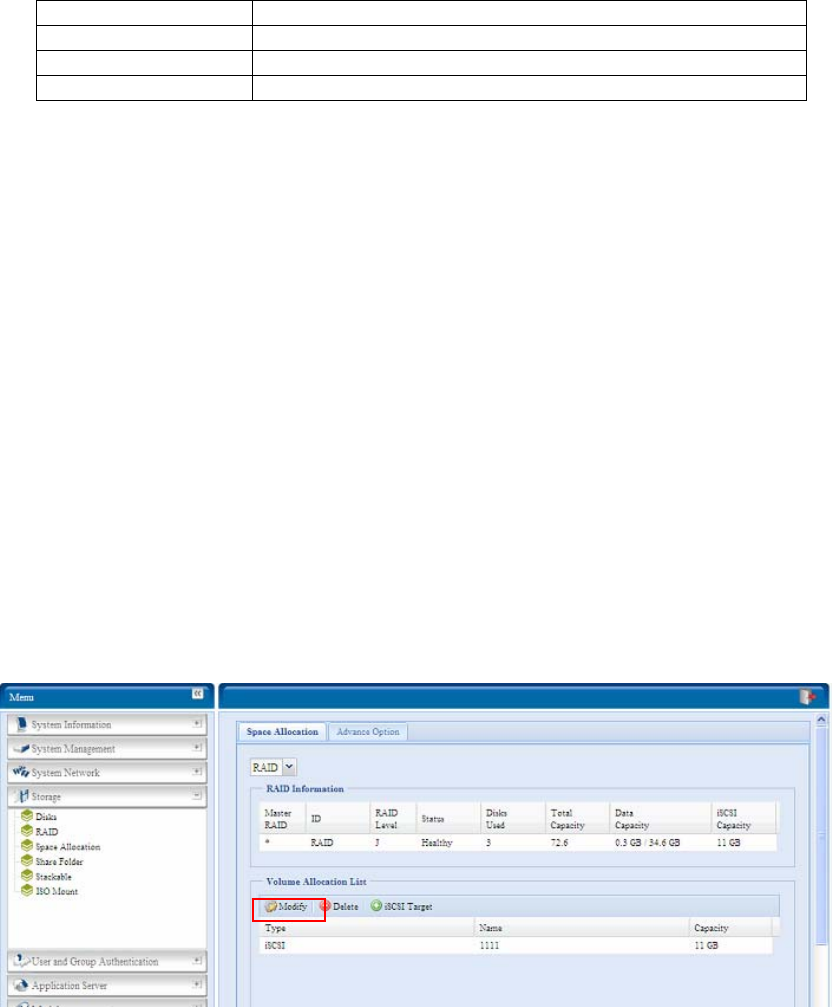
Modify iSCSI Volume
To Modify iSCSI volume on the current RAID volume, follow the steps below:
1. Under the Volume Allocation List, click Modify.
The Modify iSCSI Volume screen appears.
62