
User`s manual


Table Of Contents
- Copyright and Trademark Notice
- About This Manual
- Limited Warranty
- Safety Warnings
- Table of Contents
- Chapter 1: Introduction
- Chapter 2: Hardware Installation
- Chapter 3: First Time Setup
- Chapter 4: System Administration
- Overview
- Web Administration Interface
- Language Selection
- System Information
- System Management
- System Network
- FTP
- Media Server
- HTTP/ Web Disk
- UPnP
- Nsync Target
- Bonjour Setting
- Storage Management
- User and Group Authentication
- Application Server
- iTunes® Server
- Module Management
- Module Installation
- System Module
- User Module
- Backup
- Chapter 5: Using the N7700SAS
- Chapter 6: Tips and Tricks
- Chapter 7: Troubleshooting
- Chapter 8: Revision updated (FW 3.00.03 to 3.00.04)
- Chapter 9: Revision updated up to FW 3.00.08
- Chapter 10: Version 3.01.00 Firmware Updates
- Appendix A: Product Specifications
- Appendix B: Customer Support
- Appendix C: RAID Basics
- Appendix D: Active Directory Basics
- Appendix E: Licensing Information
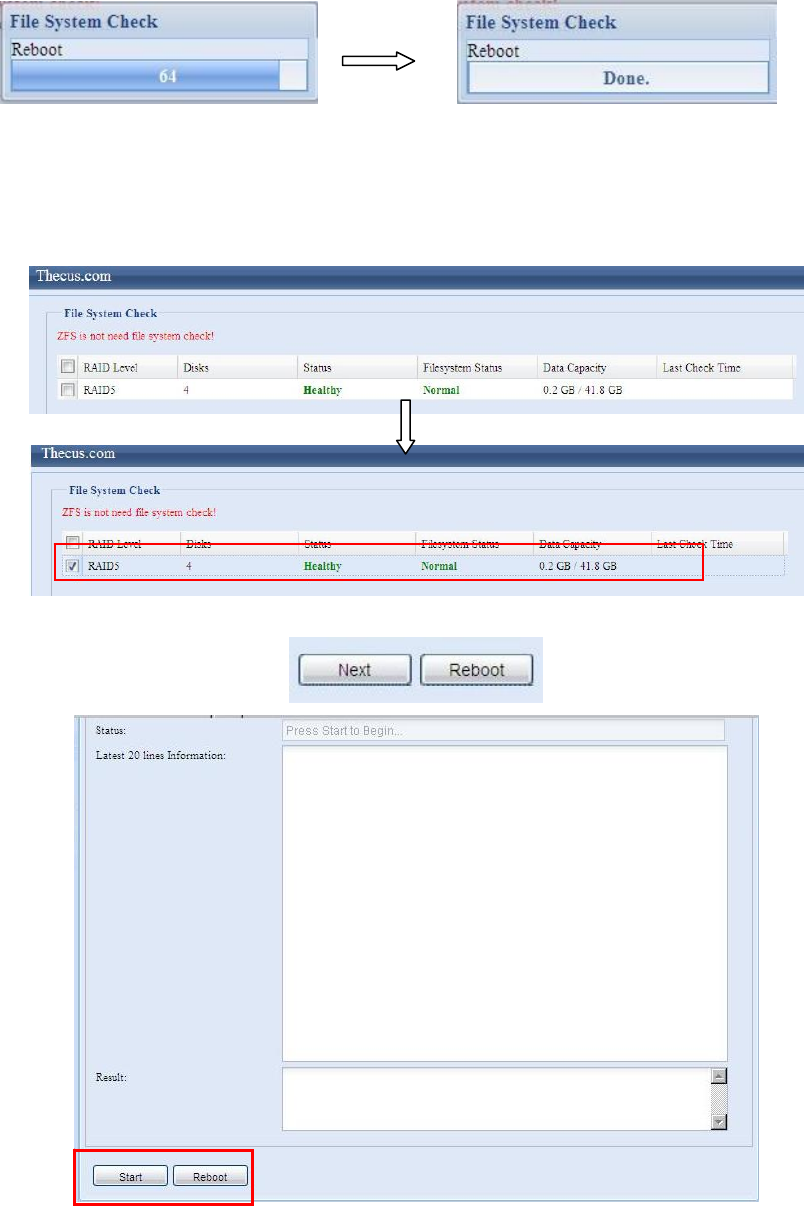
Once the system has rebooted, you will be returned to the File System Check
prompt. There you will see the available RAID volumes to run the file system check
on except ZFS volume, ZFS has no need to perform file system check. Check the
desired RAID volumes and click Next to proceed with the file system check. Click
Reboot to reboot without running the check.
Once you click Next, you will see the following screen:
Click Start to begin the file system check. Click Reboot to reboot the system.
When the file system check is run, the system will show 20 lines of information until
it is complete. Once complete, the results will be shown at the bottom.
37