
User Manual (EU Version)

Helicopter
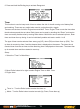
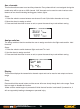
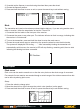
Aileron:
The aileron function enables flaps to be used as ailerons. The function sets a ratio between aileron
and flap movement which can be customized for the users’ needs. For example if flap one is set to
10% in the down column, when the aileron is at 100% movement the flap will have moved 1/10th
of that distance.
This function can also mix aileron movement to flaps and elevators.
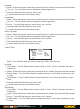
Changes between single and dual aileron mode.
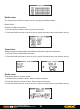
Setup:
1. Use the wheel to change between single and dual mode, if selecting single mode, press and
hold the wheel to exit, if selecting dual mode press the wheel using a normal press.
2. Use the wheel to change aileron 1 and 2 positions (positive and negative), roll the wheel to
change the value and press the wheel to change between settings.
19
6 CHANNEL TRANSMITTER
DIGITAL PROPORTIONAL RADIO
CONTROL SYSTEMPROGRAMABLE SYSTEM
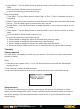
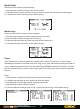
Bind:
The transmitter and receiver have been pre-bound before delivery. If you are using another trans-
mitter or receiver, follow the steps below to bind the TX and RX:
1. Connected the bind cable to the bind port of the receiver.
2. Connected the power to any other port. The indicator will start to flash in orange, indicating that
the receiver is in bind mode.
3. Turn on the transmitter, press and hold the wheel to enter the main menus.
4. Choose the model setup menu to select bind, the press the wheel to enter the bind mode.
The system will displayed “RX binding……” . After successfully binding the transmitter will
automatically exit this menu, the receiver’s LED will stop flashing, remaining solid, then to sloid
indicating that binding has been successful.
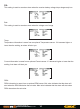
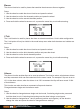
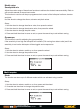
Pitch curve
Pitch curve can be used to smooth out or alter the rotor pitch over the sticks range of movement.
For example if more reaction was needed though a certain range of the sticks movement then this
can be done by altering pitch curve.
Setup:
1. Press the wheel to change point.
2. Move the wheel left or right to change the point’s value (position) on the graph.
3. Press and hold the wheel to save an exit, or press the cancel key to exit without saving.
3. If needed set the flaperon to a switch using the wheel then press the wheel.
4. Choose the flaperon position.
5. Press and hold the wheel to save an exit, or press the cancel key to exit without saving.