Oracle Unified Messaging Installation Guide Release 2.1.2 for Sun SPARC Solaris 2.6 January, 2001 Part No.
Unified Messaging Installation Guide, Release 2.1.2 for Sun SPARC Solaris 2.6 Part No. A86091-02 Copyright © 1996, 2001 Oracle Corporation. All rights reserved.
Contents Preface........................................................................................................................................................... vii 1 Preinstallation Installation Overview ........................................................................................................................ Installation Requirements ................................................................................................................ System Requirements................
Specifying Oracle eMail Server Parameters............................................................................ Specifying Oracle eMail Server Passwords............................................................................. Entering LDAP Information...................................................................................................... Exiting the Configuration Assistant.........................................................................................
Send Us Your Comments Oracle Unified Messaging Installation Guide, Release 2.1.2 for Sun SPARC Solaris 2.6 Part No. A86091-02 Oracle Corporation welcomes your comments and suggestions on the quality and usefulness of this publication. Your input is an important part of the information used for revision.
vi
Preface The topics covered in this preface include: ■ Intended Audience ■ Oracle Unified Messaging Documentation ■ Related Documents ■ Notation Conventions vii
Intended Audience The configuration and installation instructions in this document are intended for anyone who is responsible for installing Oracle products on Sun SPARC Solaris. While some command examples are provided, this document does not attempt to teach Oracle or UNIX administration. Oracle Unified Messaging Documentation Oracle Unified Messaging documentation is available in HTML and PDF format on the CD-ROM and installs automatically during product installation.
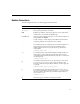
Notation Conventions The following notational conventions appear in this manual: Convention Description italic Italicized type identifies document titles. Monospace Monospace type indicates commands. bold Boldface type indicates script names, directory names, path names, and file names (for example, the root.sh script). UPPERCASE Uppercase letters indicate parameters or environment variables (for example, ORACLE_HOME). . . . ...
x Installation Guide
1 Preinstallation This chapter describes the preinstallation procedures for Oracle Unified Messaging.
Installation Overview Installation Overview Oracle Unified Messaging is a highly scalable, messaging framework which integrates messages from multiple sources into a single inbox. Prior to installation, you should plan your implementation strategy and be familiar with Unified Messaging system components, concepts, and terminology described in the Unified Messaging Client Developer’s Guide. The installation process is composed of the following steps: 1.
Installation Requirements Software Components Version Oracle Internet Directory 2.1.1 Oracle Internet Application Server (Oracle HTTP Server) 1.0.2.1 Netscape Communicator 4.6 or 4.7 Comments State During Unified Messaging Installation Installed and running Required for Web node only. Installed and running Oracle Internet Application Server cannot share the same ORACLE_HOME with other Oracle products.
Preinstallation Tasks Preinstallation Tasks The following tasks must be performed prior to installing Oracle Unified Messaging: Task 1: Back Up and Shut down Existing Database and Log Files Perform a full backup of your existing Oracle8 Universal Data Server before you perform any new installation or upgrade. A full backup ensures that you can recover from errors encountered during new installation or upgrade processes. This backup should be taken with the database shut down cleanly.
Preinstallation Tasks Task 3: Start the Processes Necessary for Installation 1. Start the database: $ svrmgrl SVRMGR> connect internal Connected to an idle instance. SVRMGR> startup SVRMGR> exit 2. Start the network listener: $ lsnrctl start Task 4: Configure Net8 (Database Node Installation) TNSLISTENER80 To install an Unified Messaging database node, a connect string must exist that provides a connection to the Unified Messaging database using the sid. 1.
Preinstallation Tasks Task 5: Configure Net8 (Multiple Instance Installations Only) If you are installing a separate Oracle Unified Messaging system from your Oracle eMail Server database instance, then you must configure Net8 to enable the Oracle Unified Messaging system to contact the Oracle eMail Server database. 1.
2 Installing and Configuring Unified Messaging This chapter describes Unified Messaging installation and configuration procedures for both new installations and upgrades.
Installing Unified Messaging Installing Unified Messaging Mounting the Product CD-ROM Manually The Oracle Product Installation CD-ROM is in RockRidge format. If you are using the Solaris Volume Management software (installed by default on Sun SPARC Solaris 2.x), the CD-ROM is mounted automatically when you put it into the disk drive. If you are not using the Solaris Volume Management software, use the following procedure to mount the CD-ROM manually.
Installing Unified Messaging 3. Make sure xhost, while physically located on the host machine, is set to enable access to the X server on your machine. Use the following command: % /usr/openwin/bin/xhost + See the UNIX man pages for more information on xhost. 4. From the install directory on the CD-ROM, type the following command: $ ./runInstaller The ./runInstaller command launches the Oracle Universal Installer and the Welcome dialog box displays.
Installing Unified Messaging Screen Button What it Does Deinstall Products Takes you to the Deinstall screen. About Oracle Universal Installer Gives you the version number. 2-4 Exit Exits you out of the install session. Installed Products Shows you what Oracle products you have installed. Previous Takes you back to the previous screen. Next Takes you to the next screen. Cancel Enables you to cancel the installation process.
Installing Unified Messaging Entering File Locations 1. At the Welcome screen, click Next. The File Locations screen displays. Enter the location of the source and destination. The Source is where the Unified Messaging stage is located. The Destination is where the ORACLE_HOME is located and where Unified Messaging will be installed. 2. Type in or use the Browse button to select the Source and Destination directories for your installation. 3. Click Next. The Installation Types screen displays.
Installing Unified Messaging Select your installation type. Installation Type What it Does Database Node Installs the database components and creates UM database objects. Web Node Installs the web components only. Click Next. The Summary screen appears.
Installing Unified Messaging Verifying Your Installation Settings The Summary screen enables you to verify your installation settings. These settings include the source and destinations locations you specified; the installation type you selected; the product language; the space requirement for installation and the space currently available; and the Unified Messaging products that will be installed.
Installing Unified Messaging To change your source or destination location, or installation type, click Previous to return to the appropriate screen. Otherwise, click Install to begin installation. The progress screen displays. This screen shows the progress of your installation. To stop installation, click Cancel.
Installing Unified Messaging The products are installed in the specified location. When installation is complete, the Configuration Tools screen appears. If installation was successful, the UM 2.1.2 Configuration Assistant launches. Starting the Configuration Assistant Manually 1. Define the ORACLE _HOME environment variable in the .login file (for the C shell) or the.
Installing Unified Messaging 3. Set your JAVA_HOME directory as shown: ksh/bsh -- export JAVA_HOME= csh -- setenv JAVA_HOME 4. At the Solaris prompt, enter the command: $ORACLE_HOME/um/bin/um_install.sh Configuration Assistant Screen Buttons This table gives you information about the Configuration Assistant screen buttons. Click Next to proceed through the steps to configure Oracle Unified Messaging 2.1.2.
Installing Unified Messaging The ORACLE_HOME for Oracle UM 2.1.2 screen appears. S Specifying File Locations On this screen you must specify the location of your Oracle Home, where Unified Messaging is to be installed. Enter the directory path of the ORACLE_HOME where Unified Messaging is installed and click Next. The ORACLE_SIDs for UM 2.1.2 screen displays.
Installing Unified Messaging On this screen you must enter the Oracle SID and connect string for Unified Messaging, as well as the Unified Messaging tablespace name.
Installing Unified Messaging * Enter the UM connect string, UM ORACLE_SID, and the Name of UM Tablespace in the corresponding fields. See the table below for more information. ORACLE_SID What it Is UM Connect String Connect string for the database that holds the Oracle Unified Messaging objects. UM ORACLE_SID SID for the database that holds the Oracle Unified Messaging objects. Name of UM Tablespace The name of the Unified Messaging tablespace on the database.
Installing Unified Messaging Database Passwords What it Is Sys User Password UM database password specified for the sys user. The password already exists from the database installation. It should be entered here. System User Password UM database password specified for the system user.The password already exists from the database installation. It should be entered here. Enter the passwords in the corresponding fields and click Next. The ES Parameters screen displays.
Installing Unified Messaging Specifying Oracle eMail Server Parameters In this screen, you must specify Oracle eMail Server parameters. IM Parameters What it Is ES Hostname Hostname and machine where ES is installed. DNS Domain DNS domain where ES is installed. ES Node Name Node name of the ES node. ES Domain Name Fully qualified domain name for Unified Messaging installation.
Installing Unified Messaging ES User Passwords What it Is admin pwd for oomgr Admin user password for oomgr. When you installed Unified Messaging, you were prompted to enter a password for the ADMIN account. The ADMIN account is the system administrator’s account (or superuser account) from which you manage objects on a given node. In addition, the ADMIN user can grant administrative privileges to other users, so that they can administer the Unified Messaging system.
Installing Unified Messaging LDAP Parameters What it Is PAB Port Port number of the LDAP server specified in PAB server. Defaults to 389. GSM Server Name of the LDAP server to use for General Directory searching capability in UM. GSM Server Port number of the LDAP server specified in GSM Server. Defaults to 389. LDAP Type The type of LDAP server being used. Must be "oracle" for an Oracle Internet Directory. Enter the parameters and click Next. The LDAP Domains screen displays.
Installing Unified Messaging In this screen you must specify your LDAP domains. LDAP Domains What it Is PAB Domain Name of the root of the LDAP domain where UM will store it’s information. GSM Domain Name of the root of the GSM LDAP server from where all the search functions will start. Enter the LDAP domains and click Next. The last screen displays.
Installing Unified Messaging Exiting the Configuration Assistant Click Finish to exit the Configuration Assistant. Once you have completed installation, you must now complete the post-installation tasks. See "Post Installation Tasks" on page 3-2 to begin post-installation tasks.
Installing Unified Messaging 2-20 Installation Guide
3 Post Installation This chapter describes post installation procedures for Unified Messaging.
Post Installation Tasks Post Installation Tasks Perform the tasks described in this section after a Unified Messaging installation or upgrade. Note: You must run the following tasks in a Korn shell environment. Note: Configure Oracle eMail Server to include two rewrite rules. Please refer to chapter 10 of the Oracle eMail Server 5.1 Administration Guide. Task 1: Create the Oracle Unified Messaging LDAP Schema Use this procedure to create the schema the helpdesk will use in the LDAP server.
Post Installation Tasks $cd 4. $ORACLE_HOME/ldap/bin Execute the following: catalog.sh catalog.sh catalog.sh catalog.sh catalog.sh catalog.sh catalog.sh 5.
Post Installation Tasks $ . $ORACLE_HOME/um/admin/.umenv 2. Encode the password: $ $ORACLE_HOME/JRE/bin/jre -cp $UM_CLASSPATH $UM_PROPERTIES oracle.um.util.EncPwd HELPDESK Task 3: Configuring the oomgr RMI Process The oomgr RMI process allows for Unified Messaging sessions to remotely share an oomgr process to do administration on Oracle eMail Server accounts. The oomgr RMI process can be run on either the Unified Messaging or the Oracle eMail Server machine.
Post Installation Tasks Task 6: Configuring JServ To configure JServ for Oracle Unified Messaging, you must edit $ORACLE_HOME/Apache/JServ/etc/jserv.properties to add JVM properties and CLASSPATHS. To add Oracle Unified Messaging properties, Oracle recommends adding the following lines in the same location where other properties are defined. wrapper.bin.parameters=-DUM_HOME=/um wrapper.bin.parameters=-DPROPERTIES=/um/config/.
Post Installation Tasks iofcmgr> execute helpdesk.oom 4. Bring up your browser. 5. Enter the following: http://:/um/activatehelpdesk.jsp 6. Enter the helpdesk user account password. The default password is helpdesk. Task 9: Updating Real Audio (only if Real Audio is installed) If Real Audio is installed, you must update the following to enable Real Audio streaming. Update rma.home (home of RealAudio) and rma.server (server name and port number of RealAudio) in .properties.
4 Troubleshooting This chapter discusses troubleshooting information.
Log Files and Trace Files Log Files and Trace Files ■ For installation troubleshooting, refer to the log file in: $ORACLE_HOME/um/log/install.log ■ For background Oracle Unified Messaging processes troubleshooting, refer to trace files in: $ORACLE_HOME/um/trace ■ For Oracle Unified Messaging classes troubleshooting, refer to log file in: $ORACLE_HOME/um/log/.txt Troubleshooting Hints ■ Make sure Oracle eMail Server is installed and working correctly, 1.
Troubleshooting Hints Note: ■ selected during installation. If the data for the helpdesk is returned, then LDAP is working fine. If the data for the helpdesk is not returned, then resolve LDAP server issue using the documentation provided by the LDAP server.
Troubleshooting Hints 4-4 Installation Guide