
User Guide


● “Creating Groups” on page 85
● “Modifying Groups” on page 86
● “Deleting Groups” on page 88
● “Provisioning Users and Groups” on page 101
● “Deprovisioning Users and Groups” on page 102
● “Generating Provisioning Reports” on page 102
Note:
Groups on external user directories cannot be managed from User Management Console.
Creating Groups
Native Directory groups can contain users and groups from any user directories configured on
Shared Services, including Native Directory. Groups that contain other groups are known as
nested groups.
Each component group of a nested group used in provisioning inherits all roles assigned to the
nested group. Similarly, users assigned to a group inherit the roles assigned to the group.
When a group from an external user directory is added to a Native Directory group, Shared
Services creates a reference in the database to establish the relationship.
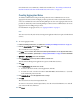
➤ To create Native Directory groups:
1 Launch User Management Console, as explained in “Launching User Management Console” on page 33.
2 In the Object Palette, right-click Groups, and select New.
3 For Name in the Create Group screen, enter a unique group name.
Group names are not case-sensitive.
4 Optional: Enter a group description.
5 Perform an action:
● To create the group without adding groups or users, click Finish, and go to step 10.
● To create a nested group or assign users to the group, click Next.
The Group Members tab is displayed.
6 Create a nested group. To skip this step, click Next.
a. In Search for Groups, enter the criterion for retrieving groups. Use * (asterisk) as the
wildcard to retrieve all available groups.
b. In Directory, select the user directory from which to retrieve groups.
All configured user directories are listed in the Directory list.
c. Click Go.
Groups that match the search criterion are listed under Available Groups.
Managing Native Directory Groups
85