
Server User Manual


Creating a Shared Virtual Disk for Live Migration
Domain Live Migration 6-3
node:
ip_port = 7777
ip_address = 10.1.1.2
number = 1
name = example2.com
cluster = ocfs2
cluster:
node_count = 2
name = ocfs2
12. Review the status of the OCFS2 cluster service:
service o2cb status
13. Load the OCFS2 module:
service o2cb load
14. Set the OCFS2 service to be online:
service o2cb online
15. Configure the OCFS2 service to start automatically when the computer boots:
service o2cb configure
16. Start up the OCFS2 service.
service o2cb start
17. Format the shared virtual disk from any of the servers in the cluster:
mkfs.ocfs2 /dev/sdh1
18. Mount the shared virtual disk from all the servers in the cluster on /OVS/remote:
mount /dev/sdh1 /OVS/remote/ -t ocfs2
19. Change the /etc/fstab file to include the shared virtual disk mounted at boot:
/dev/sdh /OVS/remote ocfs2 defaults 1 0
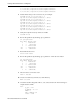
6.1.2 Creating a Shared Virtual Disk Using OCFS2 on SAN
To create a shared virtual disk using OCFS2 on SAN:
1. Review the partitions by checking /proc/partitions:
cat /proc/partitions
major minor #blocks name
8 0 71687372 sda
8 1 104391 sda1
8 2 71577607 sda2
253 0 70516736 dm-0
253 1 1048576 dm-1
Determine the share disk volume you want to use.
2. Create a new directory named /etc/ocfs2 directory:
mkdir /etc/ocfs2