Oracle TimesTen In-Memory Database Installation Guide Release 7.0 B31679-01 For last-minute updates, see the TimesTen release notes.
Copyright ©1996, 2007, Oracle. All rights reserved. ALL SOFTWARE AND DOCUMENTATION (WHETHER IN HARD COPY OR ELECTRONIC FORM) ENCLOSED AND ON THE COMPACT DISC(S) ARE SUBJECT TO THE LICENSE AGREEMENT. The documentation stored on the compact disc(s) may be printed by licensee for licensee’s internal use only.
Contents About this Guide TimesTen documentation . . Background reading . . . . Conventions used in this guide Technical Support . . . . . . . . . . . . . . . . . . . . . . . . . . . . . . . . . . . . . . . . . . . . . . . . . . . . . . . . . . . . . . . . . . . . . . . . . . . . . . . . . 1 2 3 5 Introduction. . . . . . . . . . . . . . . . . Access Control . . . . . . . . . . . . . . Limitations of Access Control and non-root installs . General . . . . . . . . . . . . . . . . .
Platform support . . . . . . . . . . . . . JDK support . . . . . . . . . . . . . . . Client/Server configurations . . . . . . . . Cache Connect to Oracle . . . . . . . . . . Replication configurations . . . . . . . . . Installation instances . . . . . . . . . . . . . Instance names . . . . . . . . . . . . . . Instance port numbers . . . . . . . . . . . Choosing the appropriate TimesTen components . . Components available on Windows. . . . . . Components available on UNIX . . . . . . .
Installing TimesTen on HP-UX Memory Windows . . Use a separate instance for each memory window . Using TimesTen in a memory window . . . . . . Address Space Considerations . . . . . . . . . Troubleshooting. . . . . . . . . . . . . . . Installing TimesTen on AIX systems . . . . . . . . Installing TimesTen . . . . . . . . . . . . . Working with the TimesTen daemon and server . . Uninstalling TimesTen . . . . . . . . . . . . Installing TimesTen on Linux systems . . . . . . . Installing TimesTen . . . . . . . .
3 Data Store Upgrades Introduction . . . . . . . . . . . . . . . . . . . . . . . . . . 87 Data store compatibility . . . . . . . . . . . . . . . . . . . . 87 Data type compatibility . . . . . . . . . . . . . . . . . . . . 87 Data store character set . . . . . . . . . . . . . . . . . . . . 88 Data type conversion . . . . . . . . . . . . . . . . . . . . . . . 89 Converting data types to Oracle data types . . . . . . . . . . . . . 90 Upgrading data types as TimesTen data types . . . . . . . . . . . .
Index Contents vii
viii Oracle TimesTen In-Memory Database Installation Guide
About this Guide This document contains all necessary information for installing the Oracle TimesTen® In-Memory Database (TimesTen) Data Manager, Client and Server components. The TimesTen CD contains a README.TXT file that holds the release notes. These notes list product information and late changes to the printed documentation. The release notes are also available in PDF format. The PDF file is named README.pdf.
Oracle TimesTen In-Memory Database SQL Reference Guide Contains a complete reference to all TimesTen SQL statements, expressions and functions, including TimesTen SQL extensions. Oracle TimesTen In-Memory Database Error Messages and SNMP Traps Contains a complete reference to the TimesTen error messages and information on using SNMP Traps with TimesTen.
• Microsoft ODBC 2.0 Programmer’s Reference and SDK Guide, included online in PDF format, provides information on ODBC for UNIX developers. For a conceptual overview and programming how-to of ODBC, see: • Kyle Geiger. Inside ODBC. Redmond, WA: Microsoft Press. 1995. For a review of SQL, see: • Melton, Jim and Simon, Alan R. Understanding the New SQL: A Complete Guide. San Francisco, CA: Morgan Kaufmann Publishers. 1993. • Groff, James R. / Weinberg, Paul N. SQL: The Complete Reference, Second Edition.
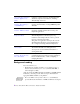
TimesTen documentation uses these conventions in command line examples and descriptions: If you see... It means... fixed width italics Variable; must be replaced with an appropriate value. [ ] Square brackets indicate that an item in a command line is optional. { } Curly braces indicated that you must choose one of the items separated by a vertical bar ( | ) in a command line. | A vertical bar (or pipe) separates arguments that you may use more than one argument on a single command line. ...
timesten A sample name for the TimesTen instance administrator. You can use any legal user name as the TimesTen administrator. On Windows, the TimesTen instance administrator must be a member of the Administrators group. Each TimesTen instance can have a unique instance administrator name. DSN The data source name. Technical Support For information about obtaining technical support for TimesTen products, go to the following Web address: http://www.oracle.com/support/contact.
6 Oracle TimesTen In-Memory Database Installation Guide
1 Access Control Introduction Access Control With TimesTen you can optionally install a layer of internal security, which throughout the TimesTen documentation set and in the installation scripts is referred to as “Access Control.” The Access Control feature of TimesTen provides an environment of basic control for applications that use the internally defined privileges. In TimesTen, user privileges are granted on a instance wide-basis.
Cache Connect For Cache Connect, the TimesTen internal user must match the Oracle user. External Client/Server users must match the Oracle user. If you are using the Cache Connect Administrator interface, the user must be an internal TimesTen user. Replication If Access Control is enabled, replication daemon administration and replication schema changes are restricted to users having the ADMIN privilege. See “Privileges” on page 13.
% ttDaemonAdmin -start To stop an instance: % ttDaemonAdmin -stop Instance data store A DSN for a minimal instance-wide data store is defined by TimesTen at install time to guarantee that TimesTen always has something with which to connect. The following is the definition of the instance DSN for a root installation: [TT_instance] Driver=install_dir/lib/libtten.
Note: All examples in the TimesTen documentation set use the name timesten to represent the instance administrator. For details on establishing the TimesTen instance administrators group, see “Create the TimesTen instance administrators group” on page 37. On Windows systems, the user System automatically becomes the TimesTen instance administrator when Access Control is selected at install time. On UNIX systems, a TimesTen instance administrator user is the OS user who installs that instance of Timesten.
automatically converts the external user name to upper case, rendering it case insensitive. The PWDCrypt attribute allows you to encrypt a password rather to use cleartext passwords, and it also provides a way to deal with the special characters and case sensitivity used in passwords that might create difficulties if specified in clear text within the PWD DSN attribute. Before installation Several steps must be taken to prepare a machine for TimesTen installation.
Installation directories, files and the daemon port Installation of TimesTen must be performed by the chosen instance administrator user. The instance administrator owns all files in the installation directory tree. Only the instance administrator can operate the instance. Installation directories The installer suggests default destination directories, based on the user performing the installation.
been selected. If this file is missing, an error occurs after Access Control is enabled. This file is readable and writable only by the instance administrator. Passwords are stored in encrypted form and are not known to the instance administrator as one way hashes, so they cannot be recovered. Daemon port Though the instance registry enforces portTCP/IP uniqueness for TimesTen instances, the possibility of the TimesTen main daemon port conflicting with ports used by non-TimesTen applications always exists.
Maintaining users and privileges TimesTen allows the instance administrator to create, drop and alter users when Access Control is enabled. It also allows the instance administrator to grant and revoke privileges for users. For details see Chapter 5, “SQL Statements in the Oracle TimesTen In-Memory Database SQL Reference Guide. Administration of users is done at the instance level by establishing a connection to any data store and using the SQL commands to create and modify users.
All other changes to the TimesTen instance can only be made by uninstalling and re-installing the same or a differently release of TimesTen. (See “Changing the daemon port number on UNIX” on page 39 and “ORACLE_HOME environment variable” on page 77.
16 Oracle TimesTen In-Memory Database Installation Guide
2 TimesTen Installation This chapter contains configuration information that you will need to review before installing TimesTen on your system, in the sections: • Platforms and configurations • Installation instances • Choosing the appropriate TimesTen components • Installation prerequisites • Operating system security considerations • Prerequisites for non-root installations on UNIX systems • Changing the daemon port number on UNIX You will find a description of the procedures to install TimesTen on your p
• Building and running the demo applications • Viewing the online documentation Finally, this chapter contains information that helps you troubleshoot any problems that may arise during the installation process: • Installation problems 18 Oracle TimesTen In-Memory Database Installation Guide
Platforms and configurations Platform support Times Ten Data Manager and TimesTen Client/Server are supported in the following environments:. Environment 32-bit 64-bit Microsoft Windows 2000, Windows XP and Windows Server 2003 for Intel IA-32 and EM64T and AMD64 CPUs. Yes Yes Solaris 10 for AMD64 CPUs. Yes Yes Solaris 8, 9 and 10 for UltraSparc CPUs. Yes Yes SuSE LINUX Enterprise Server 9 and 10 for Intel IA-32 and EM64T and AMD64 CPUs.
JDK support Note: TimesTen supports the Sun JVM and the BEA WebLogic JRockit JVM for Linux and Windows x86 systems. For details on JRockit, see www.bea.com. TimesTen supports the following JDKs on the specified platforms: Environment JDK 1.4 JDK 5.0 BEA WebLogic JRockit 5.
Environment JDK 1.4 JDK 5.0 HP-UX 11i and HP-UX 11i v2 for PA-RISC 32- and 64-bit Yes (32-bit and 64-bit) Yes (32-bit and 64-bit) HP-UX 11i v2 for Itanium2 Yes (32-bit and 64-bit) Yes (32-bit and 64-bit) AIX 5L 5.2 and 5.3 for POWER CPUs Yes (32-bit and 64-bit) (Uses IBM JDK) Yes (32-bit and 64-bit) (Uses IBM JDK) Tru64 UNIX 5.1B for Alpha EV68 CPUs Yes BEA WebLogic JRockit 5.
Cache Connect is supported on the 32-bit and 64-bit platforms specified in this table: Environment 32-bit 64-bit Microsoft Windows 2000, Windows XP and Windows Server 2003 for Intel IA-32 and EM64T and AMD64 CPUs Yes Yes Solaris 10 for AMD64 CPUs systems Yes Solaris 8, 9 and 10 for UltraSparc CPUs Yes Yes SuSE LINUX Enterprise Server 9 and 10 for Intel IA-32, EM64T and AMD64 CPUs Yes Yes SuSE LINUX Enterprise Server 10 for Itanium2 CPUs Yes Red Hat Enterprise Linux 3 and 4 running on Intel I
Installation instances On UNIX, you can install more than one instance of any TimesTen release. By default, the instance name for this release is tt70. If an instance of a particular release of TimesTen already exists on the machine, and you would like to install a second instance of the same TimesTen release, you must supply a unique instance name and port number.
Choosing the appropriate TimesTen components TimesTen allows you to select the components of TimesTen that you wish to install. Components available on Windows Type Description Compact Installs the TimesTen client, ODBC drivers and examples. Typical Installs the TimesTen Data Manager, TimesTen Client, TimesTen Server, documentation and examples. Custom You may customize installation by selecting any of the following components: TimesTen Data Manager, TimesTen Client and/or TimesTen Server.
Installation prerequisites Before installing TimesTen, make sure the appropriate requirements are met for your operating system. On platforms where JDBC is supported you must have the appropriate version of the JDK installed on your machine to use JDBC. See “Platforms and configurations” on page 19 to learn which JDK is required for your platform. UNIX requirements In general, on UNIX systems, you must configure: • The number of semaphores, and • Allowable shared memory.
Other Client/ Server Settings The maximum number of concurrent IPC connections to a TimesTen Server allowed by TimesTen is 9,999. However, system limits can take precedence on the number of connections to a single DSN. Client/ Server users can increase the file descriptor limit to support a large number of connections and processes.
3. 4. Scroll down the list of parameters to semmns and change its value to a minimum of 4096 or greater. For HP-UX 11i systems, also scroll down the list of parameters to shmmax and change its value to a maximum of 0x40000000. Note: The value 0x240000000 (a 24 followed by seven zeroes) indicates that the largest shared memory segment that can be created is 1024 MB. The size of the shared memory segment required for a shared data store is larger than the requested data store size.
The C development tools are required if native development will be done on the machine. Large pages Large pages can be enabled only if the running Linux kernel supports large pages (also called “huge pages” in Linux community). If large pages are supported by the kernel, there should be special files in the /proc directory that indicate the number and size of the large pages. On Linux 2.4.x systems, the /proc/sys/vm/hugetlb_pool indicates the total size of the large pages. On 2.6.
When TimesTen uses large pages, the HugePages_Free file in /proc/ meminfo changes. Semaphores To view existing kernel parameter settings, log in as root and use: # /sbin/sysctl -a Shared memory To increase the shared memory size to 2048 MB, for example, as root, edit the /etc/sysctl.conf file by adding the line: kernel.shmmax=2147483648 If your configuration is greater than 8GB, you should also increase the value of the shmall parameter. The value is in KB and should be equal to ceil(SHMMAX/PAGE_SIZE).
For Red Hat 3.0, install: compat-libstdc++-7.3-2.96.123 For Red Hat 4.0, install: compat-libstdc++-296-2.96.132.7.2 These packages can be install either using the rpm command or by using the Red Hat GUI installer found in “Legacy Software Development.” Replication For replication, TCP send and receive buffers should be increased to a minimum of 512KB. You may need to embed the following commands into a script that can be run at system boot time: # # # # # # # # Cache Connect /sbin/sysctl -w net.ipv4.
ryps3# modload /kernel/sys/semsys ryps3# modload /kernel/sys/shmsys Increase number of semaphores For Solaris 10 systems, the default semaphore settings should be sufficient without entries in /etc/system. On other Solaris systems, you may need to increase the number of semaphores. TimesTen consumes 1 SEMMNI per active data store, plus one additional SEMMNI per TimesTen instance where Client/Server communication is done through shared memory.
access 12 data stores, add the following line to /etc/system and reboot before using TimesTen: set shmsys:shminfo_shmseg=12 Other changes Other changes that you may need to make to your Solaris system include the following: • To allow a large number of connections to a data store, add the following lines to /etc/system and reboot before using TimesTen: set rlim_fd_cur=4096 set rlim_fd_max=4096 • To enable large shared memory objects in Solaris, add the following line to /etc/system and reboot before usin
Replication For replication, TCP send and receive buffers should be increased to a minimum of 512KB.
To increase the maximum data segment (malloc space) a process may use, change the kernel values per_proc_data_size and max_per_proc_data_size For example, to change all of these values to 10GB: 1. Create a text file, kernelparams, that contains the following: per_proc_address_space = 10737418240 max_per_proc_address_space = 10737418240 per_proc_data_size = 10737418240 max_per_proc_data_size = 10737418240 2. Log in as root and run the command: # sysconfigdb -m -f kernelparams proc 3.
The temporary directory is operating system-dependent. Usually it is located in these directories: • On Windows, C:\Documents and Settings\%USERNAME%\Local Settings\Temp • On Solaris, Linux and Tru64 UNIX, /tmp • On HP-UX and AIX, /var/tmp You can change the location of your temporary directory by setting the TMP environment variable on Windows. On UNIX, you can change the location of your temporary directory by setting the TMPDIR environment variable.
segments are ownership and permissions restricted to that of a particular operating system group. This mode only works if TimesTen is installed and running as root. See the Oracle TimesTen In-Memory Database API Reference Guide.
Prerequisites for non-root installations on UNIX systems As discussed in Chapter 1, “Access Control,” on UNIX systems, you can install TimesTen as a non-root user. This entire section applies to all UNIX platforms on which TimesTen is supported, unless otherwise indicated. However, you may need to perform certain tasks as the user root, both prior to installing TimesTen and after installation. This section outlines those tasks that must be performed as the user, root.
# setprivgrp timesten MLOCK The getprivgrp command can be used to check the privileges of a group: $ getprivgrp timesten timesten: MLOCK Note: On Linux and Tru64 systems, root privileges are required to use MemoryLock attribute. On Solaris systems, you must be installed as root to use MemoryLock=1 or 2.Data stores in a non-root instance of TimesTen can use settings 3 and 4 for this attribute, on Solaris systems. Create the TimesTen registry 1.
This step is only necessary if you want the TimesTen instance to start each time the machine is rebooted. Note: If you install these scripts into your system directory, you must manually remove them in the case that you want to uninstall your TimesTen instance, using # setuproot -uninstall Configure the syslog messages For non-root installs, the default location for daemon system message logs is to a file within the installation directory. For root installs, the default location is the syslog mechanism.
See the TimesTen Developer’s Guide for more information about using TimesTen. Installing TimesTen on Windows systems This section discusses installation and related issues for Windows systems. For a list of Windows platforms supported by TimesTen, see “Platforms and configurations” on page 19. Note: Before beginning installation, be sure that the prerequisites defined in “Installation prerequisites” on page 25 have been met.
By default, Access Control is not enabled. See Chapter 1, “Access Control” for more details. Custom setup also lets you choose other custom options. The installation program adds TimesTen directories to the system environment variables LIB and INCLUDE. In addition, installation prompts you to add a directory to the system environment variable PATH.
Verifying installation To verify that TimesTen has been properly installed, check that the driver files are available and that the services are running: 1. Check that the TimesTen 7.0 Start menu shortcut has been added to the Windows Desktop Start > Programs menu. 2. On the Windows Desktop, choose Start > Settings > Control Panel > Administrative Tools > Data Sources (ODBC). This opens the ODBC Data Source Administrator. 3. Click Drivers. Check to see that the correct drivers are installed.
The ODBC Administrator attempts to connect to the TimesTen Server and display a message to let you know if it was successful. When you click this button, the TimesTen Client verifies that: • ODBC, Windows sockets, and the TimesTen Client are installed on the machine. • The TimesTen Server you have selected is defined. • The host machine for the TimesTen Server is running. • The TimesTen Server is running. 5.
1. On the Windows desktop, choose Start > Settings > Control Panel > Administrative Tools > Services. This displays all currently available services. 2. Select TimesTen Data Manager 7.0. 3. Click Start to start the service. If the service is already running, click Stop to stop the service. Note: TimesTen writes events into the Event Log file. The Windows Application Event Log can get full. To avoid filling the Application Event Log, check the log settings in the Event Viewer.
Installing TimesTen To install TimesTen on your Solaris system, follow these steps: 1. Log in as the TimesTen instance administrator if installing as non-root, or log in as user root. 2. Load the CD-ROM into the CD drive as follows: • If the Volume Manager is installed on the system, you don’t have to explicitly mount the CD; it may be automatically mounted at: /cdrom/tt7.
In addition, setup.sh also accepts these options: -batch filename Installs or uninstalls TimesTen without having to respond to prompts. If filename is specified, the installation reads all installation prompts from the file. The batch file filename is optional. However, TimesTen recommends that you create the batch file and specifically indicate the instance name of the installation.
• On 64-bit systems, prompts you to install one of the following releases: – 32-bit (default) – 64-bit • Prompts you to: – Install a new instance – Upgrade an existing instance (This option allows you to incrementally install the Cache Connect option. The major and minor version numbers of the TimesTen release must match exactly.) – Display information about an existing instance or – Quit the installation. • Prompts you to chose the default instance name or chose a name for your TimesTen instance.
• Copies the daemon scripts into the appropriate directories. • If installed by user root, configures the system to start the daemon when the system boots. • Creates the directory where data stores created by the TimesTen demo applications will reside. By default they reside in /var/ TimesTen/TTinstance/DemoDataStore, if installed as root, or install_dir/info/DemoDataStores if installed as a non-root user. • Starts the daemon.
To stop the daemon manually, use the utility command: ttDaemonAdmin -stop To start the daemon manually, use the utility command: ttDaemonAdmin -start Uninstalling TimesTen To uninstall all TimesTen components: 1. Log in as the TimesTen instance administrator if you installed as nonroot, or log in as user root. 2. The TimesTen setup script is in the install_dir/bin directory. Run the script with the -uninstall option from a directory outside of the installation directory: # install_dir/bin/setup.
# mkdir /cdrom Mount the CD-ROM, as follows: • If your system is configured to mount the CD-ROM at /cdrom, type: # /etc/mount /cdrom • Otherwise, mount the CD-ROM device name to the /cdrom directory, as follows: # /etc/mount -r cdfs CD-ROM_device_name /cdrom where CD-ROM_device_name is the name of the CD-ROM device. 3. Run the setup script by typing the following: # cd mount_dir # ./setup.sh; where mount_dir is the directory where the CD is mounted (e.g.: /cdrom).
Specify the option at the end, outside the quotation marks. In addition, setup.sh also accepts these options: -batch filename Installs or uninstalls TimesTen without having to respond to prompts. If filename is specified, the installation reads all installation prompts from the file. The batch file filename is optional. However, TimesTen recommends that you create the batch file and specifically indicate the instance name of the installation.
• On 64-bit systems, prompts you to install one of the following releases: – 32-bit (default) – 64-bit • Prompts you to: – Install a new instance – Upgrade an existing instance (This option allows you to incrementally install the Cache Connect option. The major and minor version numbers of the TimesTen release must match exactly.) – Display information about an existing instance or – Quit the installation. • Prompts you to chose the default instance name or chose a name for your TimesTen instance.
• Copies the daemon scripts into the appropriate directories. • If installed by user root, configures the system to start the daemon when the system boots. • Creates the directory where data stores created by the TimesTen demo applications will reside. By default they reside in /var/ TimesTen/TTinstance/DemoDataStore. • Starts the daemon. • If there are other instances of the same patch release of TimesTen installed on the same machine, prompts you to provide a unique port to be used by the TimesTen daemon.
If you installed TimesTen as root, the daemon startup file on HP-UX is: /etc/rc.config.d/tt_TTinstance If you installed TimesTen as a non-root user, It is: install_dir/startup To stop the daemon manually, use the utility command: ttDaemonAdmin -stop To start the daemon manually, use the utility command: ttDaemonAdmin -start Uninstalling TimesTen To uninstall TimesTen, follow these steps: 1. Log in as the TimesTen instance administrator if installing as non-root, or log in as user root. 2.
command to determine which port is being used by the instance. Using TimesTen in a memory window In order to use a TimesTen instance running in a memory window, you must launch your application using the HP-UX setmemwindow(1M) command. For example, given instance tt_ins1, use: % setmemwindow -j -i `getmemwindow tt_ins1` TimesTen utilities are used without the setmemwindow command, for example: % ttBackup ...
application SHMEM_MAGIC may result with an Invalid Argument error (EINVAL, errno=22) when attempting to connect to TimesTen. If a connection is made to a data store with ExclAccess=1, then memory windows will not be used. In this case, TimesTen does not allocate shared memory but rather space for the data store is allocated from the process' private data space. Troubleshooting TimesTen support may ask for all of the following in order to diagnose a problem using memory windows.
• Not enough core (ENOMEM, errno=12) indicates a problem allocating the requested amount of shared memory. Can you attach with small PermSize and TempSize attributes? • Shared memory can be fragmented. Sometimes, you can attach with increasingly larger segments until you allocate what you want.
# mount /usr/cdrom/TimesTen7.0 After the CD-ROM setup is complete, you can install TimesTen as follows: 5. Still logged in as user root or the TimesTen instance administrator, run the setup script by typing: # cd mount_dir # ./setup.sh where mount_dir is the directory where the CD is mounted (e.g.: /usr/cdrom/TimesTen7.0). • To add the Cache Connect to Oracle option to an existing TimesTen installation, use the -installCache option with the startup script.
-doc Installs documentation. -help Displays the help message. -verbose Displays extra installation information. The CD contains tar files of TimesTen. If the setup script cannot find the tar files to extract from, it prompts you for their location. 6. Enter your response to the setup script prompts. Note: To install or uninstall TimesTen without having to respond to prompts, use the -batch flag with the setup.sh script.
– Data Manager only – Client only • Prompts you for the location of your TimesTen installation and specific files, if installing as a non-root user. • Prompts you to specify the daemon port number. If no instances of TimesTen are installed on the machine, or if no instances use the default port number 17000 for 32-bit installations and 17001 for 64bit applications, prompts you to use the default port number. • Prompts you to determine if Access Control should be enabled, except for Client-only installs.
Working with the TimesTen daemon and server The TimesTen daemon starts automatically when the operating system is booted and operates continually in the background. Application developers do not interact with timestend directly; no application code runs in the daemon and application developers do not, in general, have to be concerned with it. Application programs that use TimesTen data stores communicate with the daemon transparently by using TimesTen internal routines.
Installing TimesTen on Linux systems This section discusses installation and some related topics for Linux systems. Note: Before beginning installation, be sure that the prerequisites defined in “Installation prerequisites” on page 25 have been met. Installing TimesTen To install TimesTen on your Linux system, follow these steps: 1. Log in as the TimesTen instance administrator if installing as non-root, or log in as user root. 2. Load the CD-ROM into the CD drive as follows: # mount/mnt/cdrom 3.
removes all files it had installed. In addition, setup.sh also accepts these options: -batch filename Installs or uninstalls TimesTen without having to respond to prompts. If filename is specified, the installation reads all installation prompts from the file. The batch file filename is optional. However, TimesTen recommends that you create the batch file and specifically indicate the instance name of the installation.
minor version numbers of the TimesTen release must match exactly.) – Display information about an existing instance or – Quit the installation. • Prompts you to chose the default instance name or chose a name for your TimesTen instance. See “Installation instances” on page 23. • Prompts you to install TimesTen: – Oracle TimesTen In-Memory Database – Oracle TimesTen In-Memory Database with Cache Connect to Oracle • Prompts you to install one of the following components.
• If there are other instances of the same patch release of TimesTen installed on the same machine, prompts you to provide a unique port to be used by the TimesTen daemon. • If the TimesTen Server is being installed, prompts you to configure the Server: server name, port number and logging options. • Prompts you to install the TimesTen documentation. The daemon writes a timestend.
1. Log in as the TimesTen instance administrator if you installed as nonroot, or log in as user root. 2. The TimesTen setup script is in the install_dir/bin directory. Run the script with the -uninstall flag in a directory outside of the installation directory, by typing: # install_dir/bin/setup.sh -uninstall Uninstalling the system removes all TimesTen libraries and executables and also stops and uninstalls the daemon and Server. You can execute ps to verify that all TimesTen processes have terminated.
• You can run the setup script with the option -install or uninstall (default is -install). When you use the -uninstall option, the script stops the daemon if it is running and removes all files it had installed. Note: To uninstall TimesTen, you must run setup.sh -uninstall in a directory outside of the installation directory that you wish to uninstall. For example to uninstall the default instance run /opt/TimesTen/tt70/bin/setup.sh -uninstall. In addition, setup.
release are assigned default answers and may produce unexpected results when batch files from different versions are used. The setup script performs these actions (unless your answers resulted in termination of the installation process): • Prompts you to: – Install a new instance – Upgrade an existing instance (This option allows you to incrementally install the Cache Connect option. The major and minor version numbers of the TimesTen release must match exactly.
• Copies the daemon scripts into the appropriate directories. • If installed by user root, configures the system to start the daemon when the system boots. • Creates the directory where data stores created by the TimesTen demo applications will reside. By default they reside in /var/ TimesTen/TTinstance/DemoDataStore. • Starts the daemon. • If there are other instances of the same patch release of TimesTen installed on the same machine, prompts you to provide a unique port to be used by the TimesTen daemon.
To start the daemon manually, use the utility command: ttDaemonAdmin -start Uninstalling TimesTen To uninstall all TimesTen components: 1. Log in as the TimesTen instance administrator if you installed as nonroot, or log in as root. 2. The TimesTen setup script is in the install_dir/bin directory. Run the script with the -uninstall flag in a directory outside of the installation directory, by typing: # install_dir/bin/setup.
Note: The Cache Administrator will not work if it is running on a Windows machine with the Windows Firewall ON (this is the usual setting). In this case, the Windows Administrator must add an exception to allow the Cache Administrator to connect through the Windows Firewall. For details on setting the environment variables required to use Cache Connect to Oracle, see “Environment modifications” on page 74. For details on setting up the web server, see “Web server configuration” on page 79.
4. Click Next or Previous to view additional messages. Note: You can also use the ttDaemonLog utility to view messages logged by the TimesTen Data Manager. For a description of the system administration utilities, see "Utilities" in the Oracle TimesTen InMemory Database API Reference Guide. Informational messages on UNIX systems As the TimesTen daemon operates, it generates error, warning, informational and debug messages for TimesTen system administration and for debugging applications.
*.debug /var/adm/syslog/syslog.log user.err; user.warn; user.info /var/adm/messages To make changes to /etc/syslog.conf, you must have root privileges or be the TimesTen instance administrator. Changes only take effect after the syslog daemon (syslogd) process is terminated (with the command kill -1) and restarted. For further details, see your operating system's documentation for syslog.conf or syslogd for information on configuring this file. Note: If the /etc/syslog.
Environment modifications This section describes various environment variables that you may need to set, depending on the features of TimesTen that your application uses. The following table summarizes, in alphabetical order, the environment variables detailed in this section and other parts of this guide. Some of these environment variables are platform specific.
Environment Variable What to include For settings and other information, see: SYSODBCINI Set to the location where the sys.odbc.ini file used by TimesTen system data stores is to be found. This environment variable should be set in the start-up script. “SYSODBCINI environment variable” on page 76 SYSTTCONNECTINI Set to the location where the sys.ttconnect.ini file used by TimesTen Client applications to define logical server names.
application. If TimesTen cannot locate a user DSN file, the system DSN file located in /var/TimesTen/sys.odbc.ini will be used. Also, see “Defining data sources for the demo applications” on page 83 for more information on the .odbc.ini file. For non-root installations, TimesTen also looks for the sys.odbc.ini file under install_dir/info. SYSODBCINI environment variable TimesTen applications use the sys.odbc.ini file to define system data sources and their data store attributes.
CLASSPATH environment variable On Windows and UNIX platforms, add install_dir/demo and install_dir/lib/ttjdbcjdk_version.jar. to the CLASSPATH environment variable. For example, for JDK 5.0, set the CLASSPATH environment variable to: install_dir/lib/ ttjdbc5.jar. ORACLE_HOME environment variable On platforms where the Cache Connect to Oracle option is supported, to work with Oracle data, the TimesTen Oracle agent must be running.
On HP-UX 64-bit systems, add install_dir/lib to the LD_LIBRARY_PATH environment variable. If you are using the Cache Connect to Oracle option, SHLIB_PATH must also contain $ORACLE_HOME/lib and must not contain $ORACLE_HOME/lib32. See “ORACLE_HOME environment variable” on page 77. On Tru64 UNIX systems, add install_dir/lib directory to the LD_LIBRARY_PATH environment variable.
Web server configuration The TimesTen daemon contains an embedded web server, that is used for the Cache Administrator if the Cache Connect to Oracle option is installed. If you select to enable the web server at install time, TimesTen enables it by setting the -webserver option in the ttendaemon.options file.
CGIROOT — A subdirectory of WEBROOT where the CGI scripts are located. The path should begin and end with a '/' on all platforms. The default is /cgi-bin/. PERL — The path to the Perl interpreter. The path is set by the TimesTen installation scripts. Do not change the default path unless you are certain that the path is for a Perl version that is compatible with TimesTen and that it contains all the required libraries. The path should point to the Perl binary, not the Perl directory.
column and index definitions. When TimesTen restores a table in a new data store, it also restores the table’s indexes. Note: The ttMigrate utility cannot migrate data stores across different hardware platforms. For example, you cannot migrate a Windows data store to a Solaris data store. The release of ttMigrate must also match the release of the data store you are copying from or to.
% /opt/TimesTen/tt70/bin/ttMigrate -rx DSN=Salestt70 sales.dat Using the ttBulkCp utility The ttBulkCp utility copies table data between TimesTen data stores and ASCII files. The data files used by ttBulkCp can only contain rows from a single table. They also do not store the table’s column or index definitions. Therefore, when migrating from one TimesTen data store to another with ttBulkCp, you must first create the tables and indexes in the new data store manually.
% /opt/tt60/32/bin/ttBulkCp -o DSN=source600 able able.save % /opt/tt60/32/bin/ttBulkCp -o DSN=source600 baker baker.save Next create a new data source name, source_tt70 for the TimesTen 7.0 data store, and execute the commands: % /opt/TimesTen/tt70/bin/ttIsql -connStr DSN=source_tt70 -f create.sql % /opt/TimesTen/tt70/bin/ttBulkCp -i DSN=source_tt70 able able.save % /opt/TimesTen/tt70/bin/ttBulkCp -i DSN=source_tt70 baker baker.
A sample file containing definitions for the DSNs required by the TimesTen demo applications is provided in /var/TimesTen/ sys.odbc.ini, if your product was installed as root. If installed by a non-root user the file is located in install_dir/info/sys.odbc.ini. Building the demo applications Source code and makefiles are provided for all the demo applications. See the README file in install_dir/demo for more details about the demo directory.
• Is the TimesTen service running? To start the service, double-click Control Panel > Administrative Tools > Services, choose the TimesTen Data Manager service, and click Start. Building and running the JDBC demo applications Source code for a demo application is provided in the install_dir/ /demo/jdbc directory as part of the TimesTen Data Manager distribution. Information about these demos is included in the README file included in the demo directory.
Installation problems To avoid problems during installation, make sure you have met all prerequisites. Using information in the installation guide and the release notes, check that: • You are running a supported version of the OS. • You have sufficient disk space. • On UNIX, you are installing as root or the TimesTen instance administrator. • For Windows, you are installing as user Administrator who is a member of the local Administrators group. • You have installed all required operating system patches.
– 3 Data Store Upgrades Introduction When a TimesTen data store is loaded into shared memory, many of its attributes are fixed, including size, logging options, TimesTen software release number, and the location of its checkpoint and log files on disk. This chapter describes the steps required to change these attributes and to upgrade TimesTen data stores when you install a new version of TimesTen. Data store compatibility Starting with TimesTen version 7.0.0.0.
backward-compatible data types, see “Type specifications” on page 8 in the Oracle TimesTen In-Memory Database SQL Reference Guide. Because some of the new Oracle data types have the same names as the backward-compatible TimesTen data types, a set of aliases has been added for addressing the data types. Which data types the aliases refer to depends on the TypeMode that has been set for the data store.
the same as the character set specified for the Oracle database that the TimesTen data store connects to. • Replication is not possible between data stores with different character sets. Because data stores created with versions of TimesTen prior to 7.0 do not have a data store character set specified, a special data store character set, TIMESTEN8, has been created, which allows replication compatibility between data stores created by TimesTen 7.0 and those created by earlier releases.
Converting data types to Oracle data types Note: If you intend to use your data store with TimesTen Cache Connect to Oracle, you must convert your data types to Oracle data types. However, you will not be able to perform an online upgrade using replication. To convert the data types from a release prior to TimesTen 7.0 to Oracle data types, you must use the -convertTypesToOra option for ttMigrate when you restore your data store as part of your upgrade procedure.
Data store character set conversion Beginning with TimesTen 7.0, a character set must be specified for each TimesTen data store using the DSN attribute DatabaseCharacterSet. In some cases, you may need to change the configured data store character set as part of the upgrade process.
4. Load the data store from the file using ttMigrate with the -noCharsetConversion command line option. This option ensures that no character values are changed when the data is loaded into the DSN using the new character set. For example: ttMigrate -r -noCharsetConversion DSN=SalesData salesdata.
Upgrade modes TimesTen allows you to perform these kinds of upgrades: In-place upgrades In-place upgrades are available for moving to a new patch release of TimesTen, such as moving from the first patch release of 7.0, version 7.0.1.0.0, to the second patch release of 7.0, version 7.0.2.0.0.
Online upgrades with replication When upgrading to a new major release of TimesTen, you may have a mission critical data store that needs to remain continuously available to your applications. You can use TimesTen replication to keep two copies of a data store synchronized, even when the data stores are from different versions of TimesTen, allowing your applications to stay connected to one copy of the data store while the other one is being upgraded.
a Client/Server online upgrade from a TimesTen version prior to 6.0” on page 113. • If you are upgrading from a version of TimesTen that is 6.0 or above, the process is much easier. Starting with 7.0, TimesTen Server is able to talk directly to all versions of TimesTen Client from 6.0 onward. There is no need to keep the old installation of TimesTen Server when upgrading to the new version in this case. See “Performing a Client/Server online upgrade from TimesTen version 6.0 and above” on page 116.
utility. (See "ttAdmin" in Oracle TimesTen In-Memory Database API Reference Guide.) In order to unload a data store: 1. Disconnect all applications from the data store. 2. In this example, the data store original is from the previous release. The data store upgrade is in the new release.
Performing an offline upgrade You can do an offline upgrade by exporting the data store into an external file using either the ttMigrate or ttBackup utility, then restoring the data store with the desired changes. These update procedures require that all applications be disconnected from the data store and that the data store be unloaded from shared memory. For applications that require continuous availability, see “Performing an online upgrade with replication” on page 104.
Note: After ttMigrate has been used, all autorefresh cache groups in the destination data store have AUTOREFRESH STATE set to OFF, no matter how it was set on the source data store. Reset AUTOREFRESH STATE to ON by using the ALTER CACHE GROUP statement. Moving to a different directory The TimesTen daemon identifies a data store by the full path name of the data store’s checkpoint files.
Note: Before moving a replicated data store to another machine, you should be experienced with TimesTen replication. We highly advise calling TimesTen customer support for help with this procedure. To copy a data store from one system to another with the same CPU architecture and operating system: 1. Back up the data store on the original system using ttBackup. 2. Move the backup to the new system. 3. Reconfigure the replication scheme on any replicated data stores to identify the new host machine.
Reducing data store size Once a data store has been defined with a particular size for the permanent partition (indicated by the PermSize DSN attribute), it cannot be loaded at a smaller size, even if tables or rows are deleted. A copy of the data store made with ttBackup also has the data store’s permanent partition size embedded in it. To reduce the allocated size of the permanent partition of a data store, save a copy using the ttMigrate utility with the -noRepUpgrade option.
Note: The temporary partition size of a data store may be changed by simply modifying the TempSize attribute of the DSN, unloading the data store from memory, and then reconnecting to it. See “Unloading a data store” on page 95 for the steps to unload a data store from memory. Moving between 32-bit and 64-bit data stores The internal format of a 32-bit TimesTen data store differs from that of a 64-bit data store. To convert a 32-bit data store to a 64-bit data store: 1.
the steps outlined in “Moving between 32-bit and 64-bit data stores” on page 101. If you need to upgrade two or more data stores that are replicating to each other, you must perform a few extra steps in order to ensure that replication will continue to operate during and after the upgrade. For example, to migrate two replicating data stores, master1 on host machine masterhost and subscriber1 on host machine subscriberhost, from TimesTen release 5.1 to TimesTen release 7.0, perform the following steps: 1.
Now upgrade data store subscriber1 from release 5.1 to release 7.0. Perform the following steps: 1. On the machine subscriberhost, use the 5.1 release’s ttAdmin utility to stop the replication daemon: ttAdmin -repStop subscriber1 2. Use the 5.1 release’s ttDestroy utility to destroy data store subscriber1, where the data store’s files are located in the directory data_store_path: ttDestroy data_store_path/subscriber1 3. Use the 7.
Performing an online upgrade with replication In “Performing an offline upgrade” on page 97 we showed how to perform various maintenance operations on TimesTen data stores that require that all applications be stopped. This section describes how to use the TimesTen replication feature to perform online upgrades for applications that require continuous data availability. You can do an online upgrade when moving between major TimesTen releases.
release data store using ttMigrate from the newer release, and then reconnecting all applications to the upgraded data store. Note: The ttMigrate -r -rename option, used to rename the owner of data store tables, cannot be used with online upgrades. The general steps in an online upgrade include: • Disconnect all applications from the data store to be upgraded. • Shut down replication on the system being upgraded.
2. 3. Connect all applications to the active data store, if they are not already connected. Disconnect all applications from the upgrade data store. 4. Set replication to the upgrade system to the pause state. 5. Wait for updates to propagate to the active system. 6. Stop replication. 7. Back up the data store with ttMigrate -c. 8. Stop the TimesTen daemon for the old release of TimesTen. 9. Install the new release of TimesTen. 10.
16. 17. Wait for all of the updates to propagate to the upgrade system. Reconnect all applications to the upgrade data store. After the above procedures have been carried out on the upgrade system, the active system can be upgraded using the same steps. Limitations Online upgrades can be performed only on data stores for which all the user tables meet the replication requirements. All the user tables must contain either a PRIMARY KEY declaration or have a unique index declared over non-nullable columns.
Online upgrade example This section describes how to do an online upgrade of two bidirectionally replicated TimesTen data stores, using a concrete example. We’ll refer to the two TimesTen systems being upgraded as the upgrade system, on which TimesTen will be upgraded along with the data store, and the active system, which will remain operational and connected to the application for the duration of the upgrade.
Follow the steps listed here in the order they are presented. The online upgrade procedures are: Step Upgrade System Active System 1.
Step Upgrade System Active System 3. Wait for all replication updates to be sent to the data store active. You can verify that all updates have been sent by applying a recognizable update to a table reserved for that purpose on the data store upgrade. When the update appears in the data store active, you know that all previous updates have been sent. 4.
Step Upgrade System 6. Use ttMigrate to back up the data store upgrade. If the data store is very large, this step could take a significant amount of time. If sufficient disk space is free on the /backup file system, the following ttMigrate command can be used: Active System ttMigrate -c DSN=upgrade /backup/upgrade.dat 7. If the ttMigrate command is successful, destroy the data store upgrade.
Step Upgrade System 9. Use ttMigrate to load the backup created in Step 6 into a new version of the data store upgrade: Active System ttMigrate -r "DSN=upgrade;AutoCreate=0" /backup/upgrade.dat If the data store is temporary (Temporary=1), first use ttAdmin -ramLoad: ttAdmin -ramLoad upgrade Note: In this step, you must use the ttMigrate utility supplied with the new release of TimesTen to which you are upgrading. 10.
Step Upgrade System 11. Use ttAdmin to start the replication agent on the new data store upgrade and to begin sending updates to the data store active: Active System ttAdmin -repStart upgrade 12. Verify that the data store upgrade is receiving updates from active. You can verify that updates have been sent by applying a recognizable update to a table reserved for that purpose in the data store active. When the update appears in upgrade, you know that replication is operational. 13.
release of TimesTen. For example, a 5.0 client can connect to a 7.0 Server DSN. Note: Applications linked to newer TimesTen clients cannot connect to a Server DSN of any older releases. For example, a 5.1 client cannot connect to a 5.0 Server DSN. Note: For security reasons, client/server communication is not normally allowed between TimesTen 7.0 and previous versions. In order to perform an online upgrade with client/server, you must start the main TimesTen 7.
The TTCONNECTINI file at the TimesTen 5.1.x client machine contains: [my_server_51] Network_Address=my_server TCP_PORT=15102 Because TCP_PORT is set to the TimesTen 5.1 Server port number, the 5.1 server dynamically loads the correct driver for the server DSN. The .odbc.ini file at the TimesTen 5.
Performing a Client/Server online upgrade from TimesTen version 6.0 and above As of TimesTen 7.0, TimesTen Server is able to talk directly to all user applications linked with TimesTen Client ODBC driver version 6.0 or higher. This makes the procedures for upgrading a TimesTen Client/ Server installation much simpler.
3. Use ttMigrate to migrate the data store from the old version to the new version. See “Moving between 32-bit and 64-bit data stores” on page 101 for an example of this procedure. 4. Start the new version of TimesTen Server, if you have not already. The client applications now have access to the upgraded data stores.
These tables do not take up much space and are helpful when debugging upgrade problems. However, you can drop these tables if you do not experience problems with replication after running ttMigrate. Example 3.1 For example, after two migrations, the data store might contain tables which look like this: TTREP_SCHEMA_VERSION_004.REPELEMENTS TTREP_SCHEMA_VERSION_004.REPLICATIONS TTREP_SCHEMA_VERSION_004.REPPEERS TTREP_SCHEMA_VERSION_004.REPSTORES TTREP_SCHEMA_VERSION_004.
Index Numerics D 64-bit platforms, supported 19 daemon on AIX 61 on HP-UX 53 on Linux 65 on Solaris 48, 69 timestend 48, 65, 69 daemon home directory 12 daemon port Access Control 13 daemon port number changing on UNIX 39 daemon startup script 48, 53, 61, A Access Control authentication 13 Cache Connect 8 Client/Server 8 daemon home directory 12 daemon port 13 directories and files 12 GroupRestrict 13 instance home directory 12 introduction 7 limitations 7 password file 12 privileges 13 Replication 8 se
F files .odbc.
to a new patch release 96 N names instances 23 non-root installation limitations 7 prerequisites 37 O ODBC installation 73 ODBCINI file environment variable 75, 76 off-line upgrade 93, 97 on-line upgrade 94 limitations 107 requirements 107 online documentation 85 online help 73 Oracle Connect Administrator web server configuration 79 working with 70 ORACLE_HOME environment variable 35, 77 P PASSWORD_FILE Web Server option 80 PATH environmental variable on NT 41 PERL Web Server option 80 PERLLIB Web Serve
TimesTen daemon on AIX 61 TimesTen instance administrator 9 TimesTen instance users external user 10 internal user 10 overview 10 TimesTen registry creating 38 TimesTen Server on AIX 61 on HP-UX 53 on Solaris 48, 69 on Windows 43 timestend process 48, 65, 69 timestend.