
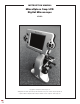
Instruction Manual


6
Troubleshooting
If you do not get an image (or a good image) to view on your
LCD screen, here are a few things to double check:
5. Make sure the AC Adapter is plugged in to an AC power
source and attached to the microscope securely and
correctly.
6. Make sure you have the illuminator turned on with
maximum brightness adjustment (this is the normal
position).
7. Make sure the objective lens you have chosen is set
correctly and it has clicked into the right position.
8. Make sure that the lter wheel is set correctly at a click
position so that the illuminated light comes up properly –
the normal position for most usage is with the clear hole.
9. Make sure the specimen slide is correctly tted into the
clamp on the mechanical stage and properly centered.
If the stage is wobbly or is erratic in movement, make sure
all screws on the top and side of the stage are tight.
Create Your Own Slides
Use a dropper to place a drop of pond water onto a blank
slide and use the microscope to view any organisms existing
in the water.
Adding a cover slip on top of liquid will allow for much thinner
viewing surface.
Use of Gum solution will make a permanent slide. The Gum
will stick the Cover slips to the slide. Dyes can be used on
specimens to bring out more detail much like the included
prepared slides. This subject matter goes beyond this manual
and further study would be required.
Salt Water Prawns
(Brine Shrimp)
Hatching
First, pour one pint of fresh water into a container and let
stand for approximately 30 hours. Pour half of the sea salt into
the container and stir until all the salt has dissolved. This will
create the saline solution that will be used to grow the brine
shrimp. Pour an additional pint of fresh water into a second
container and let stand for approximately 30 hours. This will
create spare water for adding to the hatchery when the salt
water evaporates.
Next place some of the salt solution into the hatchery using a
dropper. Then carefully place some of the eggs into hatchery
water. Place in a lit area away from direct sunlight at preferred
temperature of 75-77 degrees F. The shrimp will begin to
hatch in 2-3 days. If any water evaporates during this time,
replace with water from the second container.
Feeding
Feed your shrimp every other day using small pinch of dry
powdered yeast (included). Overfeeding will darken the water
and it will stagnate. If stagnation occurs remove shrimps and
place into fresh salt water solution.
Viewing
Use a dropper to place shrimp from hatchery onto a blank
slide or place hatchery directly under microscope with lid
removed. Take images and movies of the prawns to create a
record of the lifecycle of the brine shrimp.
Note: Shrimp eggs and shrimp are not suitable for con-
sumption