
Writer Guide


6) To stop inserting controls, click on the Select button on the
Form Controls toolbar, or click on any of the controls you have
just inserted. The mouse pointer changes back to its normal
appearance.
Tip
Holding down Shift when creating a form control makes the
control square. If you press Shift when resizing an existing
control, its proportions are kept the same.
Note
When you insert a group box, list box, or combo box, a wizard
is launched to guide you through the setup. If you prefer not to
run the wizard, click the Wizards On/Off button on the
Form Controls toolbar.
Configure controls
After inserting the controls, you need to configure them to look and
behave as you want. Right-click on a form control within your
document and select Control from the pop-up (context) menu to open
the Properties dialog box for the selected control. Double-clicking on a
form control also opens this dialog box.
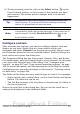
The Properties dialog box has three pages: General, Data, and Events.
For simple forms, only the General page is of any interest. On this page
you can set the look and feel of the control. See “Configure form
controls” on page 487 and “Form control formatting options” on page
499 for more information, and the descriptions in the Help for details.
Configuration for use with a database is discussed in “Creating a form
for data entry” on page 494.
The fields on this dialog box vary with the type of control. For example:
• Some controls have visible labels, such as Push Button and Option
Button. The label text can be set.
• The List Box contains a list of options to choose from. Set these in
the List entries box.
Notice the scroll bar in this dialog box. You can use the scroll bar or
enlarge the dialog box to see additional fields.
Chapter 15 Using Forms in Writer 477
Free eBook Edition