
Writer Guide


4) Click OK. The result will be a typical table of contents.
Some tips you may find useful:
• If some of your headings do not show up in the table of contents,
check that the headings have been tagged with the correct
paragraph style. If a whole level of headings does not show up,
check the settings in Tools > Outline Numbering. See
“Defining a hierarchy of headings” in Chapter 6 (Introduction to
Styles) for more information.
• The TOC appears with a gray background. This background is
there to remind you that the text is generated automatically. It is
not printed and does not appear if the document is converted to a
PDF. To turn off this gray background, go to Tools > Options >
OpenOffice.org > Appearance, then scroll down to the Text
Document section and deselect the option for Index and table
shadings.
This change may leave a gray background showing behind the
dots between the headings and the page numbers, because the
dots are part of a tab. To turn that shading off, go to Tools >
Options > OpenOffice.org Writer > Formatting Aids and
deselect the option for Tabs.
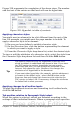
• If you cannot place the cursor in the TOC, choose Tools >
Options > OpenOffice.org Writer > Formatting Aids, and
then select Enable in the Cursor in protected areas section.
If you add or delete text (so that headings move to different pages) or
you add, delete, or change headings, you need to update the table of
contents. To do this:
1) Click anywhere in the TOC.
2) Right-click and select Update Index/Table from the pop-up
menu.
Customizing a table of contents
Almost every aspect of the table of contents can be customized to suit
the style and requirements of your document. However, with the
flexibility also comes some complexity and it is good to have in mind
the desired end result.
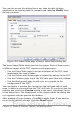
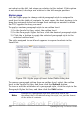
Start by clicking in the document where you want the table of contents
to apear and choose Insert > Indexes and Tables > Indexes and
Tables to open the Insert Index/Table dialog box.
382 OpenOffice.org 3.x Writer Guide
Free eBook Edition