
Getting Started Guide

Method 1 (selecting a file):
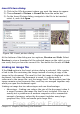
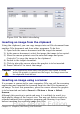
1) In the theme’s Properties, on the Files page, click the Find Files
button. The Select path dialog opens.
2) You can enter the path for the file’s directory in the Path text box,
or you can navigate to locate the file’s directory. Use the File type
drop-down list to help limit the search.
3) Click the Select button to start the search.
4) A list of graphic files is then displayed in the window. You can use
the File type filter again to further limit the search.
5) Select the files to add. To select more than one file, hold the
Control key down while you click on each file.
6) Finally, click Add.
Method 2 (drag and drop):
1) Open the document containing an image you want to add to the
Gallery, and display the Gallery theme to which you want to add
it.
2) Position the mouse pointer above the image, without clicking.
3) If the mouse pointer changes to a hand symbol, the image refers
to a hyperlink. In this case, press the Alt key while you click the
image, to select it without activating the link. If the mouse pointer
does not change to a hand symbol, you can simply click the image
to select it.
4) Once the image is selected, evident from the green selection
handles around it, release the mouse button. Click again on the
image, keeping the mouse button pressed for more than two
seconds. Without releasing the mouse button, drag the image into
the document.
5) Release the mouse button.
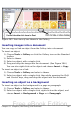
Deleting images from the Gallery
To delete an image from a theme that you created:
1) Right-click on the name of the image file or its thumbnail in the
Gallery.
2) Click Delete on the pop-up menu. A message appears, asking if
you want to delete this object. Click Yes.
Note
Deleting the name of a file from the list in the Gallery does not
delete the file from the hard disk or other location.
Chapter 11 Graphics, the Gallery, and Fontwork 349
Free eBook Edition