
Calc Guide

Clicking the Function button inserts an equals (=) sign into the
selected cell and the Input line, thereby enabling the cell to accept a
formula.
When you enter new data into a cell, the Sum and Equals buttons
change to Cancel and Accept buttons .
The contents of the current cell (data, formula, or function) are
displayed in the Input line, which is the remainder of the Formula Bar.
You can either edit the cell contents of the current cell there, or you
can do that in the current cell. To edit inside the Input line area, click
in the area, then type your changes. To edit within the current cell, just
double-click the cell.
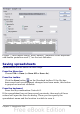
Individual cells
The main section of the screen displays the cells in the form of a grid,
with each cell being at the intersection of a column and a row.
At the top of the columns and at the left end of the rows are a series of
gray boxes containing letters and numbers. These are the column and
row headers. The columns start at A and go on to the right, and the
rows start at 1 and go down.
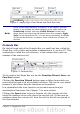
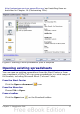
These column and row headers form the cell references that appear in
the Name Box on the Formula Bar (see Figure 3). You can turn these
headers off by selecting View > Column & Row Headers.
Sheet tabs
At the bottom of the grid of cells are the sheet tabs. These tabs enable
access to each individual sheet, with the visible (active) sheet having a
white tab. Clicking on another sheet tab displays that sheet, and its tab
turns white. You can also select multiple sheet tabs at once by holding
down the Control key while you click the names.
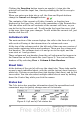
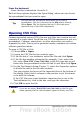
Status bar
The Calc status bar provides information about the spreadsheet and
convenient ways to quickly change some of its features.
Figure 4: Left end of Calc status bar
14 OpenOffice.org 3.x Calc Guide