
User's Guide


Network Location:!Enter a street address for the first access point. To add access points, you will
be shown a map that you click on to place access points. By entering an address here, you will be
centered on the correct location for your network.!
Email for Notifications:!Enter the email addresses, separated by spaces, for all people you’d like
to receive “outage” notifications. These are sent hourly.
When finished, click “Create” to save your new network settings.
Step 3: Add access points to your network
It’s time to let CloudTrax know which access points you want to include in the network. Adding
them to CloudTrax will allow you to manage and monitor the access points from anywhere.
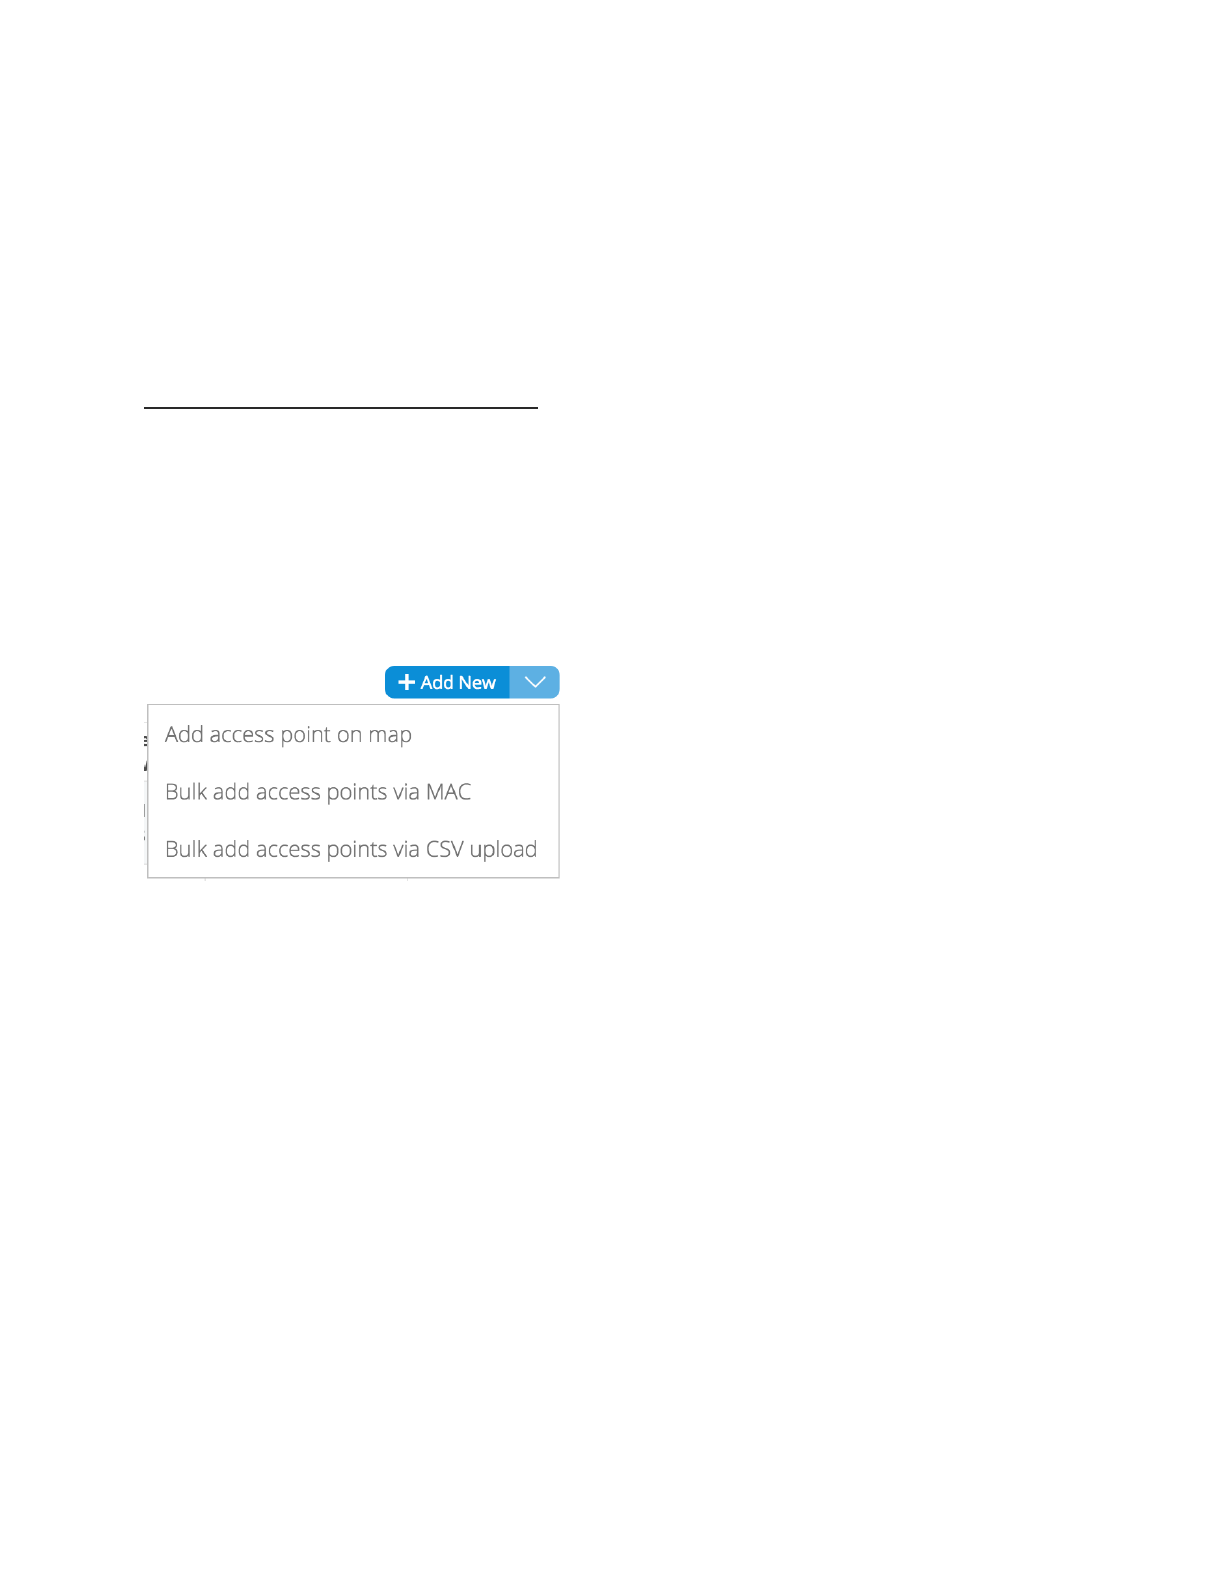
Navigate to the Manage > Access Points screen.!
There are three options to add access points to your network: click the "Add New" button to add
access points one at a time by clicking on a map, or use the down arrow to the right of that to add
access points in bulk.
If you add access points the default way, you’ll be taken to the Map tab of the Access Points!page.
A Google map, centered on the address you entered when you created the network, will show a
popup to enter your first access point. You can often (depending on location) click the “Satellite”
view button and zoom in for a closer look.!
6