
Manual


TX NR702,602 t r_book Page 43 b'Io_day,July 26, 2004 11:05 AM
First Time Setup--Continued
Component Video Setup
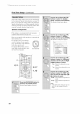
If you connect to a COMPONENT VIDEO IN, you nmst
assign it to an input selector. For example, if you connect
your DVD player to COMPONENT IN 3, you should
assign it to the DVD input selector.
For the TX-SR702/702E, TX-SR602E, and Australian
TX-SR602, if you want to output composite and S-Video
sources from the COMPONENT VIDEO OUT, select
Video, as explained below.
Input Analog audio COMPONENT
selector input (fixed) VIDEO IN jack
DVD DVD IN 1
VIDEO 1 VIDEO 1
VIDEO 2 VIDEO 2
VIDEO 3 VIDEO 3
VIDEO 4 VIDEO 4
*On the TX-SR702/702E, TX-SR602E, and Australian
TX-SR(02, he dehml se in_, is Video. For o her models, the
defaull selting is Last.
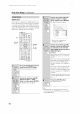
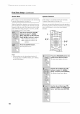
TSh_UnPi,ti_ sdt :hpl nep [ NTER].
;, .........
_q_:ihlo_Ct p _ sCs°t_epOnent
The Component Video Setup menu
appears.
............ _,_o
......................................................................................................7/:
!;!!!!!;iiii
........................................................... :Vi deo[_
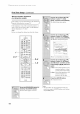
Use the Up and Down [All[V ]
buttons to select an input selec-
tor, and then use the Left and
buttons to select:
INI: Use the video component
connected to COMPO-
NENT VIDEO IN 1.
IN2: Use the video component
connected to COMPO-
NENT VIDEO IN 2.
IN3: Use the video component
connected to COMPO-
NENT VIDEO IN 3.
Video*: Output composite video
and S-Video sources from
the COMPONENT
VIDEO OUT.
Last: Select this for audio-only
iiiii¸i ii!ii!iiiiiiiiiiiiiiiiiiiiiiiiiiiii ii ii ii ii!ii ii!ii ii!ii ii ii ii ii ii ii ii ii ii ii ii ii ii i i i i ii i ii i i ii i i components
'_TX-SR702/702E, TX-SR602E, and Ausm>
lian TX-SR602 onlv.
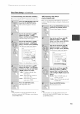
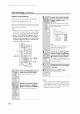
Press the [SETUP] button.
The setup menu closes.
Notes:
• If you select Last, the video source remains the same
when you select another input selector. For example,
if you set VIDEO 1 to Last, select the DVD input
selector, then select the VIDEO 1 input selector, you
can watch a DVD while listening to audio from the
component connected to the VIDEO 1 IN L/R jacks.
• This procedure can also be performed on the AV
receiver by using its [SETUP] button, arrow buttons,
and [ENTER[ button.
43