ON "tt'O_ Contents AV Receiver TX-SR702/702E TX-SR602/602E TX-SR8260 Instruction Basic Operation ,,,,,,,,,,,,,.,,,,,,, 53 Zone 2 .,,,,,,,...,,,,,,,,,,,,,,,,,,.,..,,,,, 76 Manual iiiiiiiiiiiiiiiiiiiiiiiiiiiiiiiiiii Thank you for purchasing an Onkyo AV Receivel: Please read this manual thoroughly before making any connections and plugging it in. Following the instructions in this manual will enable you to obtain optimum perlk)rmance and listening enjoyment from your new AV Receiver.
TX NR702,602 t r_book Page 2 Monday, hdy 26, 2004 11:05 AM WARNING: TO REDUCE THE RISK OF FIRE SHOCK, DO NOT EXPOSE TO RAIN OR MOISTURE. i IWARNING/I OR ELECTRIC THIS The lighming flash with arro_hcad symbol, within an CAUTION: /_ TO REDUCE THE RISK DO NOT REMOVE USER-SERVICEABLE SERVICING PERSONNEL. OF ELECTRIC COVER PARTS TO AVIS / /gX APPARATUS SHOCK, (OR BACK). NO INSIDE.
TX NR702,602 t [_book Page 3 Monday, July 26, 2004 11:05 AM Precautions For U.S. Models 1. Note to CATV system installer: This reminder is provided to call the CATV system installer's attention to Section 820-40 of the NEC which provides guidelines ular.
TX NR702,602 t r_book Page 4 Monday, July 26, 2004 11:05 AM Supplied Precautions--Continued For British Accessories Make sure yon have the following accessories: models Replacement and monnting of an AC plug on tile power snpply cord of this unit should be performed only by qualified service personnel.
TX NR702,602 t r_book Page 5 Monday, July 26, 2004 I1:05 AM Features Audio/Video • THX "4 Surround EX • THX Select certified Amplifier • VLSC (Vector Linear Shaping Circuitry) on all channels 7-channel amplifier Optimum Gain Volume Circuitry • Re-EQ Zone 2 capability 24-bit/192 WRAT • Pre outs for front L/R, center, surround L/R, surround back L/R, and subwoofer kHz D/A converters (Wide Range Color-coded Amplifier speaker • Composite and S-Video to component video conversion Technology)
TX NR702,602 t r_bool_ Page 6 Monday, July 26, 2004 I]:05 AM Table of Contents Important Safety Instructions .......................................................................................... 2 Precautions ....................................................................................................................... Supplied Accessories ....................................................................................................... Features .....................................
TX NR702,602 t r_bool_ Page 7 Monday, July 26, 2004 11:05 AM Table of Contents--Continued Entering a Remote Control Codes ................................................................................ Learning Commands from Another Remote Controller ............................................. Using Macros .................................................................................................................. 80 88 89 Decoder Setup ..........................................................
TX NR702,602 t r_bool_ Page 8 Monday, July 26, 2004 11:05 AM Front & Rear Panels TX-SR702/702E <---NotAmerican and Australian models TX-SR602/602E, TX-SR8260 ,<---NotAmerican and Australian models i T Not American 8 model i I I
TX NR702,602 t r_book Page 9 Monday, July 26, 2004 11:05 AM Front & Rear Panels--Continued For detailed @ information, POWER American see the pages in parentheses. @ models don't have this AV receiver "Using switch. When set to OFF, the is completely ON, it's in Standby shutdown.
TX NR702,602 t n book Page 10 Monday,July 26, 2004 11:05 AM Front & Rear Panels--Continued ! 2 3 i5i i4 For detailed int_rmation, see the pages in parentheses. AUTO: lights up when the Auto Tun- MUTING indicator (54) This indicator flashes while the AV receiver is muted. ing mode is selected, and disappears ual Tnning mode is selected. 2 REC OUT indicator (66) This indicator lights up when the REC OUT is selected.
) TX NR702,602 t nbook Page 11 Monday,July 26, 2004 11:05 AM Front & Rear Panels--Continued TX-SR602/602E, For detailed @ TX-SR8260 information, see the pages COMPONENTVIDEO These componeut IN 1,2, in parentheses. video outputs, @ MONITOR OUT (27) The S-Video or composite video jack shouM be connected to a video input on your TV or projector. an AM @ OPTICAL DIGITAL (27, 28, 30, 32, 34, 35) The nnmber of digital outputs depends on where the the AV receiver is purchased.
) TX NR702,602 t n book Page 12 Monday,July 26, 2004 11:05 AM Front & Rear Panels--Continued @ AC OUTLETS (38) These switched AC outlets can be used to supply power to other AV components. The type of outlet depends on the country in which you purchased your AV receiver. Some models have a single outlet. @ Grounding screw (TX-SR702/702E only) (36) This screw is for connecting a turntable's ground wire. @ PNONO IN (TX-SR702/702E only) (36) This tmalog input is for connecting a turntable.
TX NR702,602 t r_book Page 13 b'Io_day,July 26, 2004 11:05 AM Remote Controller To use the remote controller, point it at the AV receiver's remote control sensor, as shown below. Remote control sensor 30 ° in accordance inside with the polarity the battery diagram compartment. Notes: • The remote controller receiver is subjected may not work reliably to bright light or inverter-type if the AV light, such as direct fluorescent lights. sun- Keep this in mind when installing.
TX NR702,602 t n book Remote Page 14 Monday,July 26, 2004 11:05 AM Controller--Continued In addition to controlling the AV receiver, the remote controller has several operating modes for controlling your other AV components, including Onkyo components connected via r41. Modes are selected by using the remote controller's REMOTE MODE buttons. For detailed infomlation, see the pages in parentheses. Some of the flmctions described in this manual may not work as expected with other components.
TX NR702,602 t r_book Page 15 b'Io_day,July Remote 26, 2004 11:05 AM Controller--Continued PURE A button (RC-591M & RC-588M only) This button is used to select the Pure Audio listening mode. DIRECT button RC-591 M, RC-590M f This button is used to select tile Direct listening mode. No "PURE A" on @ TESTTONE, CH SEL, LEVEL- & LEVEL+ buttons (50) These buttons are used to adjust the level of each speaker individually. The [LEVEL-] & ]LEVEL+I buttons are also used to adjust the volume in Zone 2.
TX NR702,602 t n bool_ Page 16 Monday,July Remote 26, 2004 11:05 AM Controller--Continued i ¸II DVD mode is used to control an Onkyo nected to the AV receiver via r_-'. To set the remote [DVD] REMOTE DVD player con- controller to DVD mode, MODE button. @ STANDBY press the button This button is used te set the DVD player te Standby. @ ON button This button is used to turn on the DVD player and te set it to Standby.
7X NR702,602 t n book Remote @ Page 17 Monday,July A-B button is used to set the A-B OPEN/CLOSE This button @ VIDEO [A] OFF button @ @ a DVD's menu. 3 DISC button is used to adjust the volume to enter times for locating specific points in time. This button is used to select discs on a CD changer. is used to access Playback buttons From left to right: Previous, Phty, Next, Fast Reverse, Pause, Stop, and Fast Forward. 6 REPEAT button button RANDOM button This button tion.
2 ]nh'o En Pige 18 Monday, july 26, 2004 Remote 1:56 PM Controller--Continued I_ I .__TV _ I _ _ _, _ _. I an Onkyo MiniDisc to the AV receiver via To select MD/CDR REMOTE MODE the [MD/CDR] _- ...... @ ON button This button is used to set tile MD recorder recorder _1 TVVO buttons to enter ® REMOTE or CD to On or Standby. @ Number buttons L These I press (see page 80). I TVCH _#YThh _ mode, button. By default, this button is set to control a MiniDisc recorder.
TX NR702,602 t r_book Page 19 Monday,July Remote @ FR & FF [-4_]/[_,_] FF [_D,-] button @ Stop [I] @ 11:05 AM Controller--Continued The FR [-q_l ] button @ 26, 2004 buttons is used to start fast reverse. Tile is used to start fast forward. button This button is used to stop playback. RANDOM button This button tion. is used with the random MEMORY button This button is used with tile memory playback func- playback func- tion, which allows you to create a custom tracks.
TX NR702,602 t n book Page 20 Monday,July 26, 2004 11:05 AM About Home Theater Thanks to the AV receiver's superb capabilities, you can enjoy surround sound with a real sense of movement in your own home--just like being in a movie theater or concert hall. With DVDs you can enjoy DTS and Dolby Digital. With analog and digital TV you can enjoy Dolby Pro Logic llx or Onkyo's own DSP surround listening modes.
TX NR702,602 t n book Page 21 Monday,July 26, 2004 11:05 AM Connecting the AV receiver AV Connection Color Coding RCA-type • Before making any AV connections, read the manuals supplied with your other AV components. • Don't connect the power cord until you've completed and double-checked all AV connections. channel covers that open optical digital jacks when an optical close when it's removed.
TX NR702,602 t n book Page 22 Monday,July Connecting 26, 2004 11:05 AM the AV receiver--Continued Connecting Speaker Configuration For the best surround-sound experience, you shouM connect seven speakers and a powered snhwoofer. The following table indicates the channels you should use depending on the number of speakers that you have.
TX NR702,602 t n book Page 23 Monday,July Connecting 26, 2004 11:05 AM the AV receiver--Continued Speaker Connection Read the following before • American model only: an impedance of 6 ohms with a lower impedance, volume levels for a long Precautions connecting Connecting your speakers: Only connect speakers with or higher. If you use speakers and use the amplifier at high period of time, the built-in protection circuit may be activated.
FX NR702,602 t n book Page 24 Monday,July Connecting 26, 2004 11:05 AM the AV receiver--Continued This section explains how to connect the supplied indoor FM antenna and AM loop antenna, and how to connect commercially available outdoor FM and AM antennas. The AV receiver won't pick up any radio signals without any antenna connected, so yon must connect the antenna to use the tuner.
TX NR702,602 t n book Page 25 Monday,July Connecting Connecting If you cannot 26, 2004 11:05 AM the AV receiver--Continued an Outdoor FM Antenna achieve good reception indoor FM antenna, try a commercially door FM antenna instead. Connecting an Outdoor AM Antenna with tile supplied available out- If good reception AM loop antenna, addition cannot be achieved an outdoor to the loop antenna, using the supplied AM antenna can be used in as shown. Outdoor antenna \ Insulated antenna cabl
TX NR702,602 t n bool_ Page 26 Monday,July Connecting By connecting 26, 2004 11:05 AM the AV receiver--Continued both the audio and video outputs of your DVD player can select both the audio and video simultaneously , aud other AV components simply by selecting the appropriate v. to the AV receiver, you input source on the AV receiver. fd;>_............................................ :; o , o : Signal Flow =t:x o \ ,, o !] cZ2x I TV, projector, NNNNNNN DVD player, etc.
TX NR702,602 t r_book Page 27 b'Io_day,July Connecting 26, 2004 11:05 AM the AV receiver--Continued Monitor Out Audio Connections • Using Composite Video Use a composite video cable to connect the AV receiver's V MONITOR OUT jack to a composite video input on your TV, as shown. These connections will allow you to listen to audio from your TV via the AV receiver.
TX NR702,602 t n book Page 28 Monday,July Connecting 26, 2004 11:05 AM the AV receiver--Continued Audio Connections Video Connections • You only need to use one of the following connection methods. • Use an optical digital audio cable to connect one of the AV receiver's OPTICAL DIGITAL IN jacks to the optical output on your DVD player, as shown.
TX NR702,602 t [_book Page 29 b'kmday,July Connecting • Using a Multichannel audio output, 11:05 AM the AV receiver--Continued Connection If your DVD player supports such as DVD-Audio, 26, 2004 multichannel audio formats and it has a 5. l-channel you can enjoy DVD-Audio analog playback. Use a multichanuel analog audio cable to connect the AV receiver's DVD IN FRONT L/R, CENTER, SURR L/R, and SUBWOOFER audio output jacks to the 5.
TX NR702,602 t r_book Page 30 b'Io_day,July 26, 2004 11:05 AM Connecting the AV receiver--Continued This section how to connect shows so that you can watch videos a VCR for playback Video Connections via the AV receiver. If you connect to a component Video Connections assign • Use an S-Video cable to connect the AV receiver's S VIDEO 1 IN jack to a S-Video outpnt on your VCR, as shown.
TX NR702,602 t n book Connecting Page 31 Monday,July 26, 2004 11:05 AM the AV receiver--Continued VCR (recording) This section explains how to connect a VCR for recording from a TV or another VCR. Video Connections • Use an S-Video cable to connect the AV receiver's S VIDEO 1 OUT jack to an S-Video input on the recording VCR. Use another S-Video cable to connect the AV receiver's S VIDEO 3 IN jack to an S-Video output on your TV or playback VCR, as shown.
TX NR702,602 t n book Page 32 Monday,July Connecting 26, 2004 11:05 AM the AV receiver--Continued • Using ComponentVideo If you connect assign to a component Use a component receiver's Video Connections video cable to connect COMPONENT component You only need to use one of the following methods. video input, you must it (see page 43). VIDEO video output on your video source, Using Composite Use a composite to a as shown. connection ¥ • the AV IN 2 or IN 3jack ..........
) TX NR702,602 t r_bool_ Page33 Connecting • Using b'Io_day,J.ly Analog Connections or you want to record analog Use an analog VIDEO 11:05 AM the AV receiver--Continued If your video source doesn't following 26, 2004 have a digital from it, you'll audio outpnt, need to make the audio connection. audio cable to connect 3 IN L/R jacks to the analog your video source, • Using S-Video Use an S-Video cable to connect VIDEO 4 INPUT S VIDEO on camcorder, games _Ol.
TX NR702,602 t n book Page 34 Monday,July Connecting • Using assign 11:05 AM the AV receiver--Continued Optical If you connect 26, 2004 or Coaxial to a digital Connections audio Use an analog input, you'll need to it (see page 42). use another • Use an optical digital audio cable to connect one ofthe AV receiver's OPTICAL DIGITAL IN jacks to the optical outpnt on your CD player, as shown.
TX NR702,602 t n book Page 35 Monday,July Connecting • Using 26, 2004 11:05 AM the AV receiver--Continued Optical or Coaxial Note: Connections (playback only) If you connect assign Don't to a digital audio input, you'll need to receiver it (see page 42). connect the recorder's when the recorder's one of the AV receiver's • Use an optical digital audio cable to connect one ofthe AV receiver's OPTICAL DIGITAL IN jacks to the optical outpnt on your recorder, as shown.
TX NR702,602 t rlbook Page 36 Connecting MoIMay,July 26, 20(14 11:(15 AM the AV receiver--Continued For the TX-SR702/702E The AV receiver's PHONO IN is designed for use with a moving magnet (MM) type cartridge. Use an analog audio cable to connect the AV receiver's PHONO IN L/R jacks to the audio output on your turntable, as shown.
TX NR702,602 t n book Page 37 Monday,July Connecting 26, 2004 11:05 AM the AV receiver--Continued With r41 (Remote If you want to connect and use the AV receiver a more powerfld as a preamp, one to the PRE OUT jacks. nect all speakers tier. However, amplifier you can connect In this case, you should and the subwoofer if you have a powered it to this AV receiver's power to that power subwoofer, PRE OUT SUBWOOFER conampli- connect jack.
TX NR702,602 t r_book Page 38 b'Io_day,July Connecting The AV receiver 26, 2004 11:05 AM the AV receiver--Continued has AC outlets be used to connect the power nents that you intend on its rear panel that can • American & Australian models • Other models STANDBY/ON STANDBY/ON cords of AV other compo- to use with the AV receiver. These ON STANDBY components can then be left turned on so that they turn on and off as and when the AV receiver is turned on and set to Standby.
TX NR702,602 t rlbook Page 39 Monday,July 26, 20(14 11:(15 AM First Time Setup This chapter explains With the supplied matic Speaker output the settings speaker Setup number of speakers from each speaker setup microphone, fnnction by each speaker that you need to make before can measure and automatically connected, the Autothe test tone determine the Put the speaker setup microphone in the listening position, and connect it to the SETUP MIC ack their sizes, the distance to th
4 Setup En Pige 40 Monday,Ju b' 26, 2004 11:30 AM First Time Setup--Continued ;;;;;;;;;;;;;;;;;;;;;;;;;;;;;;;;;;;;;;;;;;;;;;;;;;;;;;;;;;;;Z CCCCCCCCCCCCL iiiiiiiiiiiiiiiiiiiiiiiiiiiiiiiiiiiiiiiiiiiiiiiiiiiiiiiiiiiiii! Pressthe[RETURNlbuttontoreturnto iiiiiiiiiiiiiiiiiiiiiiiiiiiiiiiiiiiiiiiiiiiiiiiiiiiiiiiiiiiiii !thepreviOnsnlenu" iiiiiiiiiiiiiiiiiiiiiiiiiiiiiiiiiiiiiiiiiiiiiiiiiiiiiiiiiiiiii_ o_1"Warning * iiiiiiiiiiiiiiiiiiiiiiiiiiiiiiiiiiiiiiiiiiiiiiiiiiiiiiiiiiiiii_ .or C.......
TX NR702,602 t rlbook Page 41 Monday,July 26, 20(14 11:(15 AM First Time Setup--Continued The AV receiver the MONITOR Settings When is configured OUT jacks. are divkted you've Advanced into two groups: configured Setup nsing onscreen Because the settings menu contains setup menus, they appear Basi{ which are displayed on your TV, they're Setup and AFtvan{ed settings connected to either of setup a breeze. Setup.
?X NR702,602 t r_book Page 42 b'Io_day,July 26, 2004 11:05 AM First Time Setup--Continued Use the Up and Down [&I/[V] buttons to select "1. Digital Input," and then press [ENTER]. The Digital Input menu appears. Digital Input If you connect a componeut tit a digital nmst assign that jack to an input selector. you connect your CD player you should default, assign input jack, to the OPTICAL INI jack is assigned if IN2 jack, that jack to the CD input selector.
TX NR702,602 t r_book Page 43 b'Io_day,July 26, 2004 11:05 AM First Time Setup--Continued Component If you connect assign Video Setup Use the Up and Down to a COMPONENT it to an input selector.
TX NR702,602 t r_book Page 44 b'Io_day,July 26, 2004 11:05 AM First Time Setup--Continued Minimum Speaker Impedance (not American models) is Use the Up and Down [&I/[V] buttons to select "1. Initial This setting not set autonqatically by peaker Setup function (see page 39). Setup," and then press [ENTER]. The Initial Setup menu appears. % the Automatic// J If the impedance of any of the connected speakers is 4 ohms or more, but Jess than 6 ohms, set the Minimum Speaker hnpedance to "4 ohms.
TX NR702,602 t rlbook Page 45 Monday,July 26, 20(14 11:(15 AM First Time Setup--Continued TV Format Setup (not American models) Here you can specify tile TV fonnat used in your area. Press the [RECEIVER] button followed by the [SETUP] button. AM Frequency (some models Step Setup only) Here you can specify the AM frequency step used in your area. When this setting is changed, all radio presets are deleted. The main menu appears onscreen. [RECEIVER] button followed by the [SETUP] button.
) TX NR702,602 t rlbook Page46 b'IoI_day,July 26, 20(14 11:05 AM First Time Setup--Continued Some of the settings by the Atltomatic in this section Speaker Here you can check the settings Speaker Setup function, are set automatically Setup function (see page 39). made by the Automatic or set them manually, usefld if you change one of the connected using the Automatic Speaker Setup Use the Up and Down [A]/[V] buttons to select "2. Speaker Setup," and then press [ENTER].
TX NR702,602 t n book Page 47 Monday,July 26, 2004 11:05 AM First Time Setup--Continued and Down [&]/[V] buttons to select "c. Center," and then use the Left and Right [
TX NR702,602 t rlbook Page 48 Mo)May,July 26, 2004 11:05 AM First Time Setup--Continued Double Bass This setting Speaker Distance is not set automatically _kSpeaker Setup flmction With the Double Bass flmction, by the Automatlc/I (see page 39). J you can boost bass out- put by feeding bass sounds from the front left and right channels to the subwoofer.
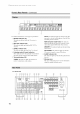
TX NR702,602 t rlbook Page 49 b'IoI_day,July 26, 20(14 11:(15 AM First Time Setup--Continued • On the TX-SR602/602E The Speaker Distance menu appears. and Subwoofer Speaker 2-2 Setup .Speaker Distance a .Unl b. Left c. Center • : 3.6m_ 3.6m{_ d. Right e.Surr f. Surr • : : 3.6m{_ 2.1m_ 2.1m_ : : : 2.1m_ 2 .lm{_ 3.6m{_ g.Surr Back h.Surr Left i .Subwoofer the Center can be set up to 5 ft. (1.5 m) (4.5 and 7.5 in).
TX NR702,602 t r_book Page 50 Rkmday,July 26, 2004 11:05 AM First Time Setup--Continued Speaker Level Calibration Use the Up and Down Here you can adjust the level of each speaker built-in test tone so that the volume same at the listening position. ./ with the of each speaker buttons tose'ect"Leve' . Ca"bration," This setting is set automatically by the Automatic peaker Setup function (see page 39). is the [&]I[V] and then press [ENTER].
TX NR702,602 t r_book Page 51 b'Io_day,July 26, 2004 11:05 AM First Time Setup--Continued Equalizer Setting Use the Left and Right [_1]/[1_] his setting is set automatically by tile Automatic LSpeaker Setup function (see page • 39). Off: Auto: ¢Here you can adjust the EQ of individual speakers. The -'_ volume of individual speakers can be set on page 50. _ Tone off, response fiat. The tone for each speaker is buttons set to select: autonmtically by the Automatic Speaker Setup function.
TX NR702,602 t r_bool_ Page 52 Monday,July 26, 2004 11:05 AM First Time Setup--Continued an I-4 I-compatible If you connect recorder or CD recorder 1-41 to work properly, This setting ...... Onkyo MiniDisc to the TAPE IN/OUT you must change can only be changed jacks, tUr this setting. on the AV receiver. 6 5 _ ......... ....../-;\J D _ %0 I, 2 (TX-SR702 shown here) _ ress the [TAPE] input selector button so that "TAPE" on the display. .............................................
TX NR702,602 t n bool_ Page 53 Monday,July 26, 2004 11:05/'kb'I Basic Operation .................................................................... This section explains how to select the input source (i.e., the AV component that you want to listen to or watch). 3 m OZ_Kyo E? m ©® receiver's input selector buttons to select the input source. To select the input source with the remote controller, press the [RECEIVER] button, and then use the INPUT SELECTOR buttons.
TX NR702,602 t n book Page 54 Monday,July 26, 2004 11:05 AM Basic Operation--Continued With the sleep timer, you can set the AV receb'er matically turn off after a specified period. I [RECEIVER] _ DIMMER -- _I_ER _EE_ --SLEEP -- MUTING to auto- Press the [RECEIVER] button, and then press the [SLEEP] button repeatedly to select the required sleep time. The sleep time can be set from 90 to 10 minutes in 10 minute steps.
TX NR702,602 t r_book Page 55 b'kmday,July 26, 2004 11:05 AM Basic Operation--Continued You can display various information about the current inpnt source as follows. f RECEIVER-- DISPLAY-f Press the [RECEIVER] button, press the [DISPLAY] button repeatedly to cycle through the available informa- The following information can typically be displayed for input sources. Input source & ,..., ,,... volume L,__.,_ L.,_ ':'i"{ii'; Signal format* or sampling frequency i) r'_ i }'", ",' .................
TX NR702,602 t r_book Page 56 b'Io_May,July 26, 2004 11:05 AM Basic Operation--Continued • With the built-in stations. ManuaITuning Press the [TUNING tuner you call enjoy AM and FM radio You call store your favorite stations Mode as presets for quick selection. MODE] button so that the AUTO indicator pears from the display. disap- Listening to the Radio _ _PressandholdtheTUNINGUpor Use the [TUNER] input selector button to select either AM or FM. In this example, FM has been selected.
TX NR702,602 t n bool_ Page 57 Monday,July 26, 2004 11:05 AM Basic Operation--Continued Presetting Radio Stations 2,4 Deleting Presets 2 3 ...... o s'% @-- ii........................................ , ]21 ©Q k==J [:h_[ @@@@@@ ....... 1;7 ..... @@@@ _ ......... _f k==J You can store up to 40 of your favorite radio stations as presets• Tune into the station that you want to store as a preset. ***** • . < 3 r appears .... The MEMORY lndlcatt and the preset number flashes.
TX NR702,602 t n bool_ Page 58 Monday,July 26, 2004 11:05 AM Basic Operation--Continued Using RDS (European models only) Program Types Used in Europe (PTY) RDS only works with Enropean models and only in areas where RDS broadcasts are available. • What Type Display Description None NONE No program type. NEWS of News reports Reports on current events and happenings.
• TX NR702,602 t nbook Page 59 Monday,July 26, 2004 11:05 AM Basic Operation--Continued Displaying Radio Text (RT) iii{_!i!i!i!i!i!i!i!i!i!iiii!_!!_i_i!_i_!_!_!_i_i@_!!_!!_ [ENTER]. 1 stationofthetypeyouspecified, which point it stops briefly tinningwiththe ©@ @@@@@@ @@@@ press [ENTER]. Ifnostationsarefound, L===J When L===J tuned to an RDS station text information, that's that intbrmation broadcasting at con- search.
TX NR702,602 t n book Page 60 Monday,July 26, 2004 11:05 AM Basic OperationmContinued Selecting with the Remote Controller RC-588M See "About the Listening Modes" on page 62 for detailed information about the listening modes. • The Dolby Digital and DTS listening modes can only be selected if your DVD player is connected to the AV receiver with a digital audio connection (coaxial or optical). • Listening mode availability depends format of the current input signal. on the ALL ST POREA - DSP,- o.
TX NR702,608 t r_bool_ Page 61 b'Io_day,July 26, 8004 11:05 AM Basic Operation--Continued The following table lists all the listening modes and shows which modes can be selected Dolby D Input signal format Analog, PCM*I "/2 2/0 for each input signal format. DTS/DTS 96124*2 Other 1/0,1+1 */2 1/0, 1 +1 2/0 Other ES DTS- Multich VHS, MD, Source Listening mode CD, turntable, TV, LD, radio, cassette, DTV, etc. _ DVD, DTV, etc. DVD, LD, CD, etc.
TX NR702,602 t n book Page 62 Monday,July 26, 2004 11:05 AM Basic Operation--Continued About the Listening Modes With its built-in surround-sound decoders and DSP prograins, the AV receiver can transform your home listening room into a movie theater If you connect right), back. two surround or concert hall. back speakers both will be used for 6.
TX NR702,602 t r_book Page 63 b'Io_day,July 26, 2004 11:05 AM Basic Operation--Continued DTS-ES Matrix mm This is DTS with an added surround back channel for 6.1 surround sound. Use it to provide 6.1 channel surronnd playback Onkyo Original DSP Modes r,.G_r*,, su..ouN_ with prograln material recorded in DTS 5.1 format. Since DTS 5.1 program material contains surround back channel information, all channels can be reconstructed for 6.1-channel playback.
TX NR702,602 t r_book Page 64 b'Io_day,July 26, 2004 11:05 AM Advanced Operation With the Re-EQ whose more suitable RECEIVER function, high-frequency making it viewing. This function can be used with the following listening modes: Dolby Digital DTS, DTS-ES, f a soundtrack is too harsh, for home theater Digital, DTS+Neo:6 J you can correct content EX, Dolby Pro Logic DTS Neo:6 Cinema, and DTS+Dolby Dolby IIx Movie, DTS 96/24, EX.
TX NR702,602 t r_book Page 65 b'Io_day,July Advanced 26, 2004 11:05 AM Operation--Continued U o_Yo @®® STA_D_V The DVD analog TV components @--3 MULTI CH mnltichannel input is for connecting with a 5.1-channel analog such as a DVD player or MPEG 80 See "Using a Multichannel connection information. andio output, decoder.
TX NR702,602 t r_book Page 66 Mop,day,July Advanced This section source, 11:05 AM Operation--Continued explains how to record how to record another, 26, 2004 the current one input source Press the [REC OUT] button, and then use the Controller [<1]/[!1_] buttons to select "Rec Sel : Source." input while enjoying and how to dub audio onto your video record- The current input source can be recorded by the recorder connected to the TAPE OUT. ings.
TX NR702,602 t r_book Advanced Page 67 Monday,July 26, 2004 11:05 AM Operation--Continued A V Recording You can record component Recording Separate AV input sources (VCR, etc) connected or VIDEO 2 OUT. See pages connecting components. to an AV recording Here you can record to the VIDEO separate 27-38 1 OUT for information on sources, Sources audio and video from completely allowing your video recordings.
TX NR702,602 t r_book Page 68 Mop,day,July 26, 2004 11:05 AM Advanced Setup 3-1. Analog/PCM Here are surround-related ital. mnltichannel, settings for PCM, Dolby and other input signal Dig- formats. These players settings apply ers, turntables, • to PCM input signals and so on, and analog a. Input L+R: from CD from cassette play- and so on.
TX NR702,602 t r_book Page 69 Mop,day,July Advanced • 11:05 AM Setup--Continued c. SurrBack This setting 26, 2004 Mode determines which surround input signals Dolby Digital Digital EX flag, or when the b. Dolby EX setting Manual. This setting speakers are connected. You can select Dolby PLlIx D, or Dolby that don't is unavailable L+R: Both the left and right channels (default).
7X NR702,602 t r_bool_ Page 70 b'Io_day,July Advanced 26, 2004 Setup--Continued You can adjust the bass and treble except when the Direct, TX-SR602), 11:05 AM or THX for the front speakers, Pure Audio listening Here you can set listening functions. (not American mode-related settings and mode is selected. Press the [RECEIVER] button followed by the [SETUP] button. t The main menu appears onscreen. ©. ............... ...... % Use the Up and Down [A]/[V] buttons to select "4.
6 Advnced Er_ Page 71 Monday, July 26, 20(14 !:57 PM Advanced Setup--Continued 4-1. Mono • of the center channel 7 (defimlt is 3). a. Output This setting put mono Channel determines which speakers attdio when the Mono L/R: Mono audio Center: • quencies that suffered of the film.
TX NR702,602 t n book Page 72 Monday,July Advanced 26, 2004 11:05 AM Setup--Continued ¸ii ,i'i'ii 4-9. Theater-Dimensional These settings apply to the Theater-Dimensional listen- ing mode. You can assign • a. Listening Angle With this setting, you can specify left and right speakers Processing source relative tile angle of tire front to the listening for the Theater-Dimensional is based on this setting. speakers shouM be equidistant Ideally, position.
TX NR702,602 t [] bool_ Page 73 Monday,July Advanced 26, 2004 11:05 AM Setup--Continued Note: • This procedure can also be performed receiver by using its [SETUP] and [ENTER] button. button, on the AV arrow buttons, iiiiiiiiiiiiiiiiiiiiiiiiiiii i!i!i!i!i!i!i!i!i!i!i!i!i!i!i!i!i!i!i!i!i!i!i!i!i!i!i!i!i!i! aDTSf°rmatdigitalaudi°signalis iiiiiiiiiiiiiiiiiiiiiiiiiiiiiii,, iiiiiiiiiiiiiiiiiiiiiiiiiiiiiiiii,,, d.D.F.
TX NR702,602 t n book Page 74 Monday,July Advanced 26, 2004 11:05 AM Setup--Continued 6-1. IntelliVolume This section explains the items on the Preference menu. With this preference, you can set the input level t_r each input source. This is usefid if some of your AV compo- Press the [RECEIVER] button followed by the [SETUP] button. nents are louder or quieter The main menu appears onscreen.
6 ftdvnc_d }in Page 75 Monday, Advanced July 26, 2004 !:58 PM Setup--Continued 6-3. OSD Setup receiver is identifying using fast forward • a. Immediate Display This preference output determines whether or not actions, such PCM: if the input signal Select this option as selecting an input source, Normah Select if your TV is 4:3. tracks Select if your TV is 16:9.
TX NR702,602 t n book Page 76 Monday,July 26, 2004 11:05 AM Zone 2 Using Only Speakers in Zone 2 With this colmection With the Zone 2 flmction, you can enjoy one input source in the main room and a different source in another method, you can use 5.1 surround sound in the main room and play a different AV source in Zone 2. The volume for Zone 2 is set on the AV receiver. roonl.
TX NR702,602 t n bool_ Page 77 Monday,July 26, 20(14 11:(15 AM Zone 2--Continued To use Zone 2, you must make this setting. speakers connected to the ZONE nals so that they produce It enables 2 SPEAKERS sound Use the Up and Down [A]/[V] to select "a. Powered Zone 2:' and use the Left and the termi- Right [<1]/[1_] buttons to select: when Zone 2 is used. Menu 1.Initial Setup 1-3.Hardware m &®®®j Setup b.
7X NR702,602 t n book Page 78 Monday,July 26, 2004 11:05 AM Zone 2--Continued To set Zone 2 to the same source as the main room, press the IZONE 2] button, and then use the Controller I_ll/l_l buttons to select "Zone 2 Sel: Source." To adjust the Zone 2 volume with the remote controller, press the [ZONE 2] button, and then use the [LEVEL-] and [LEVEL+] buttons. Ol_rl.K",/O I I To do this on the AV receiver, press the ZONE 2 [LEVEL] button, and then use the Controller [<1]/[1_] buttons.
TX NR702,602 t n boc& Page 79 Monday,July 26, 2004 11:05 AM Zone 2--Continued Using When the Trigger 12V Zone 2 is turned OUT outputs necting on, the ZONE 2 12V TRIGGER 12 volts (100 milliamperes this jack power Using a Multiroom Kit with a Cabinet to the 12-volt trigger amp in Zone 2, that power max). By coninput on, say, a amp will turn on and off automatically as and when Zone 2 is turned off on the AV receiver.
TX NR702,602 t r_book Page 80 b'Io_day,July 26, 2004 11:05 AM Controlling Other Components You can use the AV Receiver's 588MiRC-590M/RC-591 ponents, including This chapter • Learn commands actions Entering code for a component (e.g., DVD, directly controller MODE tons, choose button controller. buttons, Remote [CABLE1, your that you and [SAT] butcategory.
TX NR702,602 t n bool_ Page 81 Monday,July Controlling 26, 2004 11:05 AM Other Components--Continued Resetting the Remote Controller F_ STANDBY Here you can reset tile remote settin s. _TV_ i_- _@ controller to its default TV I/_ _ -RECEIVER _ REMOTE MODE vex. Resetting REMOTE MODE Buttons If you've entered another and now want to return code for one of these button to the default, perform the tUl- lowing procedure.
TX NR702,602 t n boc& Page 82 Monday,July Controlling 26, 2004 Other Components--Continued Remote Control Codes When two or more codes SAT (satellite are given, try each one in turn, and choose one that works best. Depending on the manufi_cturer component, the remote the and controller may not work as expected.
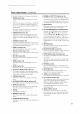
TX NR702,602 t n book Controlling SAT Page 83 Monday,July 26, 2004 11:05 AM Other Components--Continued VCR (satellite receiver) Manufacturer Control Tristar VCR Manufacturer Control 4016 Aiwa 2012,2046,2047 Unisat 4013 Akai 2003,2004,2022 Universum 4021,4024 Alba 2033,2041,2044,2045, 2047 Vortec 4017 Anitech 2033 ASA WelD code code Manufacturer Controlcode Jensen 2013 JVC 2005,2006,2007,2009, 2032,2035,2040,2048 Kaisui 2033 Kendo 2041,2046 2034 Kenwood 2005,2006,
TX NR702,602 t n bool_ Page 84 Monday,July Controlling 26, 2004 11:05 AM Other Components--Continued TV VCR Manufacturer Control RCA 2001,2002,2003,2008, 2010,2013,2021,2023, 2025,2026,2027 Realistic 2007,2008,2010,2011, 2012,2017 code Control code Admiral 1026,1040,1062 Akai 1002,1067 Akura 1045 Alba 1035,1043 Rex 2048 Amplivision 1063 Roadstar 2033,2043 Amstrad 1035,1067 Bunco 2019 Amtron 1009 Saba 2040,2048 Anam National 1003,1009 Saisho 2028,2041 Anitech 1035 S
TX NR702,602 t n book Controlling Page 85 Monday,July 26, 2004 11:05 AM Other Components--Continued TV TV Manufacturer Control code Loewe 1014,1040,1055 Luxman 1004,1006 LXI 1001,1006,1010,1014, 1016,1017,1034 M Electronic 1035,1053,1062,1063 Magnadyne 1040,1067,1068 Magnafon 1067 TV Manufacturer Control Manufacturer Controlcode Quasar 1003,1012,1031 Technics 1012,1044,1061 Ouelle 1036,1039,1054,1055, 1058,1059,1068 Techwood 1004,1006,1012 Radio Shack 1010,1017,1034 Te
TX NR702,602 t r_bool_ Page 86 Monday,July 26, 2004 11:05 AM Controlling Other Components--Continued To control component, another ler at it and use the buttons select the appropriate point the remote as explained remote control control- Controlling a Cable Receiver below (you nmst mode first). STANDBY Controlling a TV I1........................... __ .............................
FX NR702,602 t r_bool_ Page 87 Monday,July Controlling 26, 2004 11:05 ikM Other Components--Continued Controlling a VCR Controlling a Satellite Receiver h ......
I_X NR702,602 t r_bool_ Page 88 b'Io_day,July Controlling 26, 2004 11:05 AM Other Components--Continued _oint theremote contro.ers at The AV receiver's mands remote of other remote controller controllers them at each other. For example, can learn the comsimply i!i iiiiiiiiiiiiiiiiiiiiiiiiiiiiiiiiiiiiiiiiiiiiiiiiiiiiiiiiii ili!ii !ii!ii ieach other, apart, about2to0inches and then, onthe other by pointing by transmitting remote controller, button whose want to learn.
TX NR702,602 t r_book Page 89 Monday,July Controlling 26, 2004 11:05 AM Other Components--Continued ,HHHHHHH_* iiiiiiiiiiiiiiiiiiiiiiiiiiiiiiiiiiiiiiiiiiiiiiiii!ii i i!ii!ii!ii!ii!ii! With the Macro function, controller's actions MACRO you can program buttons with just one button mally you need to perform a CD: 1. Press the REMOTE to select Receiver to perform press. For example, the following actions of buttonswhose program ......................
TX NR702,602 t r_book Page 90 b'Io_day,July 26, 2004 11:05 AM Troubleshooting If you have any trouble using the AV receiver, solution If you can't in this section. yourself, contact resolve look for a the issue • For the TX-SR702/702E, cartridge, your Onkyo dealer. if your turntable you must connect MC transformer (see page 36). • Make sure that none of the connecting twisted, Can't • Specify • Make sure that the power cord is properly plugged into the wall outlet.
TX NR702,602 t r_book Page 91 Monday,July 26, 2004 11:05 AM Troubleshooting--Continued The subwoofer • When produces no sound? you play source material mation in the LFE channel, no sound. • Make sure the speakers About that contains the subwoofer no inforproduces are configured tile digital with a certain audio ontput correctly that support prevent audio output • Depending cannot t_rmat be selected such as those is oft'.
TX NR702,602 t r_book Page 92 Mop,day,July 26, 2004 11:05 AM Troubleshooting--Continued • Are yon trying cannot Reception is noisy, FM stereo reception is noisy, or the FM STEREO indicator doesn't appear? • Relocate your antenua. • Move the AV receiver away from your TV or computer. • Listen to the station in mono (page 56). • When listening to an AM station, operating the remote controller may cause noise. • Passing cars and airplanes can cause interference. • Concrete walls weaken radio signals.
TX NR702,602 t n book Page 93 Monday,July 26, 2004 11:05 AM Troubleshooting--Continued The sound changes when I connect my headphones? • When a pair of headphones is connected, the listeniug mode is set to Stereo, unless it's already set to Stereo, Direct, or Pure Audio (not all models). When you disconnect the headphones, the previous listening mode will be resumed.
TX NR702,602 t r_book Page 94 Monday,July 26, 20(14 11:(15 AM Specifications (TX-SR702/702E) Amplifier Section General Power Output All channel: Power Supply Dynamic American:100 W + 100 W (8_2,21tHz21tkHz,FTC) Europian: 130W + 130W (6_2,1kHz,DIN) Asian: 160 W + 160 W (6_LIkHz,JEITA/ 230 W + 230 W (3_LFront) 170 W + 170 W (4£LFront) 115 W + 115 W (8_2,Pront) Power THD (Total Harmonic Distortion) Damping Factor Input Sensitivity and hnpedance Output Level and hnpeadance Pbono Overload Frequency
TX NR702,602 t r_book Page 95 Mop,day,July Specifications 26, 2004 11:05 AM (TX-SR602/602E, Amplifier Section General Power Output All channels: Power Supply Dynamic Power THD (Total Harmonic Distortion) Damping Factor Input Sensitivity and hnpedance Output Lc'_el and hnpeadance Frequency Response Tone Control SN Ratio Speaker hnpedance American : 85 W (8[L20Hz-20kHz, FTC) Europian : 120W (6[LIkHz,DIN) Asian, Australian : 150 W (6_L I kHzJEITA) 220 W + 220 W (3_LFront) 165 W + 165 W (4_Lgront)
TX NR702,602 t n bool_ Page 96 Monday,July ONKYO 26, 2004 11:05 AM CORPORATION Sales & Product Planning Div. : 2-1, Nisshin-cho, Tel: 072-831-8023 Fax: 072-831-8124 Neyagawa-shi, OSAKA 572-8540, JAPAN ONKYO U.S.A. CORPORATION 18 Park Way, Upper Saddle River, N.J. 07458, U.S.A. Tel: 201-785-2600 Fax: 201-785-2650 http://www.onkyousa.com ONKYO EUROPE ELECTRONICS GmbH Liegnitzerstrasse 6, 82194 Groebenzell, GERMANY Tel: +49-8142-4401-0 Fax: +49-8142-4401-555 http://www.onkyo.