
Instruction Manual
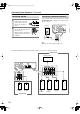
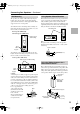
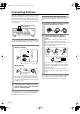
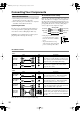
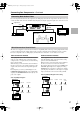
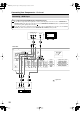
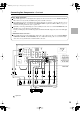
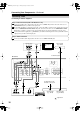
Table Of Contents
- Important Safety Instructions
- Precautions
- Speaker Precautions
- Features
- Contents
- Package Contents
- Front & Rear Panels
- Speakers
- Remote Controller
- Before Using the AV receiver
- Enjoying Home Theater
- Connecting Your Speakers
- Connecting Antenna
- Connecting Your Components
- About AV Connections
- Connecting Both Audio & Video
- Which Connections Should I Use?
- Connecting a DVD Player
- Connecting a VCR
- Connecting a Camcorder, Games Console, or Other Device
- Connecting a Satellite, Cable, Set-top Box, or Other Video Source
- Connecting a CD Player or Turntable
- Connecting the DS-A1XP RI Dock for the iPod (Audio Only)
- Connecting a Cassette, CDR, MiniDisc, or DAT Recorder
- Connecting Onkyo Components
- Connecting the Power Cord
- Turning On
- First Time Setup
- Playing Your AV Components
- Using the Tuner
- DS-A1XP RI Dock for the iPod
- Common Functions
- Using the Listening Modes
- Adjusting the Listening Modes
- Recording
- Advanced Setup
- Troubleshooting
- Specifications
28
Connecting Your Components
—Continued
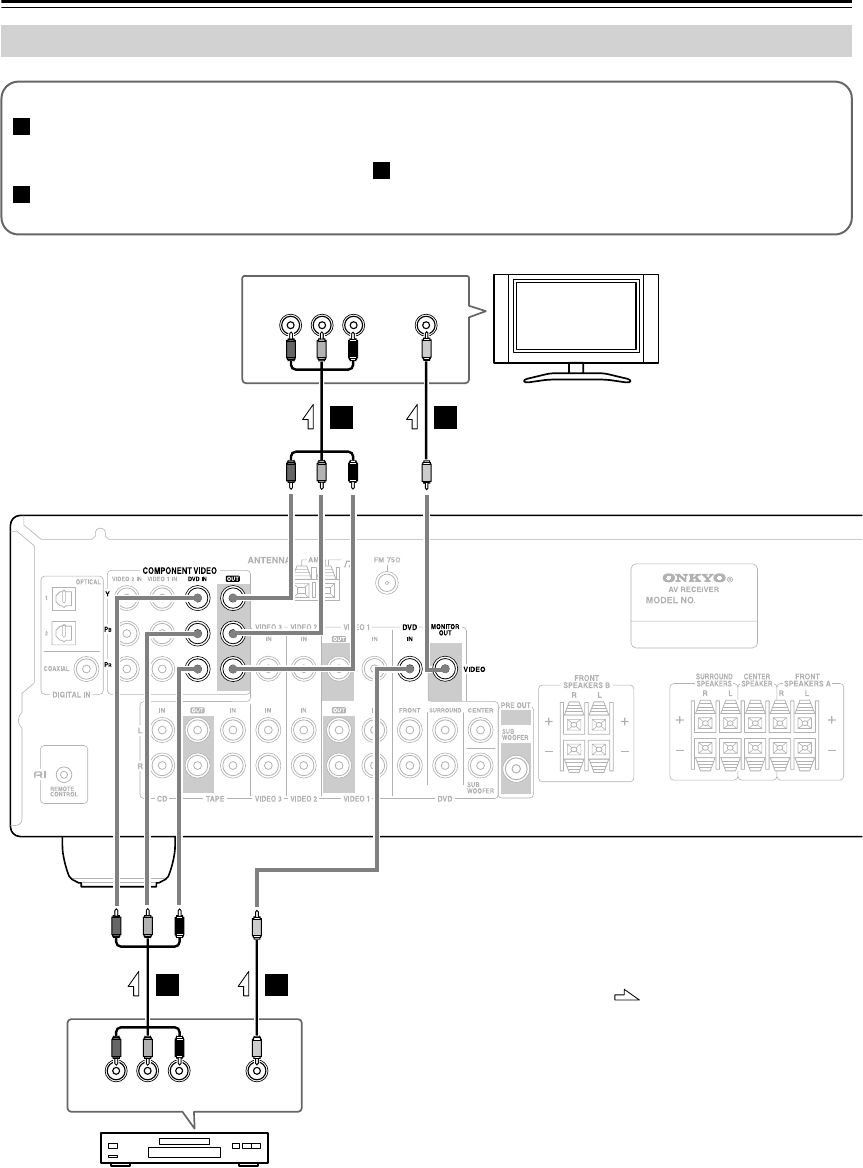
Connecting a DVD Player
YPB
COMPONENT VIDEO OUT
P
R VIDEO
OUT
YPB
COMPONENT VIDEO IN
VIDEO IN
P
R
A
B
B
B
A
B
TV, projector,
etc.
DVD player
AV receiver
Step 1: Video Connection (DVD Player to AV Receiver to TV)
If your TV has component video input jacks, connect your DVD player to the AV receiver’s COMPONENT
VIDEO DVD IN jacks. And connect the AV receiver’s COMPONENT VIDEO OUT jacks to your TV. This will
provide better picture quality than connection .
If your TV doesn’t have component video input jacks, connect your DVD player to the AV receiver’s DVD IN
VIDEO jack. And connect the AV receiver’s MONITOR OUT VIDEO jack to your TV.
A
B
B
: Signal Flow
HT-S4100_En.book Page 28 Friday, February 22, 2008 2:15 PM