Contents DVD receiver DR-UN7 Getting Started .......................... 2 Connections ............................ 16 Operations ............................... 26 Instruction Manual Playing a Disc.......................... 29 Listening to the Radio ........... 42 Enjoying Surround Sound ....... 56 Listening Mode and Audio Adjust....................................... 60 Thank you for purchasing the Onkyo DR-UN7 DVD receiver. Read this manual carefully before using your new DVD receiver.
WARNING: TO REDUCE THE RISK OF FIRE OR ELECTRIC SHOCK, DO NOT EXPOSE THIS APPARATUS TO RAIN OR MOISTURE. CAUTION: TO REDUCE THE RISK OF ELECTRIC SHOCK, DO NOT REMOVE COVER (OR BACK). NO USER-SERVICEABLE PARTS INSIDE. REFER SERVICING TO QUALIFIED SERVICE PERSONNEL.
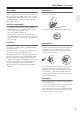
Precautions 1. Recording Copyright—Unless it’s for personal use only, recording copyrighted material is illegal without the permission of the copyright holder. 2. AC Fuse—The AC fuse inside the unit is not userserviceable. If you cannot turn on the unit, contact your Onkyo dealer. 3. Care—Occasionally you should dust the unit all over with a soft cloth. For stubborn stains, use a soft cloth dampened with a weak solution of mild detergent and water. Dry the unit immediately afterwards with a clean cloth.
Precautions—Continued NOTE: THIS CLASS B DIGITAL APPARATUS For U.S. models CAUTION: TO PREVENT ELECTRIC SHOCK, FCC Information for User MATCH WIDE BLADE OF PLUG TO WIDE SLOT, FULLY INSERT. CAUTION: The user changes or modifications not expressly approved by the party responsible for compliance could void the user’s authority to operate the equipment. NOTE: This equipment has been tested and found to comply with the limits for a Class B digital device, pursuant to Part 15 of the FCC Rules.
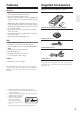
Features Supplied Accessories Receiver Make sure you have the following accessories: • • • • • • • • • Built-in Dolby Pro Logic II, Dolby Digital and DTS On board Theater Dimensional Circuit Deep bass adjustable S. Bass feature Subwoofer or power amplifier connectable PRE-OUT terminals allowing 5.
Table of Contents Getting Started Important Safety Instructions...............................2 Precautions .........................................................3 Features ..............................................................5 Supplied Accessories ..........................................5 Table of Contents ................................................6 Disc Notes ...........................................................8 Remote Controller .............................................
Table of Contents—Continued Enjoying Surround Sound Enjoying Surround Sound ................................. 56 Configuring Subwoofer and Setting Up the Number of Speakers............................ 56 Setting Distance of Speakers........................ 57 Speaker Level Calibration ............................. 57 Enjoying Listening Modes ................................. 58 Selecting Listening Mode .............................. 59 Listening Mode and Audio Adjust Adjusting Sound........................
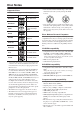
Disc Notes Supported Discs The DVD receiver supports the following discs. Disc DVD-Video Logo • Don’t use discs with an unusual shape, such as those shown below, because you may damage the DVD receiver. Format or file type See page 76 for region information. DVD-Audio DVD-Audio SACD Super Audio CD (single layer, dual layer, hybrid) DVD-Video DVD-R DVD-RW • Don’t use discs that have residue from adhesive tape, rental discs with peeling labels, or discs with custommade labels or stickers.
Disc Notes—Continued About WMA Handling Discs WMA is an acronym for Windows Media Audio and refers to an audio compression technology developed by Microsoft Corporation. WMA content can be encoded by using Windows Media® Player version 7, 7.1, Windows Media® Player for Windows® XP, or Windows Media® Player 9 Series. • Never touch the underside of a disc. Always hold discs by the edge, as shown. JPEG file compatibility • Compatible formats: Baseline JPEG and EXIF 2.
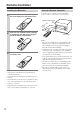
Remote Controller Installing the Batteries 1 To open the battery compartment, press the small hollow and slide off the cover. Using the Remote Controller To use the remote controller, point it at the DVD receiver’s remote control sensor, as shown below. Remote control sensor x. pro p A m) (5 2 3 Insert the two supplied batteries (AA/R6) in accordance with the polarity diagram inside the battery compartment. Put the cover onto the remote controller and slide it shut.
Part Names and Functions Front Panel Display 1 4 5 6 7 2 8 9 J 3 K L M NOPQR The page numbers in parentheses show where you can find the main explanation for each item. A Remote control sensor (10) Receives signals from the remote controller. B INPUT/CURSOR buttons (27, 28, 44, 48, 50, 80) Enable you to select an input source. These buttons also move the cursor when you input characters. C VOLUME control (26) Adjusts the volume level. D STANDBY indicator (26) Lights up in Standby mode.
Part Names and Functions—Continued Display 1 23 MUTING S.BASS TIMER 1 2 3 4 4 5 6 7 DIGITAL DTS AAC PCM DVD - AUDIO DV D PL T - D DSP STEREO VCD SACD AUTO FM ST RDS MEM RDM NORMAL REPEAT 1 GROUP TITLE CHP TRACK PRGSV TRACK NAME DISC TOTAL REMAIN SLEEP 8 9J K LM N O A S.BASS indicator This indicator lights up when the super bass is selected. B MUTING indicator This indicator flashes while the DVD receiver is muted. C Tuning indicators These indicators show the status of the timers.
Part Names and Functions—Continued Rear Panel 1BC D 5 6 G 8 9 J K L M The page numbers in parentheses show where you can find the main explanation for each item. A TAPE/HDD IN/OUT (21, 22) I VIDEO OUT S VIDEO OUT (20) This analog audio input and output are for connectThis connector can be used to connect a TV or proing a recorder with an analog audio input and output jector with an S Video input. (cassette, Mini Disc, etc.).
Part Names and Functions—Continued I DIMMER button (27) Remote Controller Adjusts the display brightness. normal dim dimmer This section describes the role of the individual buttons you use to control the amplifier and the tuner. J TIMER button (62, 65, 68) A 2 3 4 5 6 M N O Press this button to enable the timer function or set current time. K RCV SETUP button (56, 61) Press this button to configure settings for the DVD receiver.
Part Names and Functions—Continued G Remote Controller This section describes the role of the individual buttons you use to control DVD and CD. / buttons (32, 34) Fast-forward or reverve being played. H AUDIO button (35) This button is used to select foreign language soundtracks and audio formats (e.g., Dolby Digital or DTS) on DVD-Video discs. For Video CDs you can select left-channel, rightchannel, or stereo. I ANGLE button (35) This button is used to select camera angles on DVD-Video discs.
Connecting Antenna This section explains how to connect the supplied indoor FM antenna and AM loop antenna, and how to connect commercially available outdoor FM and AM antennas. The DVD receiver won’t pick up any radio signals without any antenna connected, so you must connect the antenna to use the tuner. Connecting the AM Loop Antenna The supplied indoor AM loop antenna is for indoor use only. 1 Assemble the AM loop antenna, inserting the tabs into the base, as shown.
Connecting Antenna—Continued Connecting an Outdoor FM Antenna Connecting an Outdoor AM Antenna If you cannot achieve good reception with the supplied indoor FM antenna, try a commercially available outdoor FM antenna instead. If good reception cannot be achieved using the supplied AM loop antenna, an outdoor AM antenna can be used in addition to the loop antenna, as shown.
Connecting Your Speakers The following illustration shows which speaker should be connected to each pair of terminals. Connecting Speaker 1 Strip 3/8" (10 mm) of insulation from the ends of the speaker cables, and twist the bare wires tightly, as shown. 2 While pressing the lever, insert the wire into the hole, and then release the lever. Make sure that the terminals are gripping the bare wires, not the insulation.
AV Cables and Connectors Before Making Any Connections • Read the manuals supplied with your AV components. • Don’t connect the power cord until you’ve completed all audio and video connections. • Do not place objects on the unit as they may interfere with proper ventilation. white plugs to connect left-channel audio inputs and outputs (typically labeled “L”). And use yellow plugs to connect composite video inputs and outputs.
Connecting Your TV Connect the DVD receiver to the TV directly. If you connect the DVD receiver to a VCR, TV/VCR combination, or video selector, the playback picture may be distorted as DVD videos are copy protected. Using Video Connect the VIDEO OUT to a set of VIDEO input on your TV. Use the supplied video cable (RCA), connecting the yellow plug to the video output. See the following page if you want to use a component or S Video cable for the video connection.
Connecting External Devices Connect the white plugs of the audio cables to the L jacks and connect the red plugs of the audio cables to the R jacks. Tip: The source names appearing in the display can be customized for the connected component (see page 28). Connecting an Onkyo Stereo Cassette Tape Deck The following diagram illustrates how to connect an optional Onkyo stereo cassette tape deck.
Connecting External Devices—Continued Connection for Listening to Sound from Digital Device through DVD receiver Connect the DVD receiver’s DIGITAL IN terminal with a digital audio output terminal on any digital device such as satellite tuner or PC. Optical digital audio cable Satellite tuner DIGITAL OUTPUT PC : Signal flow Connect the DVD receiver’s DIGITAL IN terminal with a digital audio output terminal on an audio processor.
Connecting External Devices—Continued Connection for TV Audio Signal Connect the LINE IN terminal on the DVD receiver and an audio output terminal on TV. DVD receiver’s rear panel white red RCA/phono audio cable red white : Signal flow Connecting a subwoofer The DVD receiver has a SUBWOOFER PRE OUT jack. Connect an active subwoofer (a subwoofer that contains an amplifier).
Connecting External Devices—Continued Enjoying Home Theater The DVD receiver provides multi-channel playback with its theater dimensional feature, even under two front speaker conditions. Certainly, it can provide full 5.1ch playback in combination with an add-on subwoofer, center and surround speakers off the shelf, so that you can enjoy more realistic, movie theater/concert hall-in-the-home sound effect. With DVDs you can enjoy DTS and Dolby Digital.
Connecting External Devices—Continued Connection for Enjoying 5.1ch Playback You can connect a center speaker and a left and a right surround speakers by adding on a power (main) amplifier. In addition to this configuration, you can add on a subwoofer to enjoy the 5.1ch surround sound. (See page 23.) Once you have completed the connection, make sure to configure the settings for speakers, described on page 56, so that you can enjoy your favorite surround mode.
Connecting the Power Cord To wall outlet When the power cord is connected to the AC outlet, the DVD receiver enters Standby mode. The STANDBY indicator lights up. STANDBY indicator Understanding Common Operations STANDBY/ ON VOLUME INPUT buttons INPUT buttons STANDBY/ON VOLUME +/– STANDBY indicator Turning the Unit On and Off Press STANDBY/ON on the unit or on the remote controller. If you press the same button again, the unit will turn off and enter Standby mode.
Understanding Common Operations—Continued Selecting a Source DVD receiver Controlling Display Brightness Remote controller You can select DVD, FM, AM, or connected external audio/video equipment (HDD, CD-R, TAPE, LINE, DIGITAL) as the audio source. To select the audio source, press the INPUT or button repeatedly. DIGITAL DVD LINE TAPE FM AM XM (US model only) Muting the Sound Press MUTING on the remote controller. The MUTING indicator lights in the display.
Customizing the Source Names You can change the source name that appears in the display to suit any component you connected per the instructions on pages 21-23. 1 Display 2 3-5 1 2 *1 Select this if you connected an Onkyo USB component that supports connection. 5 Press INPUT / until the source whose name you wish to change appears in the display. You can select TAPE, LINE or DIGITAL. Press EDIT/NO/CLEAR repeatedly until “Name Select?” appears in the display. Press MULTI JOG to enter the new name.
Before Starting DVD Playback Using the On-screen Displays Setting Up the Player for Your TV For ease of use, this player makes extensive use of graphical on-screen displays (OSDs). All the screens are navigated in basically the same way, using the cursor buttons ( / / / ) to change the highlighted item and pressing ENTER to select it. / Note:If you have a widescreen (16:9) TV, you should setup the player so that the picture will be presented correctly.
Before Starting DVD Playback—Continued Setting the Language of This Player’s On-screen Displays This sets the language of this system’s on-screen displays. DVD SETUP 1 Press DVD SETUP and select “Initial Settings”. 2 Select “OSD Language” from the “Display” settings. The available languages vary between models. • North American model: English, French, Spanish, German, Italian. • Australian, Asian and South American models: English, French, Spanish, Chinese.
Playing Discs The basic playback controls for playing DVD, CD, SACD, Video CD and MP3/WMA discs are covered here. Further functions are detailed in the next chapter. For details on playing JPEG picture discs, see “Viewing a JPEG Slideshow” on page 41. Important: Throughout this manual, the term “DVD” means DVD-Video, DVD-Audio and DVD-R/ RW. If a function is specific to a particular kind of DVD disc, it is specified.
Playing Discs—Continued Numbers / / MENU / TOP MENU / / ENTER / / Basic Playback Controls The table below shows the basic controls on the remote for playing discs. The following chapter covers other playback features in more detail. Button DVD receiver remote What it does / Starts playback. If the display shows RESUME or LAST MEM playback starts from the resume or last memory point (see also “Resume and Last Memory” on page 31.) / Pauses a disc that’s playing, or restarts a paused disc.
Playing Discs—Continued Video CD PBC menus Scanning Discs Some Video CD have menus from which you can choose what you want to watch. These are called PBC (Playback control) menus. You can play a PBC Video CD without having to navigate the PBC menu by starting playback using a number button to select a track, rather than the (play) button. Button DVD receiver remote You can fast-scan discs forward or backward at four different speeds. 1 During playback, press or to start scanning.
Playing Discs—Continued Playing in Slow Motion Frame Advance/Frame Reverse Playing in slow motion You can play DVD-Videos and DVD-R/RW at four different slow motion speeds, forwards and backwards. Video CD/Super VCDs can be played at four different forward slow motion speeds. 1 During playback, press 2 Press and hold or until slow motion playback starts. • The slow motion speed is shown onscreen. • There is no sound during slow motion playback. 3 Press repeatedly to change the slow motion speed.
Playing Discs—Continued Switching Audio Language/Channel When playing a DVD-Video disc recorded with dialog in two or more languages, you can switch audio language during playback. When playing a VR format DVD-RW disc recorded with dual-mono audio, you can switch between the main, sub, and mixed channels during playback. When playing a DVD-Audio disc, you may be able to switch channels—see the disc box for details.
Playing Discs—Continued Browsing Video Content with the Disc Navigator • Playlist: Title – Playlist titles from a VR mode DVD-RW disc. • Original: Time – Thumbnails from the Original content at 10 minute intervals. • Playlist: Time – Thumbnails from the Playlist at 10 minute intervals. The screen shows up to six moving thumbnail images displayed one after another.
Playing Discs—Continued Browsing WMA, MP3 and JPEG files with the Disc Navigator Use the Disc Navigator to find a particular file or folder by filename. / / / / ENTER DVD SETUP 1 3 To play the highlighted track or display the highlighted JPEG file, press ENTER. • When a WMA/MP3 file is selected, playback begins, starting with the selected track, and continues until the end of the folder. • When a JPEG file is selected, a slideshow begins, starting with that file, and continues to the end of the folder.
Playing Discs—Continued Creating a Program List 3 Repeat step 2 to build up a program list. A program list can contain up to 24 titles/ chapters/tracks. • You can insert steps into the middle of a program list by just highlighting the position where you want the new step to appear and entering a title/chapter/ track number. • To delete a step, highlight it and press CLEAR. 4 To play the program list, press (play).
Playing Discs—Continued Searching a Disc You can search DVD-Video discs by title or chapter number, or by time; DVD-Audio discs can be searched by group or track number; SACDs by track number, CDs and Video CD by track number or time. Important: • Search functions are not available with Video CD in PBC mode, or with WMA/MP3 discs. 1 Press MODE and select “Search Mode” from the list of functions on the left. The search options available depend on the kind of disc loaded. Select a search mode.
Playing Discs—Continued Looping a Section of a Disc The A-B Repeat function allows you to specify two points (A and B) within a track (CD, Video CD) or title (DVD-Video and DVD-RW) that form a loop which is played over and over. • You can’t use A-B Repeat with DVD-Audio, SACD, and Video CD in PBC mode, or WMA /MP3 files. • You should configure this setting by viewing the OnScreen display. Therefore even for audio CD, any viewing device must be connected in order to set the two points (A and B) for looping.
Playing Discs—Continued Viewing a JPEG Slideshow After loading a CD/CD-R/RW containing JPEG picture files, press (play) to start a slideshow from the first folder/picture on the disc. The player displays the pictures in each folder in alphabetical order. Pictures are automatically adjusted so that they fill as much of the screen as possible (if the aspect ratio of the picture is different to your TV screen you may notice black bars at the sides, or at the top and bottom of the screen).
Listening to the Radio Manually Tuning a FM/AM Broadcast Station With the built-in tuner you can enjoy AM and FM radio stations. You can store your favorite stations as presets for quick selection. Turn on the power to the unit before you start the procedure. Manual Tuning Mode 1 1 3 2 AUTO Auto Tuning Mode 1 AUTO Band Press MODE so that the AUTO indicator disappears from the display. Alternatively, you may press YES/ MODE on the DVD receiver to do so. 3 Press and hold TUNING / .
Listening to the Radio—Continued Adjusting the Antenna Adjusting and installing the FM antenna Adjusting the AM antenna Adjust the location of the FM antenna while listening to an FM broadcast. Adjust the location and position of the AM antenna while listening to an AM broadcast to determine the best reception. 1 Change the direction of the antenna to determine the best reception. 2 Affix the antenna using a thumbtack. (Do not press the thumbtack through the antenna.
Listening to the Radio—Continued Listening to XM Satellite Radio® What’s XM Satellite Radio? There is a world beyond AM and FM. It is XM Satellite Radio. XM offers more than 150 digital channels of audio entertainment, including 100% commercial-free channels, in the top markets in the U.S. Note: An XM Connect-and-Play™ antenna and monthly subscription are required to receive XM Satellite Radio. Visit www.xmradio.com for details. Note: Hardware and required basic monthly subscription sold separately.
Listening to the Radio—Continued ■ Category Search Mode Selecting XM Radio Channels There are two modes for selecting XM radio channels: Channel Search mode, which allows you to select any channel. Category Search mode, which allows you to select channels by category. Use the remote controller to select XM radio channels. 1 1 Press INPUT / to select XM. If “Antenna” appears on the display, make sure the XM antenna is connected properly. 2 Press MODE to select “Category Search” mode.
Listening to the Radio—Continued 1 2 DISPLAY 2 DISPLAY Selecting XM Channels from the Remote Controller: 1 Press INPUT / to select XM. If “Antenna” appears on the display, make sure the XM antenna is connected properly. 2 and Use TUNING / to select a channel. In Channel Search mode, you can select any channel. In Category Search mode, you can only select channels from the currently selected category.
Listening to the Radio—Continued XM Radio Messages The following messages may appear while using XM radio. 1 The XM antenna is not connected properly. Check the antenna. 2 Positioning the XM Antenna You can check the signal strength of the XM radio signal and adjust the position of the XM antenna accordingly. 1 2 3 Press EDIT/NO/CLEAR with XM redio selected. Turn MULTI JOG to select “Antenna Aim ?” and then press MULTI JOG.
Listening to the Radio—Continued Programming FM Stations Automatically – Auto Preset Auto presets store the frequencies of radio stations into memory so you can select your favorite channels without tuning manually. Radio station signals can be automatically located and stored. This function does not apply to AM stations. Before auto presetting If any radio stations are preset before you start the auto preset procedure, they will be replaced with new presets.
Listening to the Radio—Continued Programming FM/AM Stations & XM Channels One by One – Preset Write You can store the frequencies of stations one by one manually into the preset memory channels. This is useful when you want to program the stations in your favorite order. Before auto presetting • You can preset up to 30 channels including both FM and AM stations. For a set in which XM stations are involved, you can preset up to 40 channels.
Listening to the Radio—Continued Customizing the preset channels The following additional functions are available: • Naming a preset channel (see page 54) • Erasing a preset channel (see page 53) • Copying the radio station in the selected channel to another (see page 52). Selecting Preset Stations First, program the stations into preset channels (see pages 48-49). Using the remote controller Display 1 1 2 2 Turn on the power to the unit before you start the procedure.
Listening to the Radio—Continued Switching the Display Information DISPLAY DISPLAY Repeatedly pressing DISPLAY on the remote controller or on the unit toggles between two types of information display. FM/AM Frequency Preset channel name (*) * If a given preset channel is not named, the unit displays “No Name,” then indicates the frequency. see “Naming a Preset Channel” on page 54.
Changing the Preset Channels Using the delete and copy functions, you can delete preset stations, copy a preset station to another channel, or change the channel number. Tips for Changing the Preset Channels 4 Turn MULTI JOG to select the preset channel number to which you wish to copy (destination). 5 Press MULTI JOG to confirm. To change the channel number: Use the copy and delete functions.
Changing the Preset Channels—Continued Erasing a Preset Channel – Preset Erase Display 2-4 2 1 Call the preset channel you wish to erase. 2 Press EDIT/NO/CLEAR and turn MULTI JOG until “PresetErase?” appears in the display. 3 Press MULTI JOG. A message requesting confirmation appears in the display. To stop erasing, press EDIT/NO/ CLEAR. 4 Press MULTI JOG. “Complete” appears in the display. The preset channel is erased.
Naming Preset Channels You can name FM/AM preset channels. (The XM Radio can not make use of the “Name In” function.) 4 Naming a Preset Channel Turn MULTI JOG to select the character, then press it to enter. Repeat this step for the next character. If you wish to change the type of characters, repeat Step 3, then proceed with this step. After you select the preset channel to name, execute “Entering a Name” as described below. You can enter up to eight characters per name.
Naming Preset Channels—Continued Inserting a Character 1 Press NAME. 2 Press DISPLAY repeatedly until the character type you wish to enter appears in the display. Each press of the DISPLAY switches the type of characters. If the unit is not in “Name In” mode, execute steps 1 and 2 in “Entering a Name,” then follow the steps below. 1 Press TUNING / repeatedly until the character following the desired point of insertion flashes. 2 Turn MULTI JOG until “ ” appears, then press MULTI JOG.
Enjoying Surround Sound Configuring Subwoofer and Setting Up the Number of Speakers The DVD receiver will provide you a full-fledged home theater, when it is added on extra speakers in addition to the two front speakers. (For information about how to add on, see page 25.) The factory default settings support the two channels with only a left and a right front speakers; you must configure the settings according to the number of the speakers you have added on.
Enjoying Surround Sound—Continued Setting Distance of Speakers Set the distance from the listening position to the speakers. With the distance set, the DVD receiver can keep constant the time to deliver the sound from each speaker to the listening position, thus providing more comfortable sound environment for movies and music. The settings are stored even when the DVD receiver is in the Standby mode.
Enjoying Listening Modes About the Listening Modes Dolby Pro Logic II Movie Listening modes on the DVD receiver enable you to enjoy movie theater or concert hall quality sounds in your room. The DVD receiver provides the following listening modes. Before playing a source in optimal sound, be sure to complete the Speaker settings. (See pages 5657.) Use this mode with DVDs and videos that bear the Dolby Surround logo or TV programs that feature Dolby Surround.
Enjoying Listening Modes—Continued Selecting Listening Mode 1 2 Play back the selected device. DVD receiver Remote controller Select a listening mode. Press LISTENING MODE on the DVD receiver or on the remote controller to select a listening mode. Every time you press LISTENING MODE, the mode switches over. The selectable listening mode may vary depending on the playback signal. See the following list for the “Playback Sources and Corresponding Listening Modes”.
Adjusting Sound Emphasizing the Low End Using the Remote Controller This is available when the listening mode is set to other than “Direct”. 1, 3 2 LATE NIGHT DVD receiver S.BASS Adjusting Individual Speaker Levels Press S.BASS repeatedly. Pressing S.BASS repeatedly will change the option in the following order. You can adjust the level of individual speakers during playback. • These adjustments are temporary and will be cancelled when the DVD receiver is set to Standby.
Adjusting Sound—Continued The Audio Adjust functions are explained below. 1, 4 2, 3 Audio Adjust Function By using the following audio adjust function, you can fine adjust the tone and the precise settings for Mono, Multiplex and T-D. 1 2 Press RCV SETUP. The display will show “1.Sp Config”. Press / (repeatedly) to select “4.Audio Adj”. And then press ENTER. 3 Select an item you want to configure using / , and select a value or a preference using / .
Setting the Clock You can select either the 12-hour or 24-hour display. (This section explains how to set the time based on the 24hour display.) Using the remote controller CLOCK Display DISPLAY DISPLAY EDIT/ NO/ CLEAR STANDBY/ON 1 2-6 1 2, 4, 6 3, 5 1 Press TIMER repeatedly until “Clock” appears in the display. 2 Press MULTI JOG. You can now set the day of the week. 3 4 Turn MULTI JOG to select the current day of the week.
Using the Timer Functions The DVD receiver features three timer functions: Sleep, Once, and Every timer. About the Timers Selecting a timer number You can set up to four timers. Timer operation types • Timer Play: The specified component starts playback at the specified time. • Timer Rec: The specified component starts recording at the specified time. • The Timer Rec operation is available for recording on an Onkyo cassette tape deck that features an connector connected to the DVD receiver.
Using the Timer Functions—Continued Using the Sleep Timer Using the unit Using the remote controller The Sleep timer can be set for 10 to 90 minutes, in intervals of 10 minutes. You can set the Sleep timer for 10 to 90 minutes, in intervals of 10 minutes. It is also possible to set the timer from 1 to 99 in one-minute increments is also possible using MULTI JOG. SLEEP Display 1, 2 3, 4 Press SLEEP. “Sleep 90” appears in the display, indicating the unit will turn off in 90 minutes.
Using the Timer Functions—Continued Programming a Timer Before programming a timer for an AM/FM or XM (US model only) broadcast, program the desired broadcast stations to the preset channels. (See pages 48-49.) Notes: • You cannot use the timer functions unless the clock is set. • If you do not operate the buttons for 60 seconds during the timer setting, the unit returns to its normal display. • The following procedures are performed on the unit.
Using the Timer Functions—Continued 4 DVD receiver Remote controller Press MULTI JOG. (Only for Timer Rec) Check connections and settings to the recording component. 5 DVD receiver Remote controller Turn MULTI JOG to select “Once” or “Every”. The Once timer operates only one time. The Every timer operates every week. After selecting one, press MULTI JOG. If you selected “Once,” the timer operates only one time on the specified day. Turn MULTI JOG to select the day(s) of the week.
Using the Timer Functions—Continued 6 DVD receiver Remote controller Turn MULTI JOG to set the On time of the timer operation. You can also use the number buttons on the remote controller. When the desired time is displayed, press MULTI JOG. For example, to set 7:29, press 10/0, 7, 2, then 9. Notes: • When you set the On time, the Off time is automatically set to one hour later. • During timer recording, the first few seconds may not be recorded. Set the On time to one minute earlier.
Using the Timer Functions—Continued Switching the Timer On and Off Viewing the Timer Settings • You can use this function to cancel or resume the programmed timer operation. • You cannot program the timers unless the clock is set. Display 1 Display 1 1, 2 2 1 1 Repeatedly press TIMER to display the desired timer number, then press MULTI JOG. 2 Press MULTI JOG to view the subsequent timer settings. Repeatedly press TIMER to display the desired timer number.
DVD Audio Settings and Video Adjust menus Adjust the Brightness, Contrast, Hue and Chroma Level settings using the / (cursor left/right) buttons. . Brightness / min max 0 / / DVD SETUP 1 Press DVD SETUP and select “Video Ajust” from the on-screen display. 2 Select and change settings using the / / / (cursor) buttons, and ENTER. Note: Depending on your TV, the picture may appear distorted if the brightness is set too high. If this happens, lower the brightness.
Initial Settings menu Using the Initial Settings menu 1 Press DVD SETUP and select “Initial Settings”. 2 Use the cursor buttons and ENTER to select the setting and option you want to set. All the settings and options are explained on the following pages. The Initial Settings menu provides audio and video output settings, parental lock settings, and display settings, among others. If an option is grayed out it means that it cannot be changed at the current time.
Initial Settings menu—Continued Compatibility of this player with progressive-scan and high-definition TVs This player is compatible with progressive video Macro Vision System Copy Guard. Consumers should note that not all high-definition television sets are fully compatible with this product and may cause artifacts to be displayed in the picture. In case of 525 progressive scan picture problems, it is recommended that the user switch the connection to the “standard definition” output (Interlace).
Initial Settings menu—Continued Display settings Setting OSD Language Angle Indicator Option What it means English On-screen displays of the player are in English. Languages as displayed On-screen displays are shown in the language selected. On A camera icon is displayed on-screen during multi-angle scenes on a DVD disc. Off No multi-angle indication is shown.
Initial Settings menu—Continued How to Use Parental Lock • Default level: Off; Default password: none; Default Country code: us (2119) To give you some control over what your children watch on your DVD receiver, some DVD-Video discs feature a Parental Lock level. If your player is set to a lower level than the disc, the disc won’t play. Some discs also support the Country Code feature. The player does not play certain scenes on these discs, depending on the Country Code you set.
Initial Settings menu—Continued 3 Select a new level and press ENTER. • Press (cursor left) repeatedly to lock more levels (more discs will require the password); press (cursor right) to unlock levels. You can’t lock level 1. This sets the new level and you will return to the Options menu screen. Setting/changing the Country code You can find the Country code list in the adjacent column. 1 2 3 Select “Country Code”. Use number buttons to enter your password, then press ENTER.
Additional information Screen sizes and disc formats DVD-Video discs come in several different screen aspect ratios, ranging from TV programs, which are generally 4:3, to Cinema- Scope widescreen movies, with an aspect ratio of up to about 7:3. Televisions, too, come in different aspect ratios; “standard” 4:3 and widescreen 16:9. Widescreen TV users If you have a widescreen TV, the TV Screen setting (page 70) of this player should be set to “16:9 (Wide)”.
Additional information—Continued Resetting the DVD player Use this procedure to reset all the player’s settings to the factory default. 1 Stop DVD playback or unload any disc from 2 3 4 5 the tray. Press EDIT/NO/CLEAR. Rotate MULTI JOG to select “DVD Init?”. Press MULTI JOG. The “DVD Init??” message appears once again, then press MULTI JOG again. You will see the message “Waiting”.The initial setting completes when you see the original display come back.
Additional information—Continued ■ Language code list Language code letter Language code Slovak sk 1911 Slovenian sl 1912 Language Language code letter Language code Armenian hy 0825 Interlingua ia 0901 0514 Interlingue ie 0905 Samoan sm 1913 0618 Inupiak ik 0911 Shona sn 1914 Language Language code letter Language code Japanese ja 1001 English en French fr German Language de 0405 Indonesian in 0914 Somali so 1915 Italian it 0920 Icelandic is 0919 Al
Input Source Names and Available Buttons on Remote Controller If you customized source names using the method described on page 28, you can use the following buttons: A 2 3 4 5 6 7 8 9 J K L M N 78
Input Source Names and Available Buttons on Remote Controller—Continued Selector TAPE DIGITAL Selector Name TAPE Buttons on the remote controller HDD CD-R CD-R TAPE/HDD 1 TAPE/HDD TAPE/HDD / 2 PRESET / 3 TUNING 4 MODE 5 MEMORY 6 RANDOM 7 REPEAT 8 FF/FR / / SKIP / / SKIP / SKIP / / / MODE MODE MEMORY MEMORY SHUFFLE RANDOM RANDOM REPEAT REPEAT REPEAT 1–9 1–9 1–9 10/0 10/0 10/0 >10 >10 >10 CLEAR CLEAR BACK LIGHT DISPLAY DISPLAY SELECT ENTER ENTER
Recording The copyright laws prohibit using your recordings without consent of the copyright owner, except for the purpose of your personal entertainment. 1 1 1 DVD receiver Press INPUT on the DVD receiver or the remote controller to select the recording source component. Remote controller 80 2 Prepare the recording component. • Place the recording component in record standby mode. • Adjust the recording level on the recording component. 3 Start recording.
Troubleshooting Problems may be caused by any component connected to this unit. Please check the table below, cross-referencing the instruction manuals for the other components. Power The power to the system is not turned on. • Make sure that the power cable is plugged into the AC outlet. • Unplug the power cable from the AC outlet, wait for 10 seconds or more, then plug the cable in again. The power is turned off during the operation.
Troubleshooting—Continued New settings made in the Setup screen menus while a disc is playing are ineffective. • Some settings can be changed while a disc is playing, but are not effective until the disc is stopped then restarted: Press , then start playback again ( ). No picture/No color. • Incorrect video connections: Check that connections are correct and that plugs are inserted fully. Also check the video cable for damage.
Troubleshooting—Continued Connection with External Devices The interoperability with other external Onkyo device is not available. • Make sure that the cable and analog audio cables (RCA) are connected correctly. (See pages 21-23.) Connecting only an cable won’t work. • Specify the source name in the display for the external Onkyo device. (See page 28.) No sound is heard from the connected device. • Make sure that the optical digital cable is not bent over or damaged.
Specifications General Tuner Section Power Supply Power Consumption Stand-by Power Consumption Dimensions (W x H x D) Weight North American, some Asian: AC 120 V, 60 Hz Others: AC 220–230 V, 50 Hz US and Canada: 115 W Mexican: 105 W Others: 79 W ■ FM 0.2 W 8-1/16" x 5-13/16" x 13-7/8" 205 W x 147 H x 353 D mm 5.4 kg, 11.