
user manual
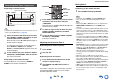


Table Of Contents
- Safety Information and Introduction
- Connections
- Turning On & Basic Operations
- Playback
- Playback
- Controlling Contents of USB or Network Devices
- Understanding Icons on the Display
- Playing an Audio from Bluetooth-enabled Device
- Playing a USB Device
- Listening to TuneIn
- Registering Other Internet Radio
- Changing the Icon Layout on the Network Service Screen
- Playing Music Files on a Server (DLNA)
- Playing Music Files on a Shared Folder
- Remote Playback
- Listening to AM/FM Radio
- Playing Audio and Video from Separate Sources
- Using the Listening Modes
- Displaying Source Information
- Using the Sleep Timer
- Setting the Display Brightness
- Changing the Input Display
- Muting the AV Receiver
- Using the Whole House Mode
- Using the Home Menu
- Playback
- Advanced Operations
- Controlling Other Components
- Controlling Other Components
- Preprogrammed Remote Control Codes
- Looking up for Remote Control Codes
- Entering Remote Control Codes
- Remapping Colored Buttons
- Remote Control Codes for Onkyo Components Connected via RI
- Resetting the REMOTE MODE Buttons
- Resetting the Remote Controller
- Controlling Other Components
- Using the Onkyo Dock
- Controlling Your iPod/iPhone
- Controlling Other Components
- Appendix
- Internet Radio Guide
- Remote Control Codes
Advanced Operations
En-73
Operating
procedure
(➔ page 56)
■ Proxy Port
If you’re using a Web proxy, enter a proxy port
number here.
■ Network Standby
` On
` Off
This setting enables or disables control over the
network.
When enabled, the NET indicator will be dimly-lit
while the AV receiver is in standby mode. Note that
the indicator may not light under certain conditions
(➔ page 22).
Note
• When set to “On”, the power consumption slightly
increases in standby mode.
■ Update Notice
` Enable
` Disable
When this setting is enabled, you will be notified if a
firmware update via network of high importance is
available.
Note
• Selecting “Never Remind me” on the notification window
will switch this setting to “Disable” (➔ page 22).
• For details on the update notification, see “Firmware
Update Notification” (➔ page 22).
■ Bluetooth
This setting enables the AV receiver to pair with
Bluetooth-enabled device.
Status
Press ENTER button to display “Now Pairing” and
start pairing.
Tip
• If pairing setting is not set, “Ready” appears on-screen
display. The name of the device paired with the AV receiver
is displayed if pairing setting is set.
• For details on the Bluetooth connection, refer to the
instruction manual of the Bluetooth-enabled device.
• The pairing can be done by holding down BLUETOOTH
button on the AV receiver until BLUETOOTH indicator
flashes.
Note
• This setting cannot be selected if you’ve selected NET or
USB as input selector in Multi Zone.
Initial Setup
If you skipped the initial setup wizard, for example on
first-time use, you can reaccess it from here.
See “Initial Setup” (➔ page 22).
Note
• This setting cannot be selected if the “Monitor Out” setting
is set to “Sub”.
Remote ID
■ Remote ID
` 1
, 2, or 3
When several Onkyo components are used in the
same room, their remote ID codes may overlap. To
differentiate the AV receiver from other components,
you can change its remote ID from “1”, to “2” or “3”.
Note
• If you do change the AV receiver’s remote ID, be sure to
change the remote controller to the same ID (see below),
otherwise, you won’t be able to control it with the remote
controller.
Changing the remote controller’s ID
Remote Mode Setup
See “Looking up for Remote Control Codes”
(➔ page 76).
With this preference, you can protect your settings by
locking the setup menus.
■ Setup
` Locked
` Unlocked
When “Locked” is selected, the setup menus will be
locked and you cannot change any setting.
8. Remote Controller Setup
1
While holding down RECEIVER, press and
hold down Q SETUP until the remote indicator
lights (about 3 seconds).
2
Use the number buttons to enter ID 1, 2, or 3.
The remote indicator flashes twice.
9. Lock Setup