
user manual

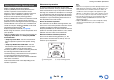
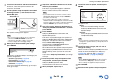
Table Of Contents
- Safety Information and Introduction
- Connections
- Turning On & Basic Operations
- Playback
- Playback
- Controlling Contents of USB or Network Devices
- Understanding Icons on the Display
- Playing an Audio from Bluetooth-enabled Device
- Playing a USB Device
- Listening to TuneIn
- Registering Other Internet Radio
- Changing the Icon Layout on the Network Service Screen
- Playing Music Files on a Server (DLNA)
- Playing Music Files on a Shared Folder
- Remote Playback
- Listening to AM/FM Radio
- Playing Audio and Video from Separate Sources
- Using the Listening Modes
- Displaying Source Information
- Using the Sleep Timer
- Setting the Display Brightness
- Changing the Input Display
- Muting the AV Receiver
- Using the Whole House Mode
- Using the Home Menu
- Playback
- Advanced Operations
- Controlling Other Components
- Controlling Other Components
- Preprogrammed Remote Control Codes
- Looking up for Remote Control Codes
- Entering Remote Control Codes
- Remapping Colored Buttons
- Remote Control Codes for Onkyo Components Connected via RI
- Resetting the REMOTE MODE Buttons
- Resetting the Remote Controller
- Controlling Other Components
- Using the Onkyo Dock
- Controlling Your iPod/iPhone
- Controlling Other Components
- Appendix
- Internet Radio Guide
- Remote Control Codes

Turning On & Basic Operations
En-28
Manual wireless LAN setup
1
Press RECEIVER followed by HOME.
2
Use e/r or q/w to select “Setup”, and then
press ENTER.
3
Use q/w to select “Hardware Setup”, and then
press ENTER.
4
Use q/w to select “Network”, and then press
ENTER.
5
Use q/w to select “Network Connection”, and
e/r to select “Wireless”, and then press
ENTER (➔ page 72).
The “Wireless Setup” menu is displayed on
screen.
Tip
• The same setting is available even if “Wireless” is
selected in “Network Connection” in initial setup
(➔ page 23).
6
Use q/w to select “Search Wireless Network”
and then press ENTER.
A list of available Access Points is displayed.
Tip
• If Access Point you wish to connect to is not displayed
in the list of available Access Points, the setting also
can be made by entering “SSID”, “Security”, and
“Password” manually after selecting “Direct Input”.
7
Use q/w to select the Access Point you wish to
connect to, and then press ENTER.
Depending on your encryption settings, the
security of your Access Point will provide one of
the following patterns:
■ WEP method
1. Use q/w to select “Default Key ID” and then
press ENTER.
2. Use q/w to choose an ID between 1 and 4,
and then press ENTER.
3. Use q/w to select “Password” and then press
ENTER.
4. Use the keyboard on screen to enter the
password and confirm with “OK”.
■ WPA/WPA2 method
1. Use q/w to select “Password” and then press
ENTER.
2. Use the keyboard on screen to enter the
password and confirm with “OK”.
■ No encryption
If your Access Point device is not secured by
encryption, there is no need to input any secret
key.
Tip
• When you select the Access Point you wish to connect to
from the list of available Access Points, “SSID” and
“Security” are automatically displayed. These settings can
be changed manually.
8
Select “OK” and press ENTER.
Connection to your Access Point starts and Wi-Fi
indicator flashes. After the connection to your
Access Point is completed, Wi-Fi indicator lights
and the connection status is displayed on the
screen.
This completes the wireless LAN setup.
You can review your setup with the “Status”
option on the “Wireless Setup” menu.
Note
• If Wi-Fi indicator doesn’t light, the connection to your
Access Point is not done successfully. Configure this
setting again (➔ page 85).