
User Manual


12
Step 4. If you previously disconnected the control computer, reconnect it via the USB cable now. If your computer is
already connected and SeaCAD is already running, restart it now to establish a connection between the com-
puter and the laser’s control board.
Step 5. Customize your contrast and engraving depth by adjusting the engraving parameters in SeaCAD.
To darken an image, use a higher frequency setting. To lighten it, use a lower one. To increase engraving
depth, increase the amount of energy per unit area by reducing the speed parameter or increasing the laser's
power or the number of loops. Engraving too deep, however, reduces image quality, especially for coated
materials. Again, constantly using settings over 80% will shorten the expected service life of your laser.
Resolution should usually be set to 500 dots per inch. Reducing your image resolution can be helpful in some
cases, reducing flaming and increasing the energy of the pulse in a way that improves the quality of the resultant
image in some materials such as some plastics.
Step 6. Activate the laser guidance system by pressing Red or hitting F1 in SeaCAD. The design should be displayed
in red light on the worktable, showing where the laser will fire.
Step 7. Place an expendable piece of the material to be engraved in the location shown by the laser guidance. Do not
use a different target as the galvanometer lens automatically focuses at different heights for different materials.
Being careful that no part of your body is near the worktable or laser path, press Mark or hit F2 in SeaCAD
to fire the test laser. Alternatively, you can activate the laser by using the foot pad.
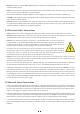
Step 8. The laser is invisible but will create a buzzing noise and sparks and begin engraving when it is correctly focused
on your test material. If no sparks are emitted, the laser is out of focus. Continue to fire it while adjusting the
up or down using its height adjustment knob. Small, consistent sparks will be emitted at the marking point
when the beam is correctly in focus. Take a note of the correct height for future reference.
In Focus Out of Focus