User’s Guide Shop online at omega.com e-mail: info@omega.com For latest product manuals: omegamanual.
OMEGAnet ® Online Service omega.com Internet e-mail info@omega.com Servicing North America: U.S.A.: Omega Engineering, Inc., One Omega Drive, P.O. Box 4047 Stamford, CT 06907-0047 USA Toll Free: 1-800-826-6342 TEL: (203) 359-1660 FAX: (203) 359-7700 e-mail: info@omega.com Canada: 976 Bergar Laval (Quebec), Canada H7L 5A1 Toll-Free: 1-800-826-6342 FAX: (514) 856-6886 ISO 9001 Certified TEL: (514) 856-6928 e-mail: info@omega.ca For immediate technical or application assistance: U.S.A.
Contents 1. Introduction ............................................................................................................. 4 2. Safety and installation............................................................................................ 4 3. Cycler TCY specification........................................................................................ 7 4. User operation and consumables ......................................................................... 8 Heated lid ..............
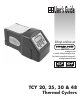
1. Introduction The Cycler TCY provides the researcher with the means of accurately controlling the temperature profile of samples. It has many scientific applications, including DNA amplification and sequencing. The Cycler TCY can cycle samples between 4°C and 99°C. The Cycler TCY is programmed by means of an integral keypad and LCD display.
Unpacking When unpacking please ensure that the following have been removed from the packaging: Thermal cycler Power cable The user is advised to keep the original packaging in case the instrument ever needs to be returned for service or repair. Omega Engineering, Inc. accepts no responsibility for damage incurred unless the unit is correctly packed and transported in its original packaging.
Working Conditions The thermal cycler is designed operate under the following conditions: Indoor use Ambient temperature range +5oC to +40oC Altitude to 2000m Relative humidity not exceeding 95% Power supply fluctuations not exceeding 10% Over voltage category II IEC 60364-4-443 Pollution degree 2 Note: The control specifications are quoted at an ambient temperature of 20oC. The specification may deteriorate outside an ambient temperature of 10oC to 30oC.
3. Cycler TCY Specification Temperature Temperature range Temperature set point precision Block uniformity (over full range) Temperature accuracy End of program cooling below ambient 4°C to 99°C 0.1°C ± 0.5°C ± 0.5°C Yes Heating/Cooling Rate Maximum heating rate Minimum heating rate Maximum cooling rate Minimum cooling rate 4.5ºC/s 0.1ºC/s 3.0ºC/s 0.
Dimensions Height Width Length 185mm 185mm 330mm Power consumption 230W Power Units marked 100V will work at any voltage between 90 and 110V. The performance will vary and will not necessarily meet the above typical specification at the extremes of voltage. 4. User operation and consumables Heated lid To release the heated lid, lift the lid catch and the lid will open. To close the lid, push down gently until the catch clicks in place. Do not close the lid without tubes being fitted in the block.
The amount of volume loss you observe and the change in reactant concentrations you can tolerate determine the minimum volume that can be used. Typical volume losses of 1µl in 30 cycles allow the use of samples of 20µl or less. During the final cool-down, a ring of condensation may form above the liquid level but below the top of the sample block. This is normal and does not effect the reaction. 0.5ml Tubes The heated lid mechanism of the Cycler TCY with the 0.5ml block is optimised for flat top tubes.
Switching on TCYTC 3000 Omega Engineering Version X.XX Block Type 25x0.2ml 48x0.2ml or 30x0.5ml Methods Programs [0] [0] Information Configuration [ , to select] select ] When you switch on the unit a screen similar to the one shown here will appear briefly. This indicates the software version and block type installed in the unit. When the initial screen has disappeared the screen shown here will automatically appear. There are three options: 1. ‘Programs’ for creating and running programs; 2.
5. Front panel controls The LCD Display Programs [0] Methods [0] Information Configuration [ select ] ] [ ,, totoselect The CYCLER TCY has a four line LCD display. The top three lines are information or program lines, while the bottom line is a prompt line. The active line flashes on screen and is shown in bold in this manual. The bottom line may change or flash between two or three different prompts depending upon which program line is active.
The keys The End, Finish or Exit key The Up arrow key The Down arrow key The Decimal Point and Insert key The Delete key The Pause key The Enter or Accept key The End, Finish or Exit key The Up arrow key The “End” or “Finish” key is used to finish editing programs or to exit a program. It is also used to exit a sequence of key operations. The “Up arrow” key is used for scrolling up through the lines on the screen. It is also used to increase certain fields when editing.
The Down arrow key The Decimal Point and Insert key The Delete key The Pause key The Enter or Accept key The Alpha/Numeric keys The “Down arrow” key is used for scrolling down through the lines on the screen. It is also used to decrease certain fields when editing. The “Decimal Point” key is used when editing numeric fields. It is also used as an Insert key during program editing to insert additional steps and other field sets.
In the prompt line is equivalent to the “End” key. On a program line means the program is locked; it can be copied and then edited but not edited directly. Up arrow Down arrow Enter Pause The following terms are used when programming the CYCLER TCY: Stage Cycle Step A ‘Stage’ is the name given to the main repeated part of a program containing the ‘Steps’ to be repeated. A program can contain a maximum of 25 stages although typically only one or two are used.
Programming Options There are two options available for creating programs on the CYCLER: 1. Copy and edit one of the pre-written templates. 2. Create a new program from the defaults. Option 1: Creating programs using templates There are two pre-written basic PCR templates: a two-step and a three-step template. These can be copied and modified as required. "In denat" stands for Initial Denaturing. 2 STEP 2 STEP TEMPLATE Heated Lid 105ºC Preheat Lid on Pause off - - - - - - - - - - 94.
A new name can now be given to the copied program (see below). To give a program a name To type in a name for the program, press "Enter" and a cursor will appear in the position shown. Using the keypad, type in the name you wish to give the program. The letters will scroll round with successive presses; for example the “2” key will give ‘A’ with one press; ‘B’ with two presses; ‘C’ with three presses and ‘2’ with four presses. Five presses will again give ‘A’.
To edit a field or step in an existing program Methods Programs [0] [0] Information Configuration [ , to select ] When the unit is switched on the display will show this screen. If known, type in the ‘Speed dial’ number for the required program and press “Enter” This will take you directly to the required program. If you do not know the ‘Speed dial’ number, press “Enter” to access the list of stored programs. Either: 1. Scroll to the required program using the “Up Arrow” or “Down Arrow” keys or 2.
To edit a temperature, type in the required temperature. In the example here, the heated lid temperature is being edited. Press “Enter” to accept. Use the “Down Arrow” and/or the “Up Arrow” keys to select the next field or step you wish to edit. To edit a field with on/off settings, first select the field and press “Enter” Use the “Up Arrow” and “Down Arrow” keys to toggle between the settings. Press “Enter” to accept.
To copy a selected program If you select ‘Copy program’ a screen similar to this will appear and the software will automatically give the program the next number until it is named. Press “Enter” and type in a new name. You will then be able to edit the program as previously described. To delete a selected program If you select ‘Delete program’ a screen similar to this will appear. Press “Enter” to delete the program or “End” to return to the program screen.
Example programs A couple of example thermal cycling programs are shown below.
A new stage will be inserted which consists of a ‘Number cycles’ field and one step. Edit the number of cycles by typing the number required then press "Enter" Use the “Down Arrow” the step. key to move to Press “Enter” to edit the step as described above. Press “Enter” again to accept. To insert additional steps To insert a new step before the first step, use the “Up Arrow” or “Down Arrow” keys to select ‘Number cycles’. Press the “Decimal Point” key to insert a new step.
To add a new stage before an existing one Use the “Up Arrow” or “Down Arrow” keys to highlight the stage number. Press "Enter" A new stage will be added before the existing stage. The other stage numbers will be adjusted as appropriate. The new stage can now be edited as described above. To add a new stage at the end - - - - - - - - - - Fin extn Post run 72.0ºC 5m00 Fin hold Post hold 10.0ºC ºC [ to insert stage ] Use the “Up Arrow” or “Down Arrow” keys to highlight the dotted line below the last stage.
To insert a ‘pause’ into a program To insert a pause after an existing stage, follow the steps for inserting a stage as above. Highlight the ‘Number cycles’ line then press “Pause” The prompt line will flash between ‘CHANGE TO PAUSE?’ and ‘YES or NO’. Press “Enter” to insert a pause. The stage number will then be highlighted with ‘Pause’ as the only line.
To program increment or decrement temperature or time. Under normal circumstances, the Hold Temperature of all steps is constant. However, it is possible to automatically increment or decrement the temperature of a specified step of a programme.
The prompt line will change to flash between ‘CHANGE STEP?’ and ‘YES’ or ‘NO’. Press “Enter” The cursor will again move into the edit mode. Now press the “Up Arrow” key The step will change to ‘fst’, meaning “first”, and the software will insert another line after it entitled ‘lst’, meaning “last”. Press “Enter” mode. twice to go into edit Use the “Alpha/numeric” keys to change the values of the ‘fst’ line to the first temperatures and/or times you require. Press “Enter” after each field you change.
first temperature is 65°C and the last temperature is 55°C, over 30 cycles the temperature will decrease 0.33°C each cycle. Similarly, in the example shown, the time would increase from 30 seconds to 1 minute 30 seconds in 2 second increments. To save the program A program can only be run once it has been saved. Press the “End” key. The prompt line will flash between 'SAVE?' and 'YES or NO'. Press “Enter” for ‘Yes’ to save the changes you have made.
To run a program Methods Programs [0] [0] Information Configuration [ , to select ] Methods Programs [7] [7] Information Configuration [ , to select ] * * New Newprogram Methods**** [][] 2 STEP TEMPLATE 501 2 3 STEP TEMPLATE 502 3 [ , to select ] When the unit is switched on the display will show this screen. If known, type in the ‘Speed dial’ number for the required program and press “Enter” This will take you directly to the required program.
Cycle 4/30 56m08 Sample 58.0ºC 5.7 /S Hold @ 58.0ºC 00m17 [ to STOP ] [ to PAUSE ] [ for info ] During the run the LCD screen will report: 1. The cycle number 2. The time remaining (counting down in seconds) 3. The sample temperature (whether holding or ramping) 4. Maximal ramp rate 5. The current step of the run 6. A count down of the hold time. An example is shown here. Manual pause Cycle 24/30 19m26 Sample 72.0ºC 2.7 /S Hold @ 72.
Program Information Pressing “Enter” while a program is running will give information about the current run including which program is actually running and the unit status e.g. holding or ramping. An example is shown here. 7. Information The Information field on the front screen contains all the unit-specific information such as serial number and software version. Press “Enter” information. Block Type: 20x0.5ml 48x0.2ml Block s/n id 123456789 139160-2 Unit s/n GP0000-01 C3C123456 S/w version 14.zz 6.
1234 Access to the ‘Configuration’ set up is password protected. Default admin passwords is 1234 To enter configuration, use the alpha keys to type in ‘1234’ Press “Enter” Settingsdefaults Program Settings Passwords Passwords Format memory Controller reset Self-calibrate There are a number of options which can be changed; these are listed here. Use the “Up Arrow” and “Down Arrow” keys to select then press “Enter” to access any of the options. Each option is discussed in detail below.
When you have finished, press the “Enter” key to go back to the ‘Configuration’ menu. Passwords The ‘Passwords’ function allows the administrator to change the ‘Admin password’ (which allows access to Configuration) and also to delete any passwords associated with programs. Settings Program defaults Settings Passwords Passwords Format memory Controller reset Self-calibrate Highlight ‘Passwords’ then press “Enter” The screen will appear as opposite.
9. Notes on transferring protocols from other thermal cyclers The CYCLER TCY heats at over 3.6°C/s and provides the highest levels of temperature uniformity. Many slower machines have historically begun the countdown on hold times before the set temperature is reached in order to avoid any overshooting in sample temperature. The slower the heating rate the more significant the loss in hold time, i.e.
10. User maintenance Cleaning your CYCLER The heating/cooling block, including wells and flat surfaces, should be cleaned regularly to ensure optimum heat transfer to the samples. Always clean the block if there has been a spillage. Use a cloth or cotton buds dipped in a fresh, 50:50 water/isopropanol solution and make sure that no deposits are left in the wells. In the case of radioactive spillages the heater block can be removed from the unit for more detailed cleaning. Omega Engineering, Inc.
11. Some frequently asked questions Q1 A1 What is the ‘Pause’ function at the start of the program used for? Some users prefer to preheat the heated lid before placing the samples into the unit. The pause feature is used to stop the unit a fter the 4 minut e heated lid preheat step. It will also sound an audible alarm indicating that the machine is ready for the sample tubes or pla te to be added. Pressing the “Pause” key followed by the “Enter” key will commence the remaining program.
12. Additional information Brief fault finding notes and a list of replacement parts are given in this section. Note that this equipment should only be dismantled by properly trained personnel. Removing the outer cover exposes potentially lethal power voltages. There are no user serviceable parts within this equipment. Fault Finding Should you encounter problems with your TCY contact Omega Flow Engineering for assistance.
WARRANTY/DISCLAIMER OMEGA ENGINEERING, INC. warrants this unit to be free of defects in materials and workmanship for a period of 36 months from date of purchase. OMEGA’s WARRANTY adds an additional one (1) month grace period to normal three (3) year product warranty to cover handling and shipping time. This ensures that OMEGA’s customers receive maximum coverage on each product. If the unit malfunctions, it must be returned to the factory for evaluation.
Where Do I Find Everything I Need for Process Measurement and Control? OMEGA…Of Course! Shop online at omega.