
Instruction Manual
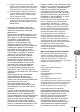
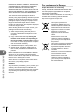
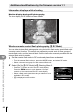
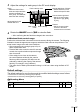
Table Of Contents
Additions/modications by rmware update
10
167
EN
3
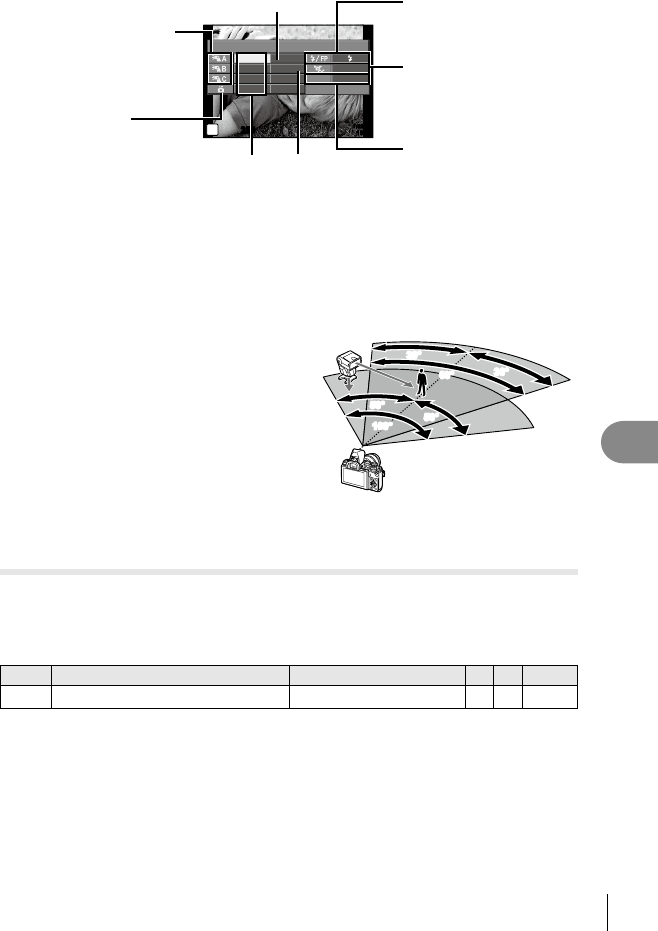
Adjust the settings for each group in the RC mode display.
250
A Mode
TTL
Manual
Off
+5.0
TTL +3.0
1/8
–
Low
1
Ch
1023
F5.6250
P
1:02:03
Flash intensity value
Group
• Select the ash control
mode and adjust the ash
intensity separately for
each group. For MANUAL,
select the ash intensity.
Normal ash/Super FP ash
• Switch between normal
ash and Super FP ash.
Communication light level
• Set the communication
light level to [HI], [MID],
or [LO].
Channel
• Set the communication
channel to the same
channel used on the ash.
Flash intensityFlash control
mode
Adjust settings for the
camera ash unit.
4
Rotate the ON/OFF lever to #UP to raise the ash.
• After conrming that the ash has charged, take a test shot.
n Wireless ash control range
Position the wireless ash units with their remote sensors facing the camera. The following
illustration shows the approximate ranges at which the ash units can be positioned. The
actual control range varies with local conditions.
• We recommend using a single group of up to
three remote ash units.
• Remote ash units cannot be used for second
curtain slow synchronization exposures longer
than 4 seconds.
• If the subject is too close to the camera,
the control ashes emitted by the camera
ash may affect exposure (this effect can be
reduced by reducing the output of the camera
ash by, for example, using a diffuser).
7m
5m
100°100°
50°
50°
50°
50°
60°
60°
30°
30°
30°
30°
• The upper limit of ash synchronization timing is 1/160 sec. when using the ash in RC
mode.
Default settings
The default settings for new functions and the modied default settings are as follows.
*1: Default can be restored by selecting [Full] for [Reset].
*2: Default can be restored by selecting [Basic] for [Reset].
K
Shooting Menu
Tab Function Default *1 *2
g
X
# RC Mode
Off
a a
166